Secure Remote Access: Raspberry Pi VNC Over SSH Explained
The Raspberry Pi, a marvel of modern computing packed into a credit-card-sized board, has revolutionized how enthusiasts, educators, and professionals approach embedded systems and DIY projects. Its versatility allows it to serve countless purposes, from home automation hubs to personal web servers. However, to truly unlock its potential, especially when operating in a "headless" configuration (without a monitor, keyboard, or mouse directly attached), mastering remote access is paramount. This is where the powerful combination of VNC (Virtual Network Computing) and SSH (Secure Shell) comes into play, offering a robust and secure way to control your Raspberry Pi's graphical desktop from virtually anywhere.
Imagine being able to access your Raspberry Pi's familiar desktop environment, complete with its graphical interface, file manager, and applications, all from your laptop or even your smartphone, without needing to be physically present. This capability is not just convenient; it's essential for managing remote projects, troubleshooting issues, or simply interacting with your Pi as if you were sitting right in front of it. While VNC provides the visual desktop sharing, SSH provides the critical secure tunnel, ensuring your connection remains private and protected from prying eyes. This guide will walk you through the complete process for securely accessing your Raspberry Pi remotely over the internet, emphasizing best practices for secure connections.
Table of Contents
- Understanding the Basics: VNC and SSH
- Why Combine VNC and SSH? The Security Imperative
- Enabling SSH on Your Raspberry Pi
- Installing and Configuring VNC Server on Raspberry Pi
- The Power of SSH Tunneling for VNC
- Connecting to Your Raspberry Pi via VNC over SSH
- Advanced Considerations and Best Practices for Raspberry Pi VNC over SSH
- Troubleshooting Common Issues with Raspberry Pi VNC over SSH
Understanding the Basics: VNC and SSH
Before we dive into the setup, let's clarify what VNC and SSH are and why they are fundamental to remote Raspberry Pi management.
VNC (Virtual Network Computing): Alright, let’s start with the basics. VNC stands for Virtual Network Computing, and it’s basically a system that allows you to remotely access the desktop of your Raspberry Pi from another computer or mobile device. A VNC (Virtual Network Computing) is a desktop sharing system that enables you to connect remotely to another computer. It transmits the screen of the remote computer to your local device and allows you to control it using your mouse and keyboard. Think of it as a virtual extension of your Raspberry Pi's screen, enabling you to interact with its graphical user interface (GUI) just as if you were sitting in front of it. This is incredibly useful for tasks that require visual interaction, such as browsing the web, using graphical applications, or configuring settings through the desktop environment.
SSH (Secure Shell): SSH, on the other hand, is a cryptographic network protocol that enables secure data communication between two networked devices. SSH gives you access to the Raspberry Pi terminal. It provides a secure channel over an unsecured network by using strong encryption. For Raspberry Pi users, SSH is the go-to method for command-line access, allowing you to execute commands, transfer files, and manage your system without a graphical interface. It's the backbone of headless setups, providing the initial point of entry to configure your Pi, install software, and, crucially, set up services like VNC.
Why Combine VNC and SSH? The Security Imperative
While VNC is excellent for graphical remote access, it inherently lacks robust encryption by default. If you were to expose VNC directly to the open internet, your desktop session, including any sensitive information displayed or typed, would be vulnerable to interception. This is where SSH becomes indispensable. By tunneling VNC traffic through an SSH connection, you effectively wrap the unencrypted VNC data within an encrypted SSH tunnel, making it secure.
Consider the risks: Port forwarding rules allowed incoming connections to reach your Pi from the public internet. If you expose VNC directly, you're opening a potential backdoor to your system. An unencrypted VNC connection is like sending a postcard with all your private information written on it – anyone can read it. SSH tunneling, however, is like putting that postcard inside a locked, armored box before sending it. This is why connecting to your Raspberry Pi VNC over SSH is not just a convenience but a critical security measure. It ensures that your remote desktop session remains private and protected, adhering to best practices for secure connections.
The "Data Kalimat" explicitly warns against exposing services directly: "Expose SSH or VNC on your Raspberry Pi over the open internet, within a VPN, or using an external service like RealVNC’s cloud VNC viewer." This highlights the danger. While external services like RealVNC's cloud VNC viewer offer their own secure methods, for direct VNC connections, an SSH tunnel is the most common and secure approach for self-hosted solutions. Alternatively, using Raspberry Pi Connect, a free screen sharing and remote shell service provided by Raspberry Pi, offers another secure, cloud-based solution, simplifying the process by abstracting away the complexities of port forwarding and direct exposure.
Enabling SSH on Your Raspberry Pi
The first step in setting up Raspberry Pi VNC over SSH is to enable SSH on your Raspberry Pi. This is often disabled by default for security reasons. There are a few ways to do this, depending on whether you have direct access to your Pi's desktop or are setting it up headless.
Initial SSH Setup
Method 1: Using Raspberry Pi Imager (Recommended for New Setups)
- When using the Raspberry Pi Imager to flash your SD card, click the gear icon (Advanced Options) before writing the image.
- Here, you can enable SSH, set a username and password (which you should definitely change from the default 'pi' and 'raspberry'), and even configure Wi-Fi credentials. This makes your Pi ready for headless SSH access right from the first boot.
Method 2: Via Raspberry Pi Desktop (If you have a monitor/keyboard)
- Open a terminal window on your Raspberry Pi.
- Type:
sudo raspi-config - Navigate to 'Interface Options' > 'SSH' > 'Yes' to enable it.
- Reboot your Pi:
sudo reboot
Method 3: Headless Setup (After flashing the SD card, before first boot)
- After flashing the Raspberry Pi OS image to your SD card, but before inserting it into the Pi, mount the boot partition of the SD card on your computer.
- Create an empty file named
ssh(no extension) in the root directory of the boot partition. The presence of this file will automatically enable SSH on the first boot. - For security, it's also highly recommended to create a
userconf.txtfile in the boot partition to set up a custom username and password. This file should contain a line likeyourusername:yourhashedpassword. You can generate a hashed password usingecho 'yourpassword' | openssl passwd -6 -stdinon a Linux/macOS terminal.
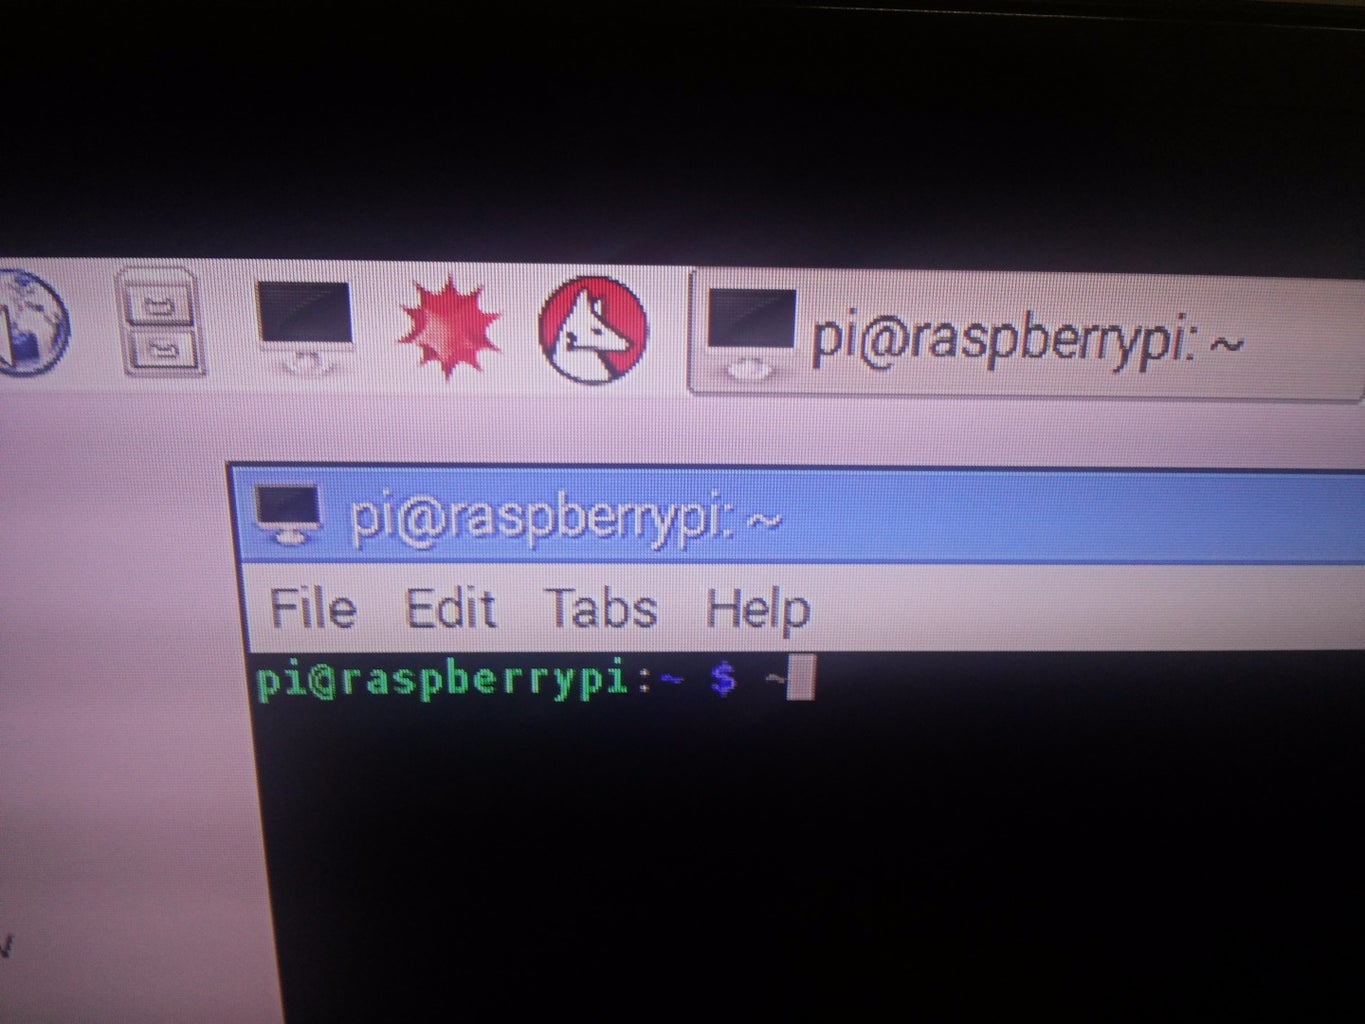
Once SSH is enabled, you can log in to Raspberry Pi through an SSH client. If you're on Windows, you can use PuTTY or MobaXterm. For macOS or Linux, the built-in terminal works perfectly. After your installation, open PuTTY and type your Raspberry Pi's IP address (seems like 192.168.n.n) then click open. Now you have got PuTTY terminal screen. After the confirmation of your board, now you can access to Raspberry Pi's terminal.
Securing SSH Connections
Enabling SSH is just the first step; securing it is paramount, especially if your Pi will be accessible from the internet. Here are some best practices for secure connections:
- Change Default Credentials: Never use the default 'pi' username and 'raspberry' password. Create a new user with sudo privileges and disable the 'pi' user, or at least change its password to a strong, unique one.
- Use SSH Key-Based Authentication: This is far more secure than password authentication. Generate an SSH key pair on your client machine and copy the public key to your Raspberry Pi. Then, disable password authentication in the SSH server configuration (
/etc/ssh/sshd_config). - Change Default SSH Port: The default SSH port is 22. Changing it to a non-standard port (e.g., 2222) won't stop a determined attacker but will significantly reduce automated scanning attempts.
- Implement a Firewall: Use
ufw(Uncomplicated Firewall) oriptablesto restrict incoming connections only to necessary ports and trusted IP addresses. - Keep Software Updated: Regularly update your Raspberry Pi's operating system and installed packages to patch security vulnerabilities:
sudo apt update && sudo apt upgrade.
Installing and Configuring VNC Server on Raspberry Pi
To set up remote desktop access on your Raspberry Pi, you will need to install a VNC server. This software runs on your Pi and broadcasts its desktop environment. There are several VNC server options available, each with its own characteristics.
Choosing the Right VNC Server
The choice of VNC server can be crucial, especially if you need access to the real desktop session versus a virtual one. The "Data Kalimat" provides valuable insight here: "I can't use TightVNC either, because I need access to the real desktop, not virtual ones. As far as I can tell, only X11VNC works with the real desktop, and should work over SSH tunnel too, but I discovered that installing VNC software other than RealVNC will replace it, and I am trying not to mess up my system if I can avoid it."
- RealVNC Server (Recommended for Raspberry Pi OS): Raspberry Pi OS (formerly Raspbian) comes with RealVNC Server pre-installed or easily installable. This is often the most straightforward option as it's optimized for the Pi's desktop environment. It's designed to give you direct access to the actual desktop session.
- X11VNC: As noted in the data, X11VNC is known for its ability to share the *actual* running X server display, meaning you see exactly what's on the physical screen (if one were attached). This is often preferred for truly "real desktop" access.
- TightVNC/TigerVNC: These are popular VNC servers that typically create a *new, virtual* desktop session when you connect. While functional, they might not be what you want if you need to see or interact with applications already running on the physical display. The warning about installing other VNC software replacing RealVNC is valid – installing multiple VNC servers can lead to conflicts.
For most users, sticking with RealVNC Server on Raspberry Pi OS is the simplest and most reliable path to get Raspberry Pi VNC over SSH working seamlessly with the real desktop.
Basic VNC Server Setup
Here’s how to install and configure VNC on your Raspberry Pi, assuming you're using RealVNC Server (which is often pre-installed or easily enabled on Raspberry Pi OS):
Step 1: Update your Raspberry Pi
- Open a terminal window on your Raspberry Pi (via SSH if headless).
- Run:
sudo apt update && sudo apt upgrade -y
Step 2: Enable VNC Server
- Type:
sudo raspi-config - Navigate to 'Interface Options' > 'VNC' > 'Yes'.
- This will install RealVNC Server if it's not already present and enable it to start automatically on boot.
Step 3: Set a VNC Password
- The first time VNC Server starts, it will prompt you to set a password for VNC connections. This is separate from your Pi's login password. Choose a strong, unique password.
Step 4: Configure VNC Resolution (Optional but Recommended)
- If you're running your Raspberry Pi headless, you might encounter a "black screen after boot" or a very low resolution when connecting via VNC. This is because the Pi doesn't detect a monitor and defaults to a minimal display setting.
- To set VNC resolution on Raspberry Pi, go back into
sudo raspi-config. - Navigate to 'Display Options' > 'VNC Resolution' and select a suitable resolution (e.g., 1920x1080 or 1280x720).
- Reboot your Pi for changes to take effect.
Otherwise, we’d have to enable the VNC server on Raspberry Pi through SSH client every time we need to access the desktop environment. Enabling it via raspi-config ensures it starts automatically, which is crucial for headless operation.
The Power of SSH Tunneling for VNC
This is the core of achieving secure Raspberry Pi VNC over SSH. Instead of directly connecting your VNC client to your Pi's VNC server (which would require opening VNC's default port 5900 or 5901 on your router, a security risk), you'll create an SSH tunnel. This tunnel acts as a secure, encrypted pathway between your local machine and your Raspberry Pi.
As Rayjoh eloquently put it: "No problem. All TCP traffic between port 5901 on PC client and VNC server is tunneled via PuTTY to/from the host you login to. The VNC client believes that the VNC server is running on your PC and the VNC server believes that the VNC client is running on the host you login to from PuTTY."
What this means is that your VNC client on your local computer will connect to a specific port on your *local machine* (e.g., localhost:5901). The SSH client (like PuTTY or your terminal) then takes all traffic from that local port and securely forwards it through the SSH connection to the VNC server port on your Raspberry Pi. From the VNC client's perspective, it's talking to a VNC server right on your own computer. From the VNC server's perspective, it's receiving a connection from the Raspberry Pi itself (or rather, from the SSH daemon running on it). This completely bypasses the need to expose the VNC port to the internet, making your connection significantly more secure.
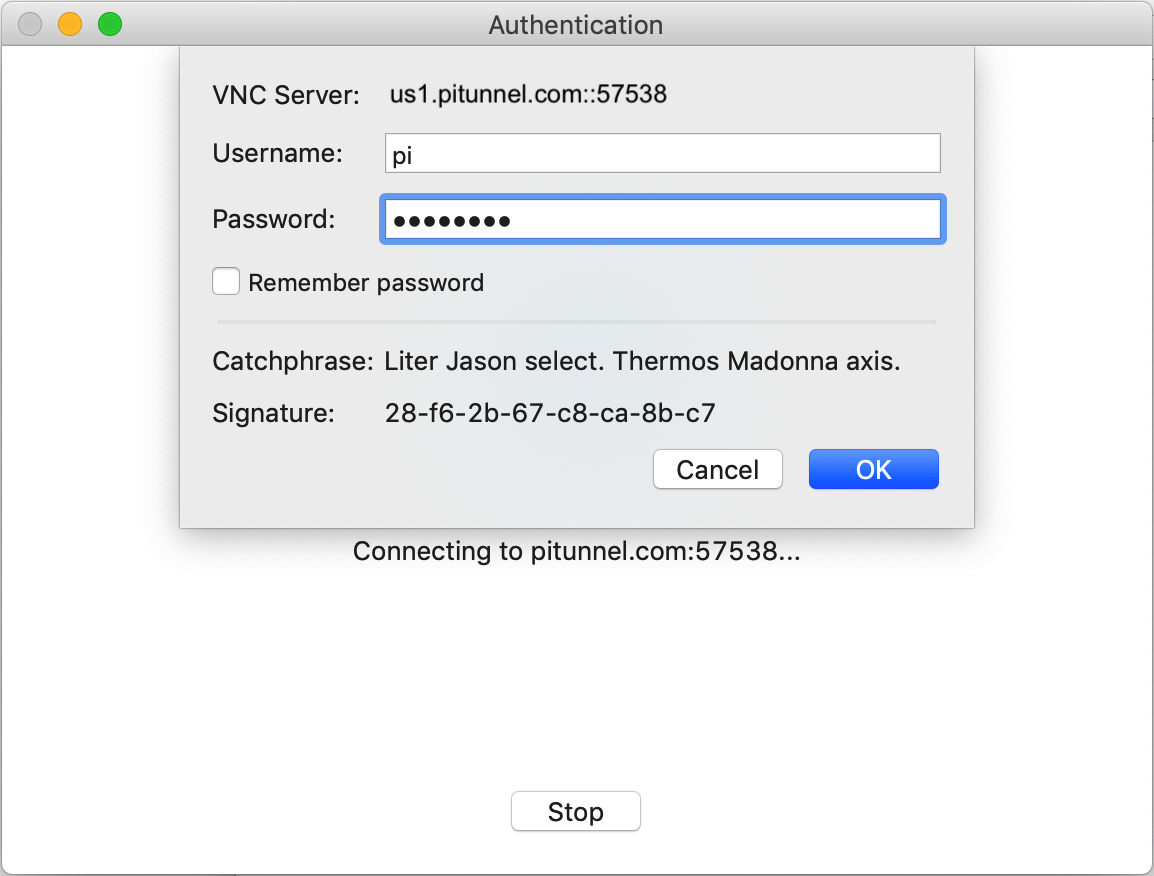
Connecting to Your Raspberry Pi via VNC over SSH
Now that SSH and VNC are configured, let's establish the connection. The process involves two main steps: creating the SSH tunnel and then connecting with your VNC client.
Step 1: Create the SSH Tunnel
For Windows Users (using PuTTY):
- Open PuTTY.
- In the 'Session' category, enter your Raspberry Pi's IP address (e.g.,
192.168.1.100or your public IP/hostname if connecting from outside your local network). Ensure the Port is set to 22 (or your custom SSH port). - Navigate to 'Connection' > 'SSH' > 'Tunnels'.
- In the 'Source port' field, enter a local port number (e.g.,
5901). This is the port on your local machine that your VNC client will connect to. - In the 'Destination' field, enter
localhost:5901(orlocalhost:5900if your VNC server uses the default port, orlocalhost:59XXwhere XX is your VNC display number + 00). The
Enable vnc through ssh raspberry pi - falasproperties
Raspberry Pi - VNC & SSH : 8 Steps - Instructables

Raspberry Pi - VNC & SSH : 8 Steps - Instructables
