Unlock Your Pi: Seamless Remote Access With SSH Explained
In today's interconnected world, the ability to manage your devices remotely is not just a convenience, but often a necessity. For Raspberry Pi enthusiasts and users, mastering remote access to Raspberry Pi via SSH (Secure Shell) is a fundamental skill that unlocks a world of possibilities. Whether your Raspberry Pi is tucked away in a smart home setup, serving as a personal server, or powering a complex IoT project, the power to control it from another machine, without a monitor or keyboard, is invaluable.
This comprehensive guide will walk you through everything you need to know about setting up and utilizing SSH for your Raspberry Pi. We'll cover the essentials, from enabling SSH on your device and finding its IP address, to establishing secure connections from various operating systems and even transferring files. By the end of this article, you'll be able to confidently manage your Raspberry Pi from anywhere, ensuring a reliable and secure connection for all your projects.
Table of Contents
- Understanding SSH and Its Role with Raspberry Pi
- Prerequisites for Remote Access to Your Raspberry Pi
- Enabling SSH on Your Raspberry Pi
- Finding Your Raspberry Pi's IP Address
- Connecting to Your Raspberry Pi via SSH
- Enhancing Security and Convenience with Static IPs
- Advanced SSH Usage: File Transfer and More
- Beyond SSH: A Glance at VNC for Graphical Access
- Troubleshooting Common SSH Connection Issues
- Conclusion: Mastering Your Raspberry Pi Remotely
Understanding SSH and Its Role with Raspberry Pi
The simplest and most common way to access a Raspberry Pi remotely is via SSH (Secure Shell). SSH is a cryptographic network protocol that enables secure data communication, remote command-line login, and other secure network services between two networked computers. At its core, OpenSSH is a free, open-source software that uses the SSH protocol to create secure and encrypted communication channels over computer networks. This encryption is crucial, as it protects your data and commands from being intercepted or tampered with by malicious actors.
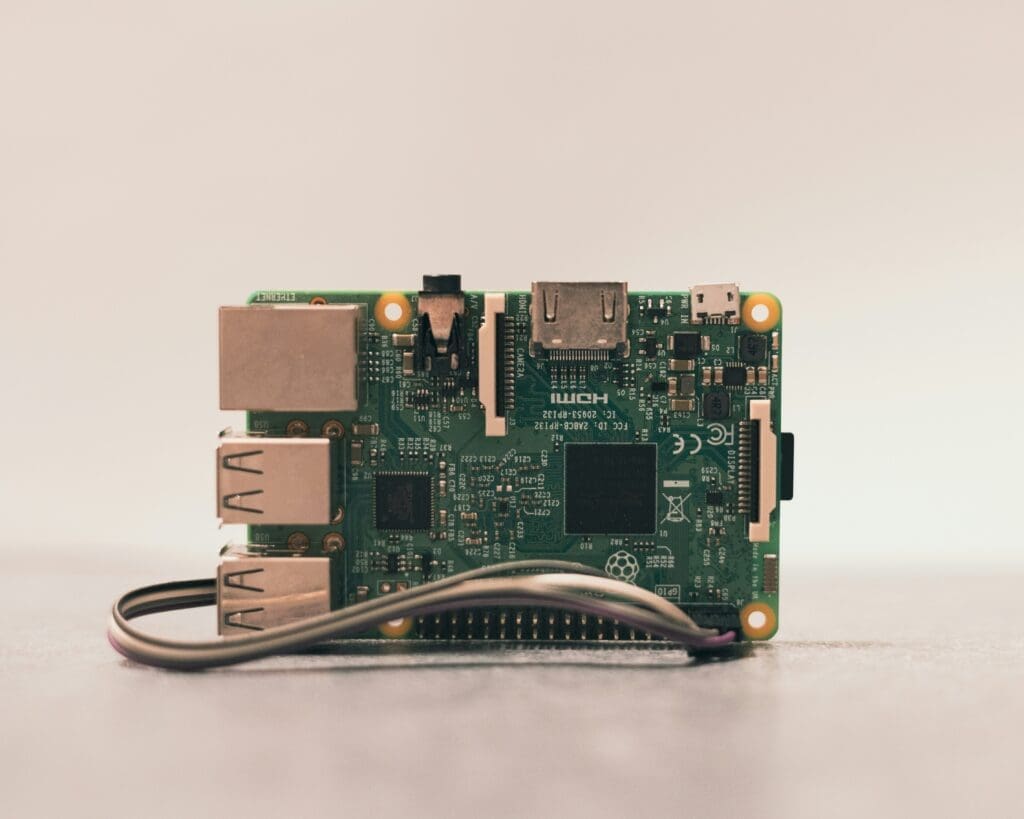
To establish a remote connection via SSH, there are typically two components involved: an SSH client and an SSH server. On a Raspberry Pi, the SSH server is built into the operating system (usually Raspberry Pi OS, formerly Raspbian), making it incredibly convenient. This means your Raspberry Pi is ready to accept secure connections from any device capable of running an SSH client. SSH allows you to log into another computer over the network and execute commands directly through a terminal, giving you full command-line control over your Raspberry Pi as if you were sitting right in front of it. This capability is what makes remote access to Raspberry Pi via SSH so powerful and widely adopted.
Prerequisites for Remote Access to Your Raspberry Pi
Before you can dive into the world of remote access to your Raspberry Pi, there are a few fundamental requirements you'll need to meet. These prerequisites ensure a smooth and successful connection:
- A Working Raspberry Pi: Naturally, you need a Raspberry Pi board with Raspberry Pi OS installed and running. Ensure it's powered on and connected to your local network.
- Network Connection: Your Raspberry Pi must be connected to the same local area network (LAN) as the computer you intend to use for remote access. This can be via an Ethernet cable or Wi-Fi. Any device connected to a local area network is assigned an IP address, which is crucial for establishing a connection.
- SSH Client: The computer you're connecting from (your PC, laptop, or another Pi) needs an SSH client.
- Linux/macOS: Most Linux distributions and macOS have an SSH client pre-installed and accessible via the terminal.
- Windows: For Windows users, you'll typically need to use a third-party SSH client such as PuTTY, though modern Windows versions (Windows 10 and 11) now include an OpenSSH client that can be enabled.
- Knowing Your Pi's IP Address: In order to connect to your Raspberry Pi from another machine using SSH or VNC, you need to know the Raspberry Pi’s IP address. We'll cover how to find this in detail.
- User Credentials: You'll need the username and password for your Raspberry Pi. The default username for Raspberry Pi OS is "pi". Initially, there might not be a secret password set, so you’ll be prompted to set one when you first connect or during the initial setup of your Raspberry Pi OS.
Once you have these prerequisites in place, you're ready to proceed with enabling SSH on your Raspberry Pi and establishing your first remote connection.
Enabling SSH on Your Raspberry Pi
For security reasons, on recent versions of Raspberry Pi OS, SSH is disabled by default. This is a good security practice, preventing unauthorized access to your device. However, to enable remote access to Raspberry Pi via SSH, you'll need to explicitly turn it on. There are a few ways to do this, depending on whether you have a monitor connected to your Pi or are setting it up headless.
Initial Setup via Raspberry Pi OS Desktop
If you have a display, keyboard, and mouse connected to your Raspberry Pi, enabling SSH is straightforward:
- Boot your Raspberry Pi into the desktop environment.
- Click on the Raspberry Pi icon in the top-left corner to open the menu.
- Navigate to
Preferences > Raspberry Pi Configuration. - In the Configuration window, select the 'Interfaces' tab.
- You will see an option for 'SSH'. Ensure the radio button next to it is set to 'Enabled'.
- Click 'OK' to save your changes.
This method is the simplest if you have direct access to your Pi's graphical interface.
Enabling SSH via Raspi-Config
For those who prefer the command line or are setting up a headless Raspberry Pi (without a monitor), you can use the raspi-config tool.
- Open a terminal on your Raspberry Pi (if you have a display) or connect to it via a temporary method if headless (e.g., direct keyboard/monitor, or if you enabled SSH during OS flashing).
- Execute the following command:
sudo raspi-config - A blue configuration menu will appear. Navigate using the arrow keys.
- Select '3 Interfacing Options'.
- From the next menu, select 'P2 SSH'.
- You’ll be asked, "Would you like the SSH server to be enabled?". Select 'Yes' and press Enter.
- You'll see a confirmation message that SSH is enabled. Press Enter to acknowledge.
- Navigate to 'Finish' and press Enter to exit
raspi-config. You might be prompted to reboot; it's a good idea to do so to ensure all changes take effect.
Once SSH is enabled, you can connect to your Raspberry Pi from another computer using an SSH client.
Finding Your Raspberry Pi's IP Address
As mentioned, in order to connect to your Raspberry Pi from another machine using SSH or VNC, you need to know the Raspberry Pi’s IP address. This is easy if you have a display connected, and there are a number of methods for finding it remotely from another machine on the network.
The most common and reliable way to find your Raspberry Pi’s IP address directly on the Pi is by using the ifconfig command in the terminal.
- Open a terminal window on your Raspberry Pi.
- Execute the following command:
ifconfig - Look for the network interface your Pi is using.
- If connected via Ethernet, look under
eth0. - If connected via Wi-Fi, look under
wlan0.
- If connected via Ethernet, look under
- Within that section, find the line that starts with
inet. The numbers followinginetare your Raspberry Pi's IP address. For example, in our case, the IP address might be172.16.1.60.
If you don't have a display connected to your Pi (headless setup), you can still find its IP address from another machine on your network:
- Network Scanner Tools: Tools like Advanced IP Scanner (Windows) or `nmap` (Linux/macOS) can scan your local network and list all connected devices along with their IP addresses. Look for a device named "raspberrypi" or "pi".
- Router's Admin Page: Log in to your home router's administration page (usually by typing its default gateway IP, like `192.168.1.1` or `192.168.0.1`, into a web browser). Look for a section like "Connected Devices," "DHCP Clients," or "Network Map." Your Raspberry Pi should be listed there with its assigned IP address.
Once you have your Raspberry Pi's IP address, you're ready to establish the SSH connection.
Connecting to Your Raspberry Pi via SSH
Now that SSH is enabled on your Raspberry Pi and you know its IP address, it's time to connect. The process varies slightly depending on whether you're using a Linux, macOS, or Windows computer.
Connecting from Linux or macOS
Connecting from a Linux or macOS machine is straightforward as both operating systems come with an SSH client pre-installed.
- Open a terminal window on your computer.
- Type the SSH command, which is structured like this:
ssh <username on pi>@<pi's ip address>.- The default username for your Raspberry Pi is “pi”.
- So, for our example IP address
172.16.1.60, you would type:ssh pi@172.16.1.60
- The first time you connect, you might see a message asking to confirm the authenticity of the host. Type
yesand press Enter to continue. This adds the Pi's fingerprint to your computer's known hosts list, preventing future warnings unless the Pi's host key changes. - You'll then be prompted to enter the password for the 'pi' user. Type it carefully (characters won't appear on screen for security) and press Enter.
- If successful, you'll see the Raspberry Pi's command prompt, indicating you've successfully established a remote connection via SSH. You can now execute commands directly on your Raspberry Pi.
Connecting from Windows Using PuTTY
To access your Raspberry Pi using SSH from a PC running Windows, you will need to use an SSH client such as PuTTY. While modern Windows 10/11 versions have a built-in SSH client, PuTTY remains a popular choice for its graphical interface and ease of use.
- Download PuTTY: If you don't have it, download PuTTY from its official website (www.putty.org).
- Launch PuTTY: Open the PuTTY application.
- Enter Connection Details:
- In the 'Host Name (or IP address)' field, enter the IP address of your Raspberry Pi (e.g.,
172.16.1.60). - Ensure the 'Port' is set to
22(the default SSH port) and 'Connection type' is set to 'SSH'.
- In the 'Host Name (or IP address)' field, enter the IP address of your Raspberry Pi (e.g.,
- Open Connection: Click the 'Open' button.
- Security Alert: The first time you connect, PuTTY will show a security alert about the host key not being cached. Click 'Accept' to proceed. This is normal and adds the Pi's key to PuTTY's cache.
- Login: A terminal window will open. You will be prompted for a username. Type
pi(the default Raspberry Pi username) and press Enter. - Password: Next, you'll be prompted for the password. Enter your Raspberry Pi's password and press Enter. Remember, characters won't appear as you type for security reasons.
- Success: If the credentials are correct, you will be logged into your Raspberry Pi's command line interface.
This completes the basic SSH connection process. You're now ready to manage your Raspberry Pi remotely!
Enhancing Security and Convenience with Static IPs
Any device connected to a local area network is assigned an IP address, usually dynamically by your router's DHCP server. This means your Raspberry Pi's IP address might change periodically, which can be inconvenient for remote access. If you plan to connect to your Raspberry Pi via IP address for more than a month, you should review our note about static vs. dynamic IPs. Setting up your Raspberry Pi with a static IP and enabling remote SSH access is a great way to maximize its utility and securely manage it from anywhere.
A static IP address ensures that your Raspberry Pi always has the same IP address on your local network. This eliminates the need to find its IP address every time you want to connect. Here's why and how to consider setting one up:
- Reliability: Your Pi's address never changes, making it easier to connect consistently.
- Port Forwarding: Essential if you plan to access your Pi from outside your local network (e.g., from the internet), as port forwarding rules on your router rely on a consistent internal IP.
- DNS Records: If you use local DNS (e.g., Pi-hole) or a custom hostname, a static IP ensures those records remain valid.
To set a static IP address for your Raspberry Pi, you typically edit its network configuration file. While the exact steps can vary slightly between Raspberry Pi OS versions, the general approach involves modifying `/etc/dhcpcd.conf` to assign a fixed IP address. You'll need to know your router's IP address (gateway), your network's subnet mask, and a DNS server.
Example (simplified steps, always refer to official documentation for precise instructions):
- Connect to your Pi via SSH or directly.
- Open the `dhcpcd.conf` file for editing:
sudo nano /etc/dhcpcd.conf - Scroll to the bottom and add lines similar to these (adjusting for your network):
(Replace `eth0` with `wlan0` if using Wi-Fi. Choose an IP address outside your router's DHCP range but within your network's subnet.)interface eth0 static ip_address=192.168.1.100/24 static routers=192.168.1.1 static domain_name_servers=192.168.1.1 8.8.8.8 - Save the file (Ctrl+X, Y, Enter) and reboot your Pi:
sudo reboot
After rebooting, your Raspberry Pi should acquire the static IP address you assigned. This step significantly enhances the long-term usability and management of your Raspberry Pi, especially for projects requiring consistent network presence.
Advanced SSH Usage: File Transfer and More
SSH isn't just for command-line access; it also enables you to share files to, and from, a Raspberry Pi using SCP (Secure Copy) on the command line, or SFTP (SSH File Transfer Protocol) with a graphical client. These methods leverage the same secure SSH connection, ensuring your file transfers are encrypted and protected.
1. Secure Copy (SCP): SCP is a command-line utility that allows you to securely copy files between a local host and a remote host, or between two remote hosts.
- Copying a file from your computer to your Raspberry Pi: To copy a file named `myfile.txt` from your personal computer to a user’s home folder on your Raspberry Pi, run the following command from the directory containing `myfile.txt`, replacing the `
` placeholder with the username you use to log in to your Raspberry Pi and the ` ` placeholder with your Raspberry Pi’s IP address:
For example:scp myfile.txt <username>@<pi_ip_address>:/home/<username>/scp myfile.txt pi@172.16.1.60:/home/pi/ - Copying a file from your Raspberry Pi to your computer:
For example:scp <username>@<pi_ip_address>:/path/to/file/on/pi.txt /path/to/local/directory/scp pi@172.16.1.60:/home/pi/remotefile.log /Users/youruser/Documents/
2. SFTP (SSH File Transfer Protocol): SFTP offers a more interactive way to transfer files, similar to FTP but with the security of SSH. You can use graphical SFTP clients like FileZilla (cross-platform) or WinSCP (Windows).
- Using FileZilla (or similar SFTP client):
- Open FileZilla.
- In the 'Host' field, enter `sftp://
` (e.g., `sftp://172.16.1.60`). - Enter your Raspberry Pi username (e.g., `pi`) and password.
- Enter `22` for the port.
- Click 'Quickconnect'.
Beyond file transfer, SSH enables a myriad of other advanced uses, such as:
- Port Forwarding/Tunneling: Create secure tunnels to access services on your Pi (or on your local network through your Pi) that aren't directly exposed to the internet.
- SSH Keys for Passwordless Login: For enhanced security and convenience, you can set up SSH public/private key authentication. This allows you to log in without typing a password, while also being more secure than password-based authentication. If your device is not Raspberry Pi based and you want to know how to install and configure SSH server, SSH clients, SSH public/private keys for remote SSH access, this is a topic worth exploring further for any SSH setup.
- Running Graphical Applications Remotely (X11 Forwarding): While VNC is for full desktop access, SSH can forward individual graphical applications to your local machine, allowing you to run them remotely.
These advanced features highlight the versatility of SSH, making it an indispensable tool for managing your Raspberry Pi projects.
Beyond SSH: A Glance at VNC for Graphical Access
While SSH provides powerful command-line access, sometimes you need to interact with your Raspberry Pi's graphical desktop environment. This is where Virtual Network

Mastering Remote IoT Management: A Guide To SSH Access On Raspberry Pi

How To Access Your Raspberry Pi Remotely Using SSH Over The Internet
Using SSH to Access Raspberry Pi Remotely: Remote Control and File Transfer
