Unlock Your Pi: Best Free Remote IoT Behind Router Solutions
Are you searching for the best Raspberry Pi remote IoT free options to enhance your projects, but find yourself constantly battling the invisible wall of your home router? You're not alone. Many tech enthusiasts, DIY wizards, and even professional developers face the challenge of accessing their Internet of Things (IoT) devices when they're tucked away behind a firewall or a Network Address Translation (NAT) router. This guide aims to provide a detailed exploration of the best practices and tools for setting up remote IoT behind a router, ensuring seamless access to your Raspberry Pi without breaking the bank.
Ever felt locked out of your Raspberry Pi project because it's hiding behind a router? Remote access to your IoT devices, even those tucked away behind firewalls and NAT routers, is crucial for monitoring, managing, and controlling them from anywhere in the world. The answer lies in the seemingly simple yet powerfully effective technique of setting up a remote IoT behind router system using a Raspberry Pi, and the best part is, it can be entirely free. This article explores the best remote IoT platforms tailored for Raspberry Pi, providing comprehensive insights into how to set up, optimize, and manage your IoT projects effortlessly.
Table of Contents
- The Challenge of Remote IoT Access Behind a Router
- Understanding Your Raspberry Pi's Role in Remote IoT
- Core Free Methods for Remote Access
- Cloud-Based Free Tunnels & Services
- Optimizing Security for Your Remote IoT Setup
- Best Practices for Managing Your Free Remote IoT System
- Troubleshooting Common Remote Access Issues
- Conclusion
The Challenge of Remote IoT Access Behind a Router
When you connect a device like your Raspberry Pi to your home network, it typically receives a private IP address (e.g., 192.168.1.100) from your router. This private IP address is only accessible from within your local network. Your router, acting as a gatekeeper, uses Network Address Translation (NAT) to allow multiple devices on your private network to share a single public IP address provided by your Internet Service Provider (ISP). While NAT is excellent for conserving public IP addresses and providing a basic layer of security by default, it also means that incoming connections from the internet cannot directly reach your Raspberry Pi. This is the fundamental hurdle when you're trying to set up the best remote IoT behind router Raspberry Pi free solutions.
Furthermore, most home ISPs assign dynamic public IP addresses, meaning your external IP address changes periodically. This makes it impossible to consistently connect to your home network from a remote location using a fixed address. Firewalls, both on your router and potentially on your Raspberry Pi itself, add another layer of protection, blocking unsolicited incoming connections. Overcoming these limitations is key to unlocking the full potential of your IoT projects. Whether you're managing a home automation system, monitoring environmental sensors, or controlling a robotic arm, the ability to access your Raspberry Pi remotely is paramount. This guide will explore the best practices, tools, and techniques for setting up a remote IoT system behind a router, ensuring you're always connected to your projects.
Understanding Your Raspberry Pi's Role in Remote IoT
The Raspberry Pi, a series of small single-board computers, has become the de facto choice for countless IoT projects due to its affordability, versatility, and robust community support. Its low power consumption makes it ideal for always-on applications, and its GPIO (General Purpose Input/Output) pins allow it to interface with a wide array of sensors, actuators, and other hardware. When it comes to remote IoT, the Raspberry Pi often serves as the central brain or gateway for your entire system.
By placing your Raspberry Pi behind a router, you can create a secure and efficient remote access point. This setup allows you to manage IoT devices, monitor data, and even update software on your Pi from anywhere with an internet connection. The Pi's Linux-based operating system (Raspberry Pi OS, formerly Raspbian) provides a powerful and flexible environment for running servers, scripts, and applications necessary for remote access. From simple SSH connections to complex VPN setups or cloud-tunneling solutions, the Raspberry Pi can be configured to host the necessary services, making it the perfect candidate for achieving the best remote IoT behind router Raspberry Pi free access. Its small form factor also means it can be discreetly placed near your other IoT devices, acting as a local hub before pushing data or receiving commands from the cloud.
Core Free Methods for Remote Access
Unlocking the best remote IoT behind router Raspberry Pi for free is not only possible but also a lot simpler than most people think. This section delves into the foundational methods that allow you to bypass router limitations and establish a reliable connection to your Pi.
Method 1: SSH with Port Forwarding (The Classic Approach)
Secure Shell (SSH) is the backbone of remote access to Linux-based systems, including your Raspberry Pi. It provides an encrypted connection, allowing you to execute commands, transfer files, and even tunnel other services securely. To use SSH for remote access when your Pi is behind a router, you'll typically need to combine it with port forwarding and Dynamic DNS (DDNS).
Here's how it works:
- Assign a Static IP to your Raspberry Pi: Inside your local network, ensure your Pi always gets the same private IP address. This can be done via your router's DHCP reservation settings or by manually configuring a static IP on the Pi itself.
- Configure Port Forwarding on Your Router: This is the crucial step. You'll instruct your router to forward incoming connections on a specific public port (e.g., 2222) to your Raspberry Pi's private IP address and its SSH port (default 22). For example, any connection to `your_public_ip:2222` will be redirected to `192.168.1.100:22`.
- Set up Dynamic DNS (DDNS): Since your public IP address might change, a DDNS service (like No-IP, DuckDNS, or FreeDNS) maps a memorable hostname (e.g., `myrpi.duckdns.org`) to your current dynamic public IP. Your router or a script on your Pi will periodically update the DDNS service with your latest IP.
- Connect Remotely: From anywhere with internet access, you can then SSH into your Pi using `ssh pi@myrpi.duckdns.org -p 2222`.
Pros: This method is direct, generally fast, and entirely free. It gives you full control over your Pi's command line. It's a fundamental skill for anyone looking to set up the best remote IoT behind router Raspberry Pi free solutions.
Cons: Exposing ports directly to the internet carries security risks if not properly secured. You must use strong SSH passwords or, better yet, SSH key authentication. Dynamic IP changes can still cause temporary connectivity issues if DDNS updates are delayed.
Method 2: VPN (Virtual Private Network) for Secure Access
Setting up a Virtual Private Network (VPN) server on your Raspberry Pi transforms your home network into a secure, encrypted tunnel that you can connect to from anywhere. Once connected to your home VPN, your remote device essentially becomes part of your local network, allowing you to access your Raspberry Pi and other local devices as if you were physically at home, without needing to forward individual ports.
Popular free VPN server software for Raspberry Pi includes OpenVPN and WireGuard. Setting up a VPN server requires a bit more technical expertise than simple port forwarding, but the security benefits are substantial.
Here's a simplified overview:
- Install VPN Server Software: Choose OpenVPN or WireGuard. There are many excellent tutorials and scripts (like PiVPN) that simplify the installation process on Raspberry Pi OS.
- Configure VPN Server: This involves generating keys, certificates, and configuration files for both the server and client devices.
- Port Forward VPN Port: You'll still need to forward a single port on your router (e.g., UDP 1194 for OpenVPN or UDP 51820 for WireGuard) to your Raspberry Pi's private IP address. This is the only port you need to expose.
- Set up DDNS: Just like with SSH, DDNS is essential to handle your dynamic public IP address.
- Install VPN Client: On your remote device (laptop, phone), install the corresponding VPN client software and import the client configuration file.
- Connect to VPN: Once connected, you can then SSH into your Pi using its private IP address (e.g., `ssh pi@192.168.1.100`), as if you were on your local network.
Pros: Highly secure and encrypted. Provides full network access to all your local devices, not just the Pi. Excellent for privacy and protecting your remote IoT setup. This is arguably one of the best remote IoT behind router Raspberry Pi free solutions for comprehensive security.
Cons: More complex to set up and maintain than basic port forwarding. Can introduce a slight performance overhead due to encryption. Requires a client application on every device you want to connect from.
Cloud-Based Free Tunnels & Services
For those who find port forwarding or VPN setup daunting, or whose ISPs block incoming connections, cloud-based tunneling services offer an elegant alternative. These services work by establishing an outbound connection from your Raspberry Pi to a cloud server, creating a tunnel that you can then use to access your Pi. Since the connection is initiated *from* your Pi, it bypasses most NAT and firewall restrictions.
Method 3: Ngrok for Temporary, Easy Access
Ngrok is a popular service that creates secure tunnels from your local machine to the internet. It's incredibly easy to use and doesn't require any router configuration, making it a fantastic option for quick, temporary access or testing. The free tier of Ngrok is sufficient for many basic remote IoT needs.
How it works:
- Install Ngrok on your Raspberry Pi: Download the Ngrok client and place it in a convenient directory.
- Authenticate Ngrok: Sign up for a free Ngrok account and obtain your authentication token. Use `ngrok authtoken your_auth_token` on your Pi.
- Start a Tunnel: To expose your Pi's SSH service, simply run `ngrok tcp 22`. Ngrok will provide you with a public URL (e.g., `tcp://0.tcp.ngrok.io:12345`).
- Connect Remotely: You can then SSH into your Pi using this Ngrok-provided address: `ssh pi@0.tcp.ngrok.io -p 12345`.
Pros: Super easy to set up – no router configuration or DDNS needed. Works even with strict NAT and firewalls. Ideal for quickly accessing your Pi for a short period. It's a truly free and simple way to get remote access.
Cons: The free tier provides random, temporary public URLs that change each time you restart the Ngrok client. This means you can't rely on a persistent address. There are also rate limits on the free tier. Not suitable for continuous, always-on remote access for the best remote IoT behind router Raspberry Pi free setup.
Method 4: Reverse SSH Tunneling for Persistent Access
Reverse SSH tunneling is a clever technique that allows your Raspberry Pi (the client, behind the router) to initiate an SSH connection *out* to a publicly accessible server (your "jump host" or "relay server"). This creates a persistent tunnel. You then connect to this public server, and through the established tunnel, you can access your Raspberry Pi. This method effectively bypasses NAT and firewalls because the initial connection is outbound from your Pi.
This method requires a public server with a static IP address. While a dedicated VPS (Virtual Private Server) might cost a few dollars a month, some cloud providers offer free tiers that could potentially host a lightweight SSH server (e.g., Oracle Cloud Free Tier, Google Cloud Free Tier). Even another Raspberry Pi with a public IP could serve as your jump host if you have one.
Here's a conceptual overview:
- Set up a Public Server: Obtain a cheap VPS or use a free-tier cloud instance. Ensure SSH is enabled and secured.
- Establish Reverse Tunnel from Pi: On your Raspberry Pi, run a command like `ssh -N -R 2222:localhost:22 user@your_public_server_ip`. This tells your Pi to open a remote port (2222) on the public server, which tunnels back to its local SSH port (22). You'll typically want to make this connection persistent using `autossh`.
- Connect Remotely: From your remote device, you SSH into your public server, but specify the tunneled port: `ssh pi@localhost -p 2222`. This connection is then forwarded through the tunnel to your Raspberry Pi.
Pros: Highly effective at bypassing NAT and firewalls. Provides persistent access. Very secure if properly configured with SSH keys. It's a robust solution for achieving the best remote IoT behind router Raspberry Pi free access, especially when other methods fail.
Cons: Requires an additional public server, which might have a minimal cost or require leveraging a free tier. More complex to set up and maintain than Ngrok or simple port forwarding. Relies on the stability of the public server.
Optimizing Security for Your Remote IoT Setup
When you're setting up the best remote IoT behind router Raspberry Pi free solutions, security cannot be an afterthought. Exposing your devices to the internet, even through tunnels, introduces potential vulnerabilities. Given that many IoT projects touch upon personal data or home automation (which can have YMYL - Your Money or Your Life implications), robust security is paramount. Here are critical steps to harden your remote access:
- Use SSH Key Authentication: Ditch password-based SSH login. Generate SSH key pairs (public and private keys) and configure your Raspberry Pi to only allow login with your private key. This is significantly more secure than passwords, which can be brute-forced.
- Disable Root SSH Login: Never allow direct SSH login as the `root` user. Instead, log in with a regular user account and use `sudo` for administrative tasks.
- Change Default Passwords: If you're still using passwords, change the default `pi` user password immediately. Use strong, unique passwords for all accounts.
- Configure a Firewall (UFW): Enable and configure a firewall on your Raspberry Pi (e.g., `ufw`). Allow only necessary incoming connections (e.g., SSH from specific IPs if possible, or only from your VPN server's IP). Block all other incoming traffic.
- Keep Software Updated: Regularly update your Raspberry Pi's operating system and all installed software (`sudo apt update && sudo apt upgrade`). This patches security vulnerabilities.
- Limit User Access: Create separate user accounts for different services or individuals, each with the minimum necessary permissions. Avoid giving unnecessary `sudo` privileges.
- Use Non-Standard Ports: For port forwarding, use a non-standard external port (e.g., 2222 instead of 22) to make your SSH service less obvious to automated scanners. This is security through obscurity, but it helps reduce noise.
- Monitor Logs: Regularly check your Pi's system logs (e.g., `/var/log/auth.log` for SSH attempts) for suspicious activity.
By diligently implementing these security measures, you significantly reduce the risk of unauthorized access to your Raspberry Pi and the data it handles, ensuring your remote IoT setup remains safe and reliable.
Best Practices for Managing Your Free Remote IoT System
Setting up remote access is just the first step. Effective management ensures your free remote IoT system remains reliable, efficient, and truly serves its purpose. Whether you're a hobbyist or a professional developer, understanding how to set up a remote IoT system behind a router with a Raspberry Pi for free can open doors to innovative and practical applications. Here are some best practices to consider:
- Automate Startup: Ensure your chosen remote access method (e.g., VPN server, reverse SSH tunnel, DDNS updater) starts automatically when your Raspberry Pi boots up. Use `systemd` services for robust management.
- Implement Monitoring: Keep an eye on your Pi's health. Tools like `htop` for real-time process monitoring, or more sophisticated solutions like Prometheus and Grafana (which can run on another Pi or a small VPS) can track CPU usage, memory, disk space, and network activity. This helps identify issues before they become critical.
- Regular Backups: Your Raspberry Pi's SD card is susceptible to corruption. Regularly back up your entire SD card image or at least your critical configuration files and data. This can save you hours of re-setup in case of failure.
- Version Control: For any custom scripts or configuration files, use a version control system like Git. Store your code on platforms like GitHub or GitLab (which offer free private repositories). This allows you to track changes, revert to previous versions, and easily deploy configurations to new Pis.
- Documentation: Document your setup process, configuration details, and any troubleshooting steps you've taken. This is invaluable for future reference, especially if you need to replicate the setup or hand it over to someone else.
- Choose the Right Method for Your Project: There isn't a single "best remote IoT behind router Raspberry Pi free" solution for everyone.
- For simple, occasional access and testing, Ngrok is fantastic.
- For robust, persistent access to a single Pi, SSH with port forwarding and DDNS is a solid choice, provided you prioritize security.
- For ultimate security and full network access, a VPN server is superior.
- For bypassing strict network restrictions or needing a persistent tunnel without router access, reverse SSH tunneling is a powerful advanced option.
- Power Management: Ensure your Raspberry Pi has a stable power supply. Unstable power can lead to SD card corruption. Consider a UPS (Uninterruptible Power Supply) for critical applications.
By following these guidelines, you can create a resilient, manageable, and truly effective remote IoT system using your Raspberry Pi. Discover the best remote IoT behind router Raspberry Pi free solutions to optimize your IoT projects, exploring the best methods, tools, and configurations.
Troubleshooting Common Remote Access Issues
Even with the best planning, you might encounter hiccups when trying to establish the best remote IoT behind router Raspberry Pi free connection. Here are some common issues and how to troubleshoot them:
- "Connection Refused" or "Connection Timed Out":
- Firewall on Pi: Check if `ufw` or `iptables` on your Raspberry Pi is blocking incoming connections on the SSH port (default 22, or your custom port).
- Router Firewall: Your router might have its own firewall blocking incoming connections. Check its settings.
- Port Forwarding Incorrect: Double-check your router's port forwarding rules. Ensure the external port, internal IP, and internal port are all correct.
- SSH Server Not Running: Verify that the SSH server (`sshd`) is running on your Raspberry Pi (`sudo systemctl status ssh`).
- Incorrect IP/Hostname: Are you trying to connect to the correct public IP or DDNS hostname? Is your DDNS updated?
- Dynamic IP Not Updating:
- DDNS Client: Ensure the DDNS client (either on your router or a script on your Pi) is running and correctly configured to update your DDNS service.
- ISP Restrictions: Some ISPs might use Carrier-Grade NAT (CGNAT), which means your home router doesn't get a truly public IP address. In such cases, port forwarding won't work, and you'll need to rely on tunneling solutions like Ngrok or Reverse SSH.
- Slow Performance:
- Network Bandwidth: Your home internet's upload speed can be a bottleneck.
- VPN Overhead: If using a VPN, encryption/decryption adds a slight overhead.
- Pi Resources: Check your Pi's CPU and memory usage. If it's overloaded, it might struggle to handle remote connections.
- Ngrok Tunnel Not Working:
- Ngrok Client Running: Ensure the Ngrok client is actively running on your Pi and hasn't crashed or timed out.
- Internet Connection: The Pi needs an active internet connection to establish the outbound tunnel.
- Reverse SSH Tunnel Dropping:
- `autossh` Configuration: If using `autossh`, ensure it's configured correctly to keep the tunnel alive.
- Public Server Stability: Your public jump host needs to be stable and always online.
- SSH Session Timeout: Configure `ServerAliveInterval` in your SSH client and `ClientAliveInterval` on your Pi's `sshd_config` to prevent timeouts.
By systematically checking these points, you can diagnose and resolve most remote access issues, ensuring your "best remote IoT behind router Raspberry Pi free" setup remains functional.
Conclusion
And there you have it—everything you need to know about setting up the best remote IoT behind router for Raspberry Pi free. From understanding your router’s role in network address translation to leveraging powerful, free tools like SSH, VPNs, Ngrok, and reverse SSH tunnels, you now have a comprehensive toolkit at your disposal. This guide has walked you through the best methods to achieve secure and free remote SSH access to your Raspberry Pi, even when it's behind a router, ensuring you can manage your IoT devices, monitor data, and maintain control from anywhere in the world.
Remote IoT solutions are the systems that allow you to access, manage, and control your IoT devices, like a Raspberry Pi, from a remote location. The best part is, the core methods presented here are free, enabling seamless access to your IoT devices by bypassing the limitations imposed by routers and firewalls. Setting up the best remote IoT behind a router for Raspberry Pi requires careful planning and execution, but as we've explored, it's not only possible but also a lot simpler than most people think. Whether you're a tech enthusiast, a DIY wizard, or just someone looking to enhance your smart home, these free remote IoT options for Raspberry Pi will undoubtedly empower your projects. We encourage you to experiment with these methods, find the one that best suits your needs, and share your experiences in the comments below. What amazing remote IoT projects will you build next?
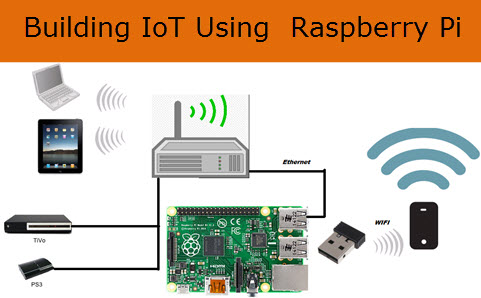
Building The (Internet of Things) IOT Using Raspberry Pi
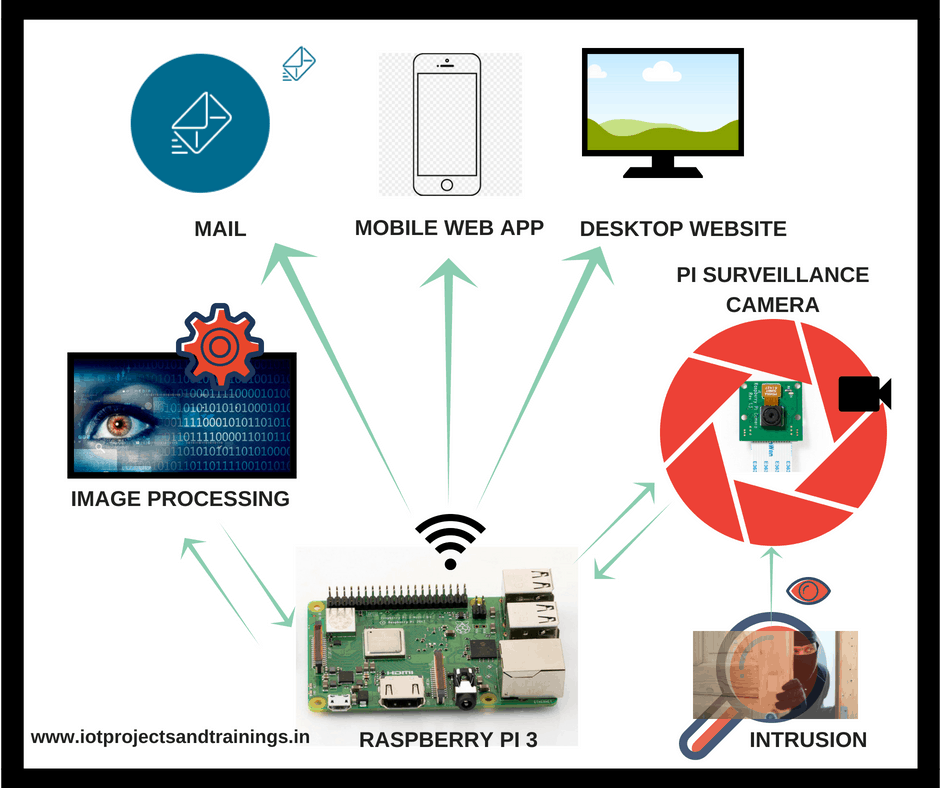
Raspberry Pi based IOT Security and Surveillance System with motion OS

Raspberry Pi IOT Con Firebase, Python y Android - YouTube
