Unlock Your IoT: Free Remote SSH Access From Anywhere
The Internet of Things (IoT) has rapidly transformed our world, connecting everything from smart home appliances to industrial sensors. As more devices come online, the need for efficient and secure remote management becomes paramount. Imagine being able to monitor your smart garden's soil moisture from your office, or reboot a remote sensor in a factory without physically being there. This is where how to access IoT devices remotely with SSH free comes into play, offering a robust and secure solution for managing your connected world from anywhere.
Whether you're a hobbyist tinkering with a Raspberry Pi or a professional managing complex IoT networks, gaining remote access is crucial for optimal performance and troubleshooting. This comprehensive guide will walk you through everything you need to know about establishing a secure and free SSH connection to your IoT devices, ensuring you maintain full control and peace of mind.
Table of Contents
- Understanding SSH: The Secure Shell Protocol
- Why Remote SSH for IoT Devices?
- Prerequisites for Remote SSH Access
- Setting Up Your IoT Device for SSH
- Accessing IoT Devices Remotely with SSH: Step-by-Step Guides
- Advanced SSH Techniques for IoT Management
- Troubleshooting Common SSH Connection Issues
- Security Best Practices for IoT SSH Access
- Conclusion: Empowering Your IoT Journey
Understanding SSH: The Secure Shell Protocol
Before diving into the practical steps of how to access IoT devices remotely with SSH free, it's essential to grasp what SSH is and why it's so critical for remote management. SSH, or Secure Shell, is a cryptographic network protocol that allows secure remote access to a computer over an unsecured network. It provides a secure channel over an unsecured network by using a client-server architecture, connecting an SSH client application with an SSH server.
Unlike older, less secure protocols like Telnet, SSH encrypts all traffic, including passwords, commands, and data transferred between the client and the server. This encryption prevents eavesdropping, connection hijacking, and other network attacks, making it the de facto standard for secure remote administration of servers and, increasingly, IoT devices.
How SSH Works: A Quick Overview
SSH operates on a client-server model. Your computer acts as the SSH client, initiating a connection to the SSH server running on your IoT device. When you attempt to connect, the following key steps occur:
- Handshake: The client and server establish a secure connection. During this phase, they exchange cryptographic keys to encrypt subsequent communication.
- Authentication: The server authenticates the client. This is typically done using passwords or, more securely, SSH keys. SSH keys consist of a public key (stored on the server) and a private key (kept secret on the client). If the keys match, authentication is successful.
- Session: Once authenticated, a secure, encrypted tunnel is established. You can then execute commands on the IoT device as if you were sitting right in front of it.
This robust mechanism ensures that your IoT remote SSH connection is a perfect way to securely monitor and manage IoT devices remotely.
Why Remote SSH for IoT Devices?
The proliferation of IoT devices brings immense convenience but also management challenges. Imagine having dozens, or even hundreds, of devices deployed across different locations. Physically accessing each one for updates, troubleshooting, or data retrieval is simply not feasible. This is where SSH shines. With SSH, however, IoT remote access to devices is safe, easy to deploy, and dependable.
Here are the primary benefits of using SSH for remote IoT device access:
- Security: As highlighted, SSH encrypts all communications, protecting your data and device from unauthorized access and cyber threats. This is paramount for IoT, where devices can be vulnerable entry points into a network.
- Control: By enabling remote SSH access, you can gain full control over your IoT devices from anywhere in the world, ensuring they function optimally and securely. You can execute commands, modify configurations, transfer files, and even restart services.
- Efficiency: Remotely managing devices saves significant time and resources. Instead of traveling to a device's location, you can perform maintenance tasks from your desk. This greatly increases efficiency and security.
- Flexibility: SSH is protocol-agnostic and can be used with a wide range of IoT devices, from simple microcontrollers running embedded Linux to more powerful single-board computers like Raspberry Pi.
- Cost-Effective: SSH is an open-source protocol, meaning the tools and clients are generally free to use. This makes it an incredibly cost-effective solution for remote management, aligning perfectly with the goal of how to access IoT devices remotely with SSH free.
SSH makes it possible for you to truly manage your IoT ecosystem without geographical limitations. As IoT continues to grow, secure and flexible remote access solutions like SSH become indispensable.
Prerequisites for Remote SSH Access
Before you can establish an SSH connection to your IoT device, there are a few fundamental requirements you need to meet. Ensuring these are in place will smooth out the setup process significantly.
- An IoT Device with SSH Server: Your IoT device must have an SSH server (daemon) running. Most Linux-based IoT devices (like Raspberry Pi, ESP32 running MicroPython with SSH capabilities, etc.) come with OpenSSH server pre-installed or easily installable.
- Network Connectivity: Both your client machine (the one you're connecting from) and your IoT device must be connected to the internet or the same local network.
- IP Address of the IoT Device: You'll need to know the IP address of your IoT device. This can be its local IP address (e.g., 192.168.1.100) for connections within your home network, or its public IP address (or a domain name if using Dynamic DNS) for connections over the internet.
- SSH Client Software: Your client machine needs an SSH client. Modern operating systems like macOS and Linux have built-in SSH clients. For Windows, you might need to enable the OpenSSH client or use a third-party tool like PuTTY.
- User Credentials: You'll need a username and password (or SSH keys) for a user account on your IoT device that has SSH access enabled.
Understanding these prerequisites is the first step towards a successful IoT remote SSH connection. This guide will walk you through how to access IoT devices remotely with SSH on both Windows and Mac, as well as Android, addressing these requirements.
Setting Up Your IoT Device for SSH
The specific steps to enable SSH on your IoT device will vary depending on the device and its operating system. However, the general principle remains the same: activate the SSH server and ensure network accessibility. For many hobbyist and professional IoT applications, Raspberry Pi is a popular choice due to its versatility and robust Linux-based operating system.
Enabling SSH on Raspberry Pi
SSH remote access to IoT devices using Raspberry Pi has become a popular method for controlling and managing devices remotely. Yes, it is possible to access your Raspberry Pi IoT device remotely. Here’s how to enable SSH on a Raspberry Pi:
- During OS Installation (Recommended):
- When using Raspberry Pi Imager to flash your SD card, click the gear icon (Settings) before writing the image.
- Enable SSH, set a username and password (or configure SSH public key authentication). This is the easiest and most secure method.
- After OS Installation (Headless - No Monitor):
- After flashing your SD card, before booting the Raspberry Pi, create an empty file named `ssh` (no extension) in the boot partition of the SD card.
- When the Raspberry Pi boots, it will detect this file and enable SSH automatically. For security, it's crucial to change the default password immediately if you haven't set one during imaging.
- After OS Installation (With Monitor/Keyboard):
- Boot your Raspberry Pi and open a terminal.
- Run `sudo raspi-config`.
- Navigate to `Interface Options` -> `SSH` -> `Yes`.
- Confirm and exit `raspi-config`.
- You can verify the SSH service status by running `sudo systemctl status ssh`.
Once SSH is enabled, your Raspberry Pi will be ready to accept incoming SSH connections on its default port (22).
Configuring Network for Remote Access
For true remote access over the internet, your IoT device needs to be reachable from outside your local network. This typically involves:
- Port Forwarding: Your home or office router acts as a firewall, blocking incoming connections. You'll need to configure your router to "forward" incoming SSH requests (usually on port 22) to the local IP address of your IoT device.
- Log in to your router's administration interface (usually via a web browser).
- Look for "Port Forwarding," "Virtual Servers," or "NAT" settings.
- Create a new rule:
- External Port: Choose a non-standard port (e.g., 2222, 50000) for security. Avoid using 22 directly from the internet.
- Internal Port: 22 (the default SSH port on your IoT device).
- Internal IP Address: The local IP address of your IoT device (e.g., 192.168.1.105).
- Protocol: TCP.
- Save the settings.
- Static Local IP Address: It's highly recommended to assign a static local IP address to your IoT device. This prevents its IP from changing, which would break your port forwarding rule. You can usually do this in your router's DHCP reservation settings or directly on the IoT device.
- Dynamic DNS (DDNS): Your home's public IP address might change periodically. A DDNS service (e.g., No-IP, DuckDNS, FreeDNS) maps a memorable domain name (e.g., `myiotdevice.ddns.net`) to your dynamic public IP address. The DDNS client software (often running on your router or the IoT device itself) updates the service whenever your public IP changes. This allows you to connect using a domain name instead of a constantly changing IP address.
This article will guide you step by step on how to set up SSH access for your IoT devices from anywhere, completely free of charge, using Windows 10, macOS, or Android. By the end of this article, you will have a clear understanding of these network configurations.
Accessing IoT Devices Remotely with SSH: Step-by-Step Guides
Now that your IoT device is ready and your network configured, it's time to establish the connection. This guide will walk you through how to access IoT devices remotely with SSH on various platforms.
SSH from Windows
Modern versions of Windows (Windows 10 and 11) come with a built-in OpenSSH client, making it much easier to connect than in the past.
- Enable OpenSSH Client (if not already enabled):
- Go to `Settings` -> `Apps` -> `Optional features`.
- Click `Add a feature` and search for `OpenSSH Client`.
- Install it if it's not already listed under "Installed features."
- Open Command Prompt or PowerShell:
- Press `Win + R`, type `cmd` or `powershell`, and press Enter.
- Connect via SSH:
- Use the command: `ssh username@ip_address_or_domain`
- Replace `username` with the username on your IoT device (e.g., `pi` for Raspberry Pi).
- Replace `ip_address_or_domain` with your device's local IP, public IP, or DDNS domain name (e.g., `192.168.1.105` or `myiotdevice.ddns.net`).
- If you configured a non-standard port (e.g., 2222) for external access, use: `ssh -p 2222 username@ip_address_or_domain`
- The first time you connect, you might see a warning about the host's authenticity. Type `yes` to continue and add the host to your known_hosts file.
- Enter your password when prompted.
- Use the command: `ssh username@ip_address_or_domain`
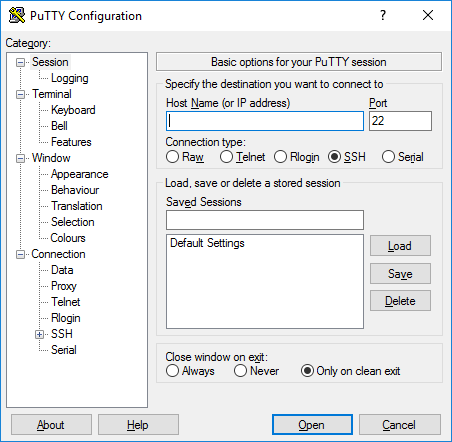
For older Windows versions or if you prefer a GUI, PuTTY remains a popular free choice. Download and install PuTTY, then enter your device's IP/domain and port, and click "Open."
SSH from macOS and Linux
macOS and most Linux distributions have the OpenSSH client pre-installed, making connections straightforward.
- Open Terminal:
- On macOS, go to `Applications` -> `Utilities` -> `Terminal`.
- On Linux, you can usually find "Terminal" in your applications menu or by pressing `Ctrl + Alt + T`.
- Connect via SSH:
- Use the same command as for Windows: `ssh username@ip_address_or_domain`
- For a non-standard port: `ssh -p 2222 username@ip_address_or_domain`
- Confirm the host authenticity if prompted, and enter your password.
You are now connected to your IoT device via SSH and can execute commands.
SSH from Android
Accessing your IoT devices from a mobile device offers unparalleled flexibility. This article delves into the practicalities of accessing IoT devices remotely via SSH on Android, exploring free tools and methods that empower users to maintain full control over their devices.
- Download an SSH Client App:
- Several free SSH client apps are available on the Google Play Store. Popular choices include:
- Termius: Offers a clean interface, SSH key management, and SFTP.
- JuiceSSH: Feature-rich, easy to use, with a good terminal emulator.
- ConnectBot: An older but reliable open-source option.
- Several free SSH client apps are available on the Google Play Store. Popular choices include:
- Configure the Connection:
- Open your chosen SSH app.
- Add a new connection profile.
- Enter the following details:
- Nickname: A descriptive name (e.g., "My Raspberry Pi").
- Hostname/IP: Your IoT device's IP address or DDNS domain.
- Port: 22 (or your custom external port, e.g., 2222).
- Username: Your IoT device's username.
- Authentication: Password or SSH Key (if you've set up key-based authentication).
- Connect:
- Tap on the connection profile you just created.
- Enter your password if prompted.
With the right tools and knowledge, you can remotely access IoT devices via SSH web on free Android apps, giving you complete control on the go. In this guide, we’ll walk you through these steps to ensure a smooth setup.
Advanced SSH Techniques for IoT Management
Beyond basic remote command execution, SSH offers powerful features that can significantly enhance your IoT management capabilities.
- SSH Key-Based Authentication: This is far more secure than password authentication. Instead of a password, you use a pair of cryptographic keys: a public key on the IoT device and a private key on your client machine.
- Generate Keys: On your client, run `ssh-keygen`. Follow the prompts (you can set a passphrase for extra security).
- Copy Public Key to IoT Device: Use `ssh-copy-id username@ip_address` (e.g., `ssh-copy-id pi@192.168.1.105`). This command securely copies your public key to the `~/.ssh/authorized_keys` file on the IoT device.
- Once set up, you can connect without entering a password, making automated scripts easier and significantly improving security.
- SSH Tunneling (Port Forwarding): SSH can create secure tunnels for other network services. This is incredibly useful if your IoT device runs services (like a web server on port 80 or a camera stream on port 8080) that you want to access securely without exposing them directly to the internet.
- Local Port Forwarding: `ssh -L 8080:localhost:80 username@ip_address`
- This forwards local port 8080 on your client to port 80 on the IoT device. You can then access the IoT device's web server by navigating to `http://localhost:8080` in your client's browser.
- Local Port Forwarding: `ssh -L 8080:localhost:80 username@ip_address`
- SFTP (SSH File Transfer Protocol): For secure file transfers, SFTP is built on top of SSH. You can use command-line `sftp` or GUI clients like FileZilla (which supports SFTP) to securely upload and download files to and from your IoT device.
- SSH Config File: For frequent connections, create an `~/.ssh/config` file on your client machine. This allows you to define aliases and default settings for your IoT devices, simplifying connections (e.g., `ssh myiotdevice` instead of `ssh -p 2222 pi@myiotdevice.ddns.net`).
These advanced techniques provide even greater flexibility and security for your IoT remote access needs. This guide will explain how to harness the SSH protocol to securely manage your devices.
Troubleshooting Common SSH Connection Issues
While SSH is robust, you might encounter issues. This guide will also show you when SSH starts to fall and how to address common problems.
- "Connection refused" or "No route to host":
- Firewall: Check if a firewall on your IoT device (e.g., `ufw` on Linux) is blocking port 22.
- SSH Service: Ensure the SSH server is running on your IoT device (`sudo systemctl status ssh`).
- Incorrect IP/Port: Double-check the IP address, domain name, and port number.
- Router Firewall/Port Forwarding: If connecting remotely, ensure your router's firewall isn't blocking the external port and that port forwarding is correctly configured to the IoT device's internal IP and port 22.
- "Permission denied (publickey, password)":
- Incorrect Username/Password: Verify your credentials.
- SSH Key Issues: If using SSH keys, ensure your private key has the correct permissions (read-only for owner) and that the public key is correctly installed in `~/.ssh/authorized_keys` on the IoT device.
- Root Login Disabled: Many systems disable direct SSH login for the root user for security reasons. Try logging in with a non-root user.
- "Host key verification failed":
- This usually means the host key of the IoT device has changed (e.g., you reinstalled the OS, or there's a potential man-in-the-middle attack).
- To resolve, remove the old host key from your client's `~/.ssh/known_hosts` file. The error message usually tells you which line to remove.
- Slow Connection/Lag:
- Network Latency: Remote connections over the internet will always have some latency.
- Bandwidth: Low bandwidth on either end can cause slowness.
- DNS Resolution: If using a domain name, slow DNS resolution can cause initial delays.
- Device Load: If your IoT device is under heavy load, its SSH server might respond slowly.
By systematically checking these points, you can resolve most SSH connection problems and ensure your IoT devices remain accessible.
Security Best Practices for IoT SSH Access
While SSH is inherently secure, misconfigurations can create vulnerabilities. Given the growing popularity of IoT (Internet of Things), ensuring robust security for remote access is paramount. In this article, we will explore how you can gain SSH access to your IoT devices for free, ensuring both security and ease of use.
- Use SSH Key-Based Authentication: Always prefer SSH keys over passwords. Keys are much harder to crack and eliminate the risk of brute-force password attacks. Protect your private key with a strong passphrase.
- Disable Password Authentication (Once Keys are Set Up): After successfully configuring SSH key authentication, disable password login on your IoT device's SSH server (`/etc/ssh/sshd_config` file, set `PasswordAuthentication no`). This drastically reduces the attack surface.
- Change Default SSH Port: Instead of using the default port 22, configure your SSH server and router's port forwarding to use a high, non-standard port (e.g., 2222, 50000-65535). This won't stop a determined attacker but significantly reduces automated scanning attempts.
- Use Strong, Unique Passwords (if using passwords): If you must use passwords, ensure they are long, complex, and unique for each device.
- Regularly Update Software: Keep your IoT device's operating system and all software (including the SSH server) up to date. Updates often include critical security patches.
- Limit User Privileges: Create a dedicated user for SSH access with only the necessary permissions. Avoid logging in as `root` directly. Use `sudo` for administrative tasks.
- Implement Firewall Rules: Configure a firewall on your IoT device (e.g., `ufw` on Linux) to only allow SSH connections from specific IP addresses or networks,

How To Access And Manage Your Iot Devices Remotely Using Ssh On Android
How To Access Iot Device Remote Ssh On Raspberry Pi Using Free Android
Step-by-step Guide | How to Remotely Connect to IoT Devices via SSH
