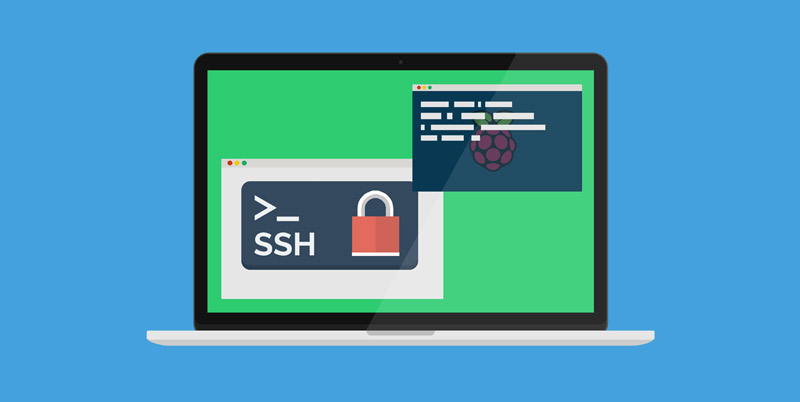
Unlock Remote IoT: Secure Raspberry Pi VPC SSH For Windows (Free Guide)
If you're reading this, chances are you're diving headfirst into the world of remote IoT setups, SSH configurations, and Raspberry Pi projects. The ability to remotely manage your Raspberry Pi using SSH (Secure Shell) from a Windows PC adds immense convenience and flexibility to your workflow. This article delves into the process of how to securely connect remote IoT VPC SSH Raspberry Pi, offering a practical guide to establishing a secure and robust remote access solution.
Imagine the possibilities: managing your smart home devices from anywhere, collecting sensor data from a remote location, or updating software on an edge device without physically being there. This comprehensive guide will walk you through the process of configuring remote IoT VPC SSH on Raspberry Pi, complete with free Windows download options to simplify your journey. We'll explore the ins and outs of remote IoT management, VPC SSH setup, and leveraging Raspberry Pi for solutions that won't break the bank, ensuring your connection is not just convenient, but also rock-solid secure.
Table of Contents
- Understanding the Core Concepts: Remote IoT, VPC, and SSH
- Why Raspberry Pi for Remote IoT Management?
- The Power of Remote Access: SSH and Its Benefits
- Setting Up Your Raspberry Pi for Remote Access
- Leveraging a Virtual Private Cloud (VPC) for Enhanced Security
- Connecting from Windows: Essential Tools and Free Downloads
- Advanced Security Measures and Best Practices
- Troubleshooting Common Remote Connection Issues
- Real-World Applications and Future Possibilities
- Conclusion: Mastering Your Remote IoT Ecosystem
Understanding the Core Concepts: Remote IoT, VPC, and SSH
Before we dive into the practical steps, let's lay a solid foundation by understanding the key players in our setup: Remote IoT, Virtual Private Cloud (VPC), and Secure Shell (SSH). These aren't just buzzwords; they're fundamental components that, when combined, create a powerful and secure ecosystem for managing your devices.
IoT (Internet of Things) refers to the vast network of physical objects embedded with sensors, software, and other technologies for the purpose of connecting and exchanging data with other devices and systems over the internet. Think smart thermostats, connected security cameras, industrial sensors, or even your smart refrigerator. Raspberry Pi devices are incredibly popular in the IoT space due to their compact size, low power consumption, versatility, and affordability, making them perfect for edge computing – processing data closer to where it's generated, rather than sending everything to a central cloud.
SSH (Secure Shell) is a cryptographic network protocol for operating network services securely over an unsecured network. It's the backbone of secure remote access. When you use SSH, all communication between your local computer (your Windows PC) and the remote device (your Raspberry Pi) is encrypted, preventing eavesdropping, connection hijacking, and other attacks. It's far superior to older, insecure protocols like Telnet. Mastering remote IoT VPC SSH Raspberry Pi begins with a deep understanding of how SSH works and how to leverage its security features.
A VPC (Virtual Private Cloud) takes security and isolation to the next level. Imagine a section of a public cloud (like Amazon Web Services, AWS) that is logically isolated from other virtual networks. You define your own IP address ranges, subnets, route tables, and network gateways. This gives you complete control over your network environment, allowing you to configure highly specific security rules (like firewalls and access controls) to protect your Raspberry Pi and other IoT devices. One particularly powerful combination involves leveraging a Raspberry Pi on Amazon Web Services (AWS), accessed securely through a virtual private cloud (VPC) using SSH. This setup ensures that your Raspberry Pi, even when exposed to the internet, is protected within a secure, controlled perimeter, making your remote IoT platform incredibly resilient.
Why Raspberry Pi for Remote IoT Management?
The Raspberry Pi has become synonymous with DIY electronics, educational projects, and, increasingly, professional IoT deployments. But why is it such a fantastic choice for remote IoT management, especially when considering secure remote access via SSH and VPC?
- Cost-Effectiveness: Compared to industrial-grade IoT gateways or custom embedded systems, Raspberry Pis are incredibly affordable. This allows for widespread deployment without significant capital investment.
- Versatility and Power: Despite their small size, modern Raspberry Pi models pack a punch. They can run a full Linux-based operating system (Raspberry Pi OS), handle complex scripts, process sensor data, and even manage multiple connected devices simultaneously.
- Rich Ecosystem and Community Support: The Raspberry Pi boasts a massive global community. This means abundant tutorials, forums, open-source projects, and readily available software libraries for almost any IoT application you can imagine. If you encounter a problem, chances are someone else has already solved it.
- GPIO Pins: The General Purpose Input/Output (GPIO) pins are a core feature, allowing the Pi to interface directly with a wide array of sensors, actuators, and other electronic components, making it ideal for physical IoT interactions.
- Low Power Consumption: For battery-powered or off-grid IoT deployments, the Raspberry Pi's low power draw is a significant advantage, extending operational time.
- Ease of Use: While powerful, getting started with a Raspberry Pi is relatively straightforward. The Raspberry Pi Imager tool simplifies the process of installing the operating system, even for beginners. This ease of use extends to configuring services like SSH, which is crucial for remote management.
In essence, the Raspberry Pi offers an unparalleled balance of performance, flexibility, and cost, making it the perfect brain for your remote IoT projects, especially when combined with the robust security of VPC and SSH.
The Power of Remote Access: SSH and Its Benefits
As mentioned, SSH is the cornerstone of secure remote access. But beyond just encryption, what exactly does it offer that makes it so indispensable for managing your Raspberry Pi and remote IoT platform?
- Secure Command-Line Interface (CLI): SSH provides a text-based interface to your Raspberry Pi, allowing you to execute commands, run scripts, manage files, and configure settings as if you were sitting right in front of it. This is invaluable for system administration, debugging, and deploying updates.
- Secure File Transfer (SFTP/SCP): SSH isn't just for command lines. It also underpins secure file transfer protocols like SFTP (SSH File Transfer Protocol) and SCP (Secure Copy Protocol). This means you can securely upload configuration files, download sensor data logs, or transfer application updates to and from your Raspberry Pi without worrying about data interception. Imagine you’re running a smart home setup with several IoT devices connected to a Raspberry Pi. You want to download some configuration files from your Pi to your Windows 10 PC for backup. SSH makes this process seamless and secure.
- Port Forwarding (SSH Tunneling): This is a powerful feature that allows you to securely tunnel network traffic through an SSH connection. For instance, you could securely access a web interface running on your Raspberry Pi (e.g., a home automation dashboard) from your Windows PC, even if that interface isn't directly exposed to the internet.
- Convenience and Flexibility: The primary benefit is the ability to manage your devices from anywhere with an internet connection. This eliminates the need for physical access, saving time and resources, especially for geographically dispersed IoT deployments. The remoteiot platform offers a robust framework for this.
- Enhanced Security: By encrypting all data in transit, SSH protects against various network attacks, including packet sniffing, IP spoofing, and DNS spoofing. When combined with a VPC, you're building a highly fortified remote access solution.
This guide will serve as your roadmap, diving deep into the processes of establishing a secure remote connection to your Raspberry Pi, allowing you to download all necessary files and manage your remote IoT setup with confidence.
Setting Up Your Raspberry Pi for Remote Access
Before you can connect remotely, your Raspberry Pi needs to be properly set up and configured. This involves installing the operating system and enabling the SSH service. This guide will walk you through the process of downloading and configuring SSH remote access for Raspberry Pi on Windows, all for free.
1. Installing Raspberry Pi OS
Begin by installing Raspberry Pi OS (formerly Raspbian) on your Raspberry Pi's microSD card. This is the recommended operating system for most Raspberry Pi projects due to its optimization and robust support.
- Download Raspberry Pi Imager: The easiest way to get the OS onto your SD card is by using the official Raspberry Pi Imager. Click the Raspberry Pi Imager download link from the official Raspberry Pi website (raspberrypi.com/software). Follow the installation prompts for your Windows machine.
- Choose OS: Open the Raspberry Pi Imager. Click "CHOOSE OS" and select "Raspberry Pi OS (64-bit)" or "Raspberry Pi OS (Legacy)" depending on your Pi model and specific needs. For most modern Pis and general use, the 64-bit version is recommended. The Raspberry Pi OS comes in these variants for different OSes.
- Choose Storage: Insert your microSD card into your computer's card reader. Click "CHOOSE STORAGE" and select your microSD card.
- Write Image: Click "WRITE" to begin the imaging process. This will format your SD card and write the chosen OS image to it. This might take a few minutes.
2. Enabling SSH on Raspberry Pi
For security reasons, SSH is often disabled by default on new Raspberry Pi OS installations. You'll need to enable it before you can connect remotely.
- Method 1: Via Raspberry Pi Imager (Recommended for Headless Setup):
- Before clicking "WRITE" in the Imager, click the gear icon (Settings) in the bottom right corner.
- In the settings menu, enable "SSH". You can choose to set a password or use public-key authentication (more secure). For simplicity, you can start with password, but we'll discuss key-based authentication later.
- You can also pre-configure Wi-Fi settings and set a hostname here, which is incredibly useful for headless setups (without a monitor).
- Proceed with writing the image.
- Method 2: After First Boot (Requires Monitor/Keyboard):
- Boot your Raspberry Pi with the freshly imaged SD card.
- Open a terminal window on the Raspberry Pi.
- Type `sudo raspi-config` and press Enter.
- Navigate to "Interface Options" -> "SSH" -> "Yes" to enable the SSH server.
- Exit `raspi-config` and reboot your Pi: `sudo reboot`.
3. Finding Your Raspberry Pi's IP Address
You'll need your Raspberry Pi's IP address to connect to it from your Windows PC. If you're connecting it to your home network, you can find its IP in a few ways:
- On the Raspberry Pi itself: Open a terminal and type `hostname -I` or `ip a`.
- Check your router's connected devices list: Log into your router's administration page (usually via a web browser) and look for a list of connected devices. Your Raspberry Pi will likely appear with a hostname like "raspberrypi" or "rpi".
- Using a network scanner: Tools like Advanced IP Scanner (free for Windows) can scan your local network and list active devices and their IP addresses.
For a more stable setup, especially in a remote IoT VPC SSH environment, consider configuring a static IP address for your Raspberry Pi or setting up a DHCP reservation on your router. This ensures its IP address doesn't change, simplifying future connections.
Leveraging a Virtual Private Cloud (VPC) for Enhanced Security
While SSH provides secure communication, integrating your Raspberry Pi into a Virtual Private Cloud (VPC) adds an unparalleled layer of network security and control. This is where the "VPC" in "remote IoT VPC SSH Raspberry Pi" truly shines. If your Raspberry Pi is part of a larger IoT deployment or needs to be accessible from outside your local network, a VPC becomes critical.
A VPC allows you to define your own isolated network within a public cloud provider like Amazon Web Services (AWS), Google Cloud Platform (GCP), or Microsoft Azure. Within this isolated network, you can launch resources (like virtual machines, or in our case, a Raspberry Pi connected via a VPN gateway or a dedicated connection) and control their network configuration. This level of control is paramount for IoT, where devices might be distributed and need robust, segmented access.
Here’s why a VPC is so powerful for remote IoT:
- Network Isolation: Your Raspberry Pi and other IoT devices within the VPC are logically separated from the public internet and other cloud users. This significantly reduces the attack surface.
- Granular Security Controls: You can create custom security groups and network Access Control Lists (ACLs) to precisely define what traffic is allowed in and out of your VPC and its subnets. For instance, you can configure a security group to only allow SSH traffic (port 22) from specific IP addresses (your Windows PC's public IP) or from a VPN gateway within your VPC.
- Private IP Addressing: Devices within a VPC can communicate using private IP addresses, which are not directly routable over the public internet. This enhances security by default. Public IPs are only assigned when necessary and controlled via Elastic IPs or NAT gateways.
- VPN Integration: You can establish a secure VPN connection (e.g., an OpenVPN client on your Raspberry Pi connecting to an OpenVPN server in your VPC, or a Site-to-Site VPN) between your local network (or even directly from your Windows PC) and your VPC. This creates a secure tunnel, making your remote IoT VPC SSH setup even more robust. This utilizes free download Windows tools for OpenVPN client and SSH access.
- Scalability and Management: For large-scale IoT deployments, a VPC provides a structured environment for managing hundreds or thousands of devices, ensuring consistent network policies and easier scaling.
While setting up a full VPC might be beyond the scope of a single article's step-by-step, understanding its importance is key. If your Raspberry Pi is hosted on a cloud platform (e.g., a virtualized Pi instance or a physical Pi connected via a gateway), mastering remote IoT VPC SSH becomes an essential skill. By the end of this guide, you’ll have a solid understanding of how to set up a Raspberry Pi with VPC SSH, connect it to remoteiot, and use it to download Windows 10 (or other files) if needed.
Connecting from Windows: Essential Tools and Free Downloads
Now that your Raspberry Pi is ready, it's time to set up your Windows PC to connect to it. Fortunately, there are excellent, free tools available that make this process straightforward.
Installing PuTTY and WinSCP
These two applications are your primary weapons for remote management:
- PuTTY: This is a free and open-source SSH client for Windows. It allows you to open a secure command-line session to your Raspberry Pi.
- Download: Go to the official PuTTY website (putty.org). Look for the "Download PuTTY" section and download the appropriate Windows Installer (e.g., `putty-0.XX-installer.msi` for 64-bit Windows).
- Installation: Run the installer and follow the on-screen prompts. The default options are usually fine.
- WinSCP: While PuTTY handles the command line, WinSCP is a free and open-source SFTP, FTP, WebDAV, SCP, and S3 client for Windows. It provides a graphical user interface (GUI) for secure file transfers, making it much easier to drag and drop files between your Windows PC and your Raspberry Pi.
- Download: Visit the official WinSCP website (winscp.net). Download the "Installation package".
- Installation: Run the installer. Choose "Typical installation" and follow the prompts.
These free download Windows tools for SSH access will form the core of your remote management toolkit.
Configuring SSH Connection in PuTTY
Once PuTTY is installed, connecting to your Raspberry Pi is simple:
- Open PuTTY: Launch PuTTY from your Start Menu.
- Enter Connection Details:
- In the "Host Name (or IP address)" field, enter the IP address of your Raspberry Pi (e.g., `192.168.1.100`).
- Ensure the "Port" is set to `22` (the default SSH port).
- Make sure "Connection type" is set to "SSH".
- Save Session (Optional but Recommended):
- In the "Saved Sessions" field, type a name for your connection (e.g., "MyPi" or "RemoteIoT-Pi").
- Click "Save". This will save your connection details so you don't have to type them every time.
- Open Connection: Click "Open".
- Security Alert (First Connection): The first time you connect, PuTTY will show a security alert about the host key not being cached. This is normal. Click "Accept" to trust the host and proceed.
- Login: A terminal window will appear.
- At the `login as:` prompt, type your Raspberry Pi username (default is `pi`).
- At the `password:` prompt, enter your Raspberry Pi password (default is `raspberry` if you haven't changed it).
You are now securely connected to your Raspberry Pi via SSH! You can execute commands, manage files, and perform any administrative tasks remotely. This is the essence of mastering remote IoT VPC SSH Raspberry Pi.
Secure File Transfer with WinSCP
For transferring files, WinSCP offers a much more user-friendly experience than command-line SCP or SFTP:
- Open WinSCP: Launch WinSCP from your Start Menu.
- New Site Login:
- In the "File protocol" dropdown, select "SFTP".
- In the "Host name" field, enter your Raspberry Pi's IP address.
- Ensure the "Port number" is `22`.
- Enter your "User name" (e.g., `pi`) and "Password" (e.g., `raspberry`).
- Save Session (Optional): Click "Save" to store these connection details for quick access later.
- Login: Click "Login".
- Security Alert (First Connection): Similar to PuTTY, you might get a warning about the server's host key. Click "Yes" to accept and continue.
Once connected, WinSCP will display two panes: your local Windows file system on one side and your Raspberry Pi's file system on the other. You can now easily drag and drop files between them, securely downloading configuration files or uploading new scripts. This ability to download files from your remote IoT platform is incredibly useful.
Advanced Security Measures and Best Practices
While the basic remote IoT VPC SSH Raspberry Pi setup is functional, enhancing its security is paramount, especially for devices deployed in the field or connected to sensitive data. Remote IoT VPC SSH is a powerful tool that allows you to access your Raspberry Pi remotely over a secure connection, and making that connection as secure as possible is crucial.
- Change Default Passwords: The very first thing you should do after setting up your Raspberry Pi is change the default `pi` user password (`raspberry`). Use a strong, unique password.
- Use SSH Key-Based Authentication: This is significantly more secure than password authentication. Instead of a password, you use a pair of cryptographic keys: a private key (kept secret on your Windows PC) and a public key (placed on your Raspberry Pi).
- Generate Keys: Use PuTTYgen (included with PuTTY) to generate an SSH key pair.
- Upload Public Key: Copy the public key to your Raspberry Pi's `~/.ssh/authorized_keys` file.
- Configure PuTTY: In PuTTY, under Connection -> SSH -> Auth, browse to your private key file.
- Disable Password Authentication: For maximum security, edit `/etc/ssh/sshd_config` on your Raspberry Pi to set `PasswordAuthentication no` and `PermitRootLogin no`. Remember to restart the SSH service (`sudo systemctl restart ssh`) after changes.
- Change the Default SSH Port: The default SSH port is 22. Changing it to a non-standard port (e.g., 2222, 22222) reduces automated scanning attempts by bots looking for open port 22. Edit `/etc/ssh/sshd_config` and change `Port 22` to your desired port. Remember to update your PuTTY connection and any firewall rules.
- Implement a Firewall (UFW on Pi, Windows Firewall on PC):
- On Raspberry Pi: Enable and configure `ufw` (Uncomplicated Firewall). For example, `sudo ufw enable`, `sudo ufw allow ssh` (or `sudo ufw allow 2222/tcp` if you changed the port), `sudo ufw allow in on eth0 to any port 80` (for web servers).
- On Windows PC: Ensure your Windows Firewall is active and properly configured to protect your local machine.
- Keep Software Updated: Regularly update your Raspberry Pi OS and all installed software (`sudo apt update && sudo apt full-upgrade`). This ensures you have the latest security patches.
- Use a VPN for an Extra Layer of Security: For highly sensitive deployments, consider setting up a VPN (Virtual Private Network) between your Windows PC and your Raspberry Pi (or your VPC). This creates an encrypted tunnel over the internet, even before SSH traffic is initiated. OpenVPN is a popular open-source choice that utilizes free download Windows tools for its client.
- Limit User Privileges: Avoid logging in as the `root` user directly. Use a regular user account and use `sudo` for administrative tasks.
This article delves into the essential components of remote IoT VPC SSH, helping you understand how to set up your Raspberry Pi for remote access while ensuring data integrity and system security. We’ll break down the process, explain the 'why' behind each step, and empower you to build a truly secure remote IoT solution.
Troubleshooting Common Remote Connection Issues
Even with the best preparation, you might encounter issues when trying to establish a remote IoT VPC SSH connection. Here are some common problems and their solutions:
- "Connection Refused" or "Network Error: Connection Timed Out":
- Incorrect IP Address: Double-check the IP address of your Raspberry Pi. It might have changed if you're using DHCP without a reservation.
- Raspberry Pi Not Powered On/Connected: Ensure your Pi is powered on and connected to the network (Wi-Fi or Ethernet).
- SSH Service Not Running: The SSH server might not be running on your Raspberry Pi. Connect a monitor/keyboard to your Pi and check its status: `sudo systemctl status ssh`. If it's not running, start it: `sudo systemctl start ssh`.
- Firewall Blocking Connection: A firewall on your Raspberry Pi (e.g., `ufw`) or your router might be blocking port 22 (or your custom SSH port). Ensure the port is open.
- Router/Network Issues: Your router might be blocking incoming connections or there could be general network connectivity problems.
- "Access Denied" or "Authentication Failed":
- Incorrect Username or Password: This is the most common culprit. Double-check your username (default is `pi`) and password. Remember passwords are case-sensitive.
- SSH Key Issues: If using key-based authentication, ensure your private key is correctly loaded in PuTTY and the public key is correctly placed in `~/.ssh/authorized_keys` on your Raspberry Pi. Check file permissions on `~/.ssh` (700) and `authorized_keys` (600).
- Password Authentication Disabled: If you disabled password authentication on your Pi, you *must* use key-based authentication.

Remote IoT VPC SSH Raspberry Pi Review: Your Ultimate Guide To Secure
Learn how to use SSH to remote control your Raspberry Pi – Howto

How to SSH Raspberry Pi Remote access from MAC / Windows - YouTube
