Mastering Remote IoT: SSH Raspberry Pi Access With Free Windows Download
In today's interconnected world, the ability to manage devices remotely is no longer a luxury but a necessity, especially when it comes to the burgeoning field of the Internet of Things (IoT). For enthusiasts and professionals alike, harnessing the power of a Raspberry Pi for IoT projects is incredibly appealing, but how do you seamlessly control these tiny computers from afar, particularly from a Windows environment? This is where the powerful combination of a remoteiot platform, SSH, and a Raspberry Pi, complete with a free Windows download, comes into play, offering unparalleled control and flexibility.
This comprehensive guide will walk you through everything you need to know about setting up and using the remoteiot platform SSH on Raspberry Pi, including a free Windows download. We'll explore the process step by step, ensuring you have all the information you need to set up SSH on your Raspberry Pi and download the free Windows tools necessary to get started. Whether you're setting up a smart home system or managing industrial automation, having access to a reliable and secure SSH (Secure Shell) connection is paramount.
Table of Contents
- Understanding the Core Components: Raspberry Pi, SSH, and IoT
- Why Choose RemoteIoT Platform for Your Raspberry Pi?
- Preparing Your Raspberry Pi for Remote Access
- Step-by-Step Guide: Configuring RemoteIoT VPC SSH on Raspberry Pi
- Downloading and Setting Up Free Windows Tools for Remote Access
- Mastering Remote Management: Beyond Basic SSH
- Troubleshooting Common Issues and Best Practices
- Conclusion
Understanding the Core Components: Raspberry Pi, SSH, and IoT
Before diving into the specifics of the remoteiot platform, it's crucial to grasp the foundational elements that make this remote management possible. At the heart of many modern IoT projects lies the Raspberry Pi. This series of small, single-board computers has revolutionized hobbyist electronics and embedded systems, offering incredible processing power in a compact, affordable package. Its versatility makes it ideal for everything from home automation to industrial monitoring, serving as the "brain" of your IoT devices.
Complementing the Raspberry Pi's hardware capabilities is SSH, or Secure Shell. SSH is a cryptographic network protocol that allows secure remote login and command-line execution. In simpler terms, it's a secure way to access and control your Raspberry Pi from another computer over a network, even if that computer is thousands of miles away. Without SSH, managing your headless (screen-less) Raspberry Pi would be cumbersome, requiring direct physical access for every command or update. SSH encrypts all communication, protecting your data and commands from eavesdropping, which is absolutely critical when dealing with sensitive IoT data or controlling physical systems.
Finally, the Internet of Things (IoT) refers to the vast network of physical objects embedded with sensors, software, and other technologies for the purpose of connecting and exchanging data with other devices and systems over the internet. From smart thermostats and security cameras to industrial sensors and agricultural monitoring systems, IoT is transforming how we interact with our environment. The ability to remotely access and manage these IoT devices, often powered by a Raspberry Pi, is what makes large-scale deployments and efficient operation feasible. The remoteiot platform specifically addresses the need for a streamlined, secure, and efficient way to achieve this remote control, making it an invaluable tool for any IoT enthusiast or professional.
Why Choose RemoteIoT Platform for Your Raspberry Pi?
While SSH provides the fundamental secure connection, managing multiple Raspberry Pi devices, or even just one, can become complex without a centralized, intuitive interface. This is where a dedicated remote IoT platform like remoteiot comes into its own. The remoteiot platform offers an intuitive interface and robust tools to simplify the process of connecting and managing your Raspberry Pi devices. It takes the raw power of SSH and wraps it in a user-friendly environment, making remote management accessible to both beginners and advanced users.
One of the key advantages is its seamless integration. Are you looking for a reliable way to manage your Raspberry Pi remotely using SSH on a Windows system? The remoteiot platform offers a seamless solution for downloading and connecting. It's designed to reduce the friction often associated with setting up complex network configurations, allowing you to focus more on your IoT projects and less on the underlying infrastructure. The platform is compatible with various Raspberry Pi models, making it a versatile tool for both beginners and advanced users, ensuring that your existing or future Pi devices can be easily integrated.
Moreover, the remoteiot platform often provides features beyond basic SSH, such as device monitoring, data visualization, and even remote code deployment, transforming your Raspberry Pi into a truly powerful and manageable IoT hub. This comprehensive approach simplifies the entire lifecycle of your remote IoT projects, from initial setup to ongoing maintenance and scaling.
The Power of the Web Console
A standout feature of many remote IoT platforms, including remoteiot, is the integrated web console. This isn't just a fancy add-on; it's a game-changer for accessibility and convenience. With the web console, you can connect your Raspberry Pi directly from your PC browser or mobile device, eliminating the need to install separate SSH clients on every machine you use. The web console is a standard terminal emulator, providing a familiar command-line interface directly within your web browser. This means you can issue commands, run scripts, and manage your Raspberry Pi as if you were sitting right in front of it, all from the comfort of any internet-connected device.
This capability is particularly beneficial for quick checks, troubleshooting on the go, or when you're using a public computer where installing software isn't an option. It streamlines the workflow, making remote management incredibly efficient and user-friendly. It’s a testament to how the remoteiot platform aims to simplify your interaction with your Raspberry Pi, providing a seamless and secure connection experience.
Preparing Your Raspberry Pi for Remote Access
Before you can harness the power of the remoteiot platform and SSH, your Raspberry Pi needs some foundational setup. This section covers the essential steps to get your Pi ready for remote access.
- Install Raspberry Pi OS: Start by installing the latest version of Raspberry Pi OS (formerly Raspbian) onto your microSD card. You can use the Raspberry Pi Imager tool for an easy process. Choose the "Lite" version if you don't need a graphical desktop environment, as it uses fewer resources, which is ideal for headless IoT applications.
- Initial Boot and Configuration: After flashing, insert the microSD card into your Raspberry Pi and power it on. For initial setup, you might need a monitor, keyboard, and mouse. Once booted, open a terminal.
- Enable SSH: SSH is not enabled by default on new Raspberry Pi OS installations for security reasons. To enable it, open the terminal and type:
Navigate to "Interface Options" > "SSH" > "Yes" and then "OK". Exit `raspi-config` and reboot your Pi. This step is crucial for allowing any remote connection, including those facilitated by the remoteiot platform.sudo raspi-config - Update Your System: It's always good practice to update your Raspberry Pi's software to the latest versions. In the terminal, run:
This ensures you have the latest security patches and software features.sudo apt update sudo apt full-upgrade -y - Change Default Password: The default username for Raspberry Pi OS is `pi` and the password is `raspberry`. This is a major security risk. Change it immediately using:
Follow the prompts to set a strong, unique password.passwd - Network Configuration (Optional but Recommended): For reliable remote access, consider assigning a static IP address to your Raspberry Pi on your local network. This prevents its IP from changing, which would break your SSH connection. You can configure this by editing the `dhcpcd.conf` file:
Add lines similar to these at the end of the file (adjusting values for your network):sudo nano /etc/dhcpcd.conf
Replace `eth0` with `wlan0` if you're using Wi-Fi. Reboot for changes to take effect.interface eth0 static ip_address=192.168.1.100/24 static routers=192.168.1.1 static domain_name_servers=192.168.1.1 8.8.8.8
With these steps completed, your Raspberry Pi is now primed for secure remote access via SSH, laying the groundwork for integration with the remoteiot platform.
Step-by-Step Guide: Configuring RemoteIoT VPC SSH on Raspberry Pi
Now that your Raspberry Pi is prepared, let's delve into the core process of configuring remoteiot vpc ssh on Raspberry Pi. This comprehensive guide will walk you through the process, complete with free Windows download options to simplify your setup. The exact steps might vary slightly depending on the specific remoteiot platform you choose, but the general principles remain consistent.
- Sign Up for a RemoteIoT Account: Begin by visiting the chosen remoteiot platform's website and signing up for an account. Many platforms offer free tiers or trial periods, which are perfect for getting started.
- Add Your Device to the Platform: Once logged in, look for an option to "Add Device" or "Register Device." You'll typically be guided through a process to select your device type (e.g., Raspberry Pi).
- Install the RemoteIoT Agent on Raspberry Pi: The remoteiot platform usually provides a specific script or set of commands that you need to run on your Raspberry Pi. This agent establishes a secure connection back to the platform's servers, allowing it to manage your Pi. An example command might look like:
(Note: This is a placeholder example; always use the exact command provided by your chosen remoteiot platform.) This agent facilitates the secure communication channels, including the VPC (Virtual Private Cloud) connection, which enhances the security and reliability of your remote SSH access.curl -sSL https://get.remoteiot.com/install.sh | sudo bash - Verify Connection: After running the agent script, return to the remoteiot platform's web console. You should see your Raspberry Pi appear as "online" or "connected." This indicates that the agent has successfully established communication.
- Access SSH via Platform's Web Console: With the device connected, you can now utilize the platform's built-in web console. As mentioned earlier, the web console allows you to connect your Raspberry Pi directly from your PC browser or mobile device. Look for an "SSH" or "Terminal" button next to your device's entry on the platform dashboard. Clicking this will open a secure terminal session in your browser, giving you immediate command-line access to your Raspberry Pi.
From setting up your Raspberry Pi to establishing a secure connection through the remoteiot platform, you've now created a robust remote management system. This streamlined approach simplifies what could otherwise be a complex network configuration, allowing you to securely access your Raspberry Pi from anywhere.
Securing Your RemoteIoT Connection
While SSH inherently provides encryption, enhancing the security of your remoteiot connection is paramount, especially for YMYL (Your Money Your Life) scenarios where data integrity and device control are critical. Here are key practices:
- SSH Key-Based Authentication: Move beyond password-based authentication for SSH. Generate an SSH key pair (a public key and a private key) on your Windows machine. Upload the public key to your Raspberry Pi (typically to `~/.ssh/authorized_keys`). Then, configure your SSH client to use your private key. This is far more secure than passwords, as it relies on cryptographic keys that are nearly impossible to guess.
- Disable Password Authentication for SSH: Once key-based authentication is working, disable password login for SSH on your Raspberry Pi by editing `/etc/ssh/sshd_config` and setting `PasswordAuthentication no`. Restart the SSH service (`sudo systemctl restart ssh`).
- Firewall Rules: Configure your Raspberry Pi's firewall (e.g., using `ufw`) to only allow SSH connections from trusted IP addresses if possible, or from the specific IP range used by the remoteiot platform.
- Regular Updates: Keep your Raspberry Pi OS and the remoteiot agent software updated. Vulnerabilities are constantly discovered and patched, and staying current is your best defense.
- Strong Passwords for RemoteIoT Platform: Use a strong, unique password for your remoteiot platform account and enable Two-Factor Authentication (2FA) if available.
With the right setup, you can securely access a remote IoT platform via SSH on a Raspberry Pi without needing to download additional software beyond your initial Windows SSH client. This article will guide you through this process, ensuring your setup is not only functional but also highly secure.
Downloading and Setting Up Free Windows Tools for Remote Access
While the remoteiot platform's web console offers immense convenience, having a dedicated SSH client on your Windows machine provides additional flexibility and features. Remotely access Raspberry Pi with remoteiot free download for Windows is made effortless with these tools. This article will explore the process step by step, ensuring you have all the information you need to set up SSH on your Raspberry Pi and download the free Windows tools.
- PuTTY (Recommended for Simplicity):
- Download: PuTTY is a free and open-source SSH client for Windows. Download the latest version from the official PuTTY website. Look for the `putty.exe` executable or the installer package.
- Installation: If you downloaded the installer, run it and follow the on-screen prompts. If you downloaded the standalone `.exe`, you can simply run it directly.
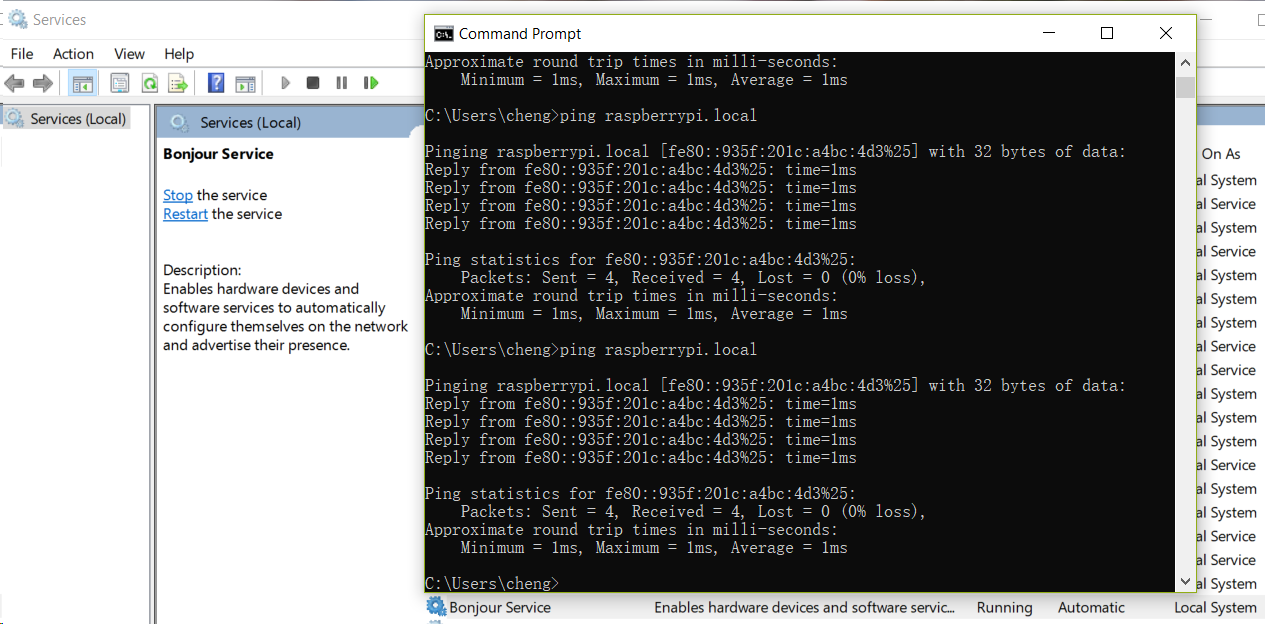
- Usage: Open PuTTY. In the "Host Name (or IP address)" field, enter your Raspberry Pi's IP address (e.g., `192.168.1.100`) or its hostname (e.g., `raspberrypi.local`). Ensure the "Port" is `22` and "Connection type" is `SSH`. Click "Open." The first time you connect, you'll see a security alert about the host key; accept it. You'll then be prompted for your username (`pi` by default, or your new username) and password.
- Saving Sessions: To avoid re-entering details, type a name in the "Saved Sessions" field (e.g., "MyPi") and click "Save."
- Windows Subsystem for Linux (WSL) with OpenSSH (Recommended for Power Users):
- Download/Enable: WSL allows you to run a Linux environment directly on Windows. To enable it, open PowerShell as Administrator and run:
This will install WSL and a default Linux distribution (usually Ubuntu). You might need to restart your computer.wsl --install - Installation: Once WSL is installed, open the Ubuntu (or chosen distro) app from your Start Menu. It will complete its initial setup.
- Usage: Inside the WSL terminal, you have access to the standard Linux `ssh` command. To connect to your Raspberry Pi, simply type:
(Replace `pi` with your username and `192.168.1.100` with your Pi's IP address). You'll be prompted for your password.ssh pi@192.168.1.100 - SSH Key Setup: WSL makes it easy to generate SSH keys (`ssh-keygen`) and manage them, which is ideal for secure, password-less logins.
- Download/Enable: WSL allows you to run a Linux environment directly on Windows. To enable it, open PowerShell as Administrator and run:
- Visual Studio Code with Remote - SSH Extension (Recommended for Developers):
- Download: Download and install Visual Studio Code for Windows.
- Install Extension: Open VS Code, go to the Extensions view (Ctrl+Shift+X), search for "Remote - SSH" by Microsoft, and install it.
- Usage: Click the green remote indicator in the bottom-left corner of VS Code, select "Connect to Host...", and enter `ssh pi@192.168.1.100`. VS Code will connect, and you can then open folders from your Raspberry Pi directly in the VS Code interface, allowing for remote code editing and execution.
These free Windows download options provide powerful ways to connect to your Raspberry Pi. Whether you prefer a simple terminal client, a full Linux environment, or an integrated development experience, there's a tool that fits your needs.
Connecting Your Raspberry Pi from Windows
Once you have your chosen SSH client installed, connecting to your Raspberry Pi is straightforward. For PuTTY, simply open the saved session and click "Open." For WSL, open your Linux terminal and type `ssh pi@your_pi_ip_address`. For VS Code, use the "Remote - SSH" functionality. Regardless of the tool, the core process involves providing your Raspberry Pi's IP address (or hostname), your username, and your password (or SSH key if configured). Upon successful authentication, you'll be presented with the familiar command-line interface, ready to issue commands and manage your remote IoT platform via SSH on Raspberry Pi.
Mastering Remote Management: Beyond Basic SSH
Once you've established a stable SSH connection to your Raspberry Pi, the possibilities for remote management extend far beyond simply typing commands. The remoteiot platform SSH Raspberry Pi offers an incredible opportunity for users to remotely control and manage IoT devices through a secure and efficient setup. Here's how you can leverage your remote access for more advanced tasks:
- File Transfer (SCP/SFTP): You'll often need to move files between your Windows machine and your Raspberry Pi.
- SCP (Secure Copy Protocol): For simple command-line file transfers, SCP is your friend. Using WSL or a tool like WinSCP (a free SFTP, SCP, and FTP client for Windows), you can copy files like:
orscp /path/to/local/file pi@your_pi_ip:/path/to/remote/directoryscp pi@your_pi_ip:/path/to/remote/file /path/to/local/directory - SFTP (SSH File Transfer Protocol): SFTP provides a more interactive, graphical way to transfer files, similar to an FTP client but over a secure SSH connection. WinSCP is an excellent choice for Windows users, offering a dual-pane interface to drag and drop files.
- SCP (Secure Copy Protocol): For simple command-line file transfers, SCP is your friend. Using WSL or a tool like WinSCP (a free SFTP, SCP, and FTP client for Windows), you can copy files like:
- Running Scripts Remotely: You can execute Python scripts, shell scripts, or any other program on your Raspberry Pi directly via SSH. This is fundamental for deploying new IoT logic or updating existing applications. For example:
You can also run scripts in the background using `nohup` or `screen`/`tmux` to keep them running even after you disconnect your SSH session.ssh pi@your_pi_ip 'python /home/pi/my_iot_script.py' - Monitoring Raspberry Pi Health: Remotely check the status of your Pi's resources.
- `htop` or `top`: Monitor CPU and memory usage.
- `df -h`: Check disk space.
- `vcgencmd measure_temp`: Get CPU temperature (Raspberry Pi specific).
- `uptime`: See how long your Pi has been running.
- Automating Tasks with Cron: Schedule scripts to run automatically on your Raspberry Pi using `cron`. For instance, you could schedule a script to collect sensor data every hour or reboot the Pi nightly.
This opens the cron table where you can add entries like `0 * * * * python /home/pi/data_logger.py` to run a script every hour.crontab -e - Remote Desktop (VNC/XRDP): If your Raspberry Pi has a desktop environment and you prefer a graphical interface, you can set up VNC or XRDP to access it remotely. This allows you to see and interact with the Raspberry Pi's desktop as if you were sitting in front of it. While not strictly SSH, it often relies on SSH for initial secure tunneling.
By mastering these techniques, you can effectively manage and scale your IoT deployments, ensuring your devices are always performing optimally and securely. The remoteiot platform, combined with robust SSH practices, empowers you to maintain complete control over your distributed IoT network.
Troubleshooting Common Issues and Best Practices
Even with the best preparation, you might encounter issues when setting up or maintaining your remote IoT platform via SSH on Raspberry Pi. Here are some common problems and best practices to ensure a smooth experience:
Common Troubleshooting Scenarios:
- Connection Refused:
- SSH Not Enabled: Double-check that SSH is enabled on your Raspberry Pi via `sudo raspi-config`.
- SSH Service Not Running: Ensure the SSH daemon is active: `sudo systemctl status ssh`. If not, start it with `sudo systemctl start ssh`.
- Firewall Blocking: Your Raspberry Pi's firewall (or your router's firewall) might be blocking port 22.
- Authentication Errors (Permission Denied):
- Incorrect Password: Verify your username and password. Remember, Linux passwords are case-sensitive.
- Incorrect Username: Default is `pi`. If you created a new user, use that.
- SSH Key Issues: If using key-based authentication, ensure your private key is correctly loaded by your client and the public key is on your Pi (`~/.ssh/authorized_keys`). Check file permissions on the Pi (`chmod 600 ~/.ssh/authorized_keys`).
- Network Issues (Host Unreachable, Timeout):
- Wrong IP Address: Confirm your Raspberry Pi's current IP address (`hostname -I` on the Pi).
- Pi Not Powered On/Connected: Ensure your Raspberry Pi is powered on and connected to the network (check Wi-Fi/Ethernet lights).
- Network Configuration: If using a static IP, verify it's correctly configured and doesn't conflict with other devices. If using DHCP, ensure your router is assigning an IP.
- Router Issues: Reboot your router. Check if your router's firewall is blocking outbound connections from your Windows PC or inbound connections to your Pi.
- Slow Connection/Lag:
- Network Latency: High ping times to your Pi will cause lag.
- Pi Resource Usage: If your Pi is under heavy load (high CPU/memory

Ssh Raspberry Pi Iot From Anywhere Download Free Windows Guide Best

How to SSH Raspberry Pi Remote access from MAC / Windows - YouTube
SSH into Raspberry Pi on Windows using "raspberrypi.local" · GitHub
