Mastering RemoteIoT VPC SSH: Secure Downloads On Windows 10
In an increasingly interconnected world, the ability to securely manage and interact with remote devices is paramount. Whether you're a network administrator overseeing a fleet of IoT sensors or a tech enthusiast tinkering with a Raspberry Pi, the challenge often lies in establishing a reliable and secure connection. If you've been scratching your head about how to set up a remoteiot vpc ssh connection using a Raspberry Pi and download files on Windows 10, you're in the right place. This guide is designed to demystify the process, offering a comprehensive, step-by-step approach to achieving seamless remote access and file transfers.
The convergence of Virtual Private Clouds (VPCs), Secure Shell (SSH), and the burgeoning ecosystem of IoT devices like the Raspberry Pi presents an unparalleled opportunity for robust remote management. Traditional methods often involve complex VPN or firewall configurations, but RemoteIoT VPC SSH offers a streamlined and highly secure alternative. This combo is powerful, trust me. By the end of this guide, you’ll have a solid understanding of how to set up a Raspberry Pi with VPC SSH, connect it to RemoteIoT, and use it to download Windows 10 files securely and efficiently. We'll cover everything from setting up your virtual private environment to mastering secure file transfers, unlocking a world of possibilities for remote management, automation, and system integration.
Table of Contents
- Understanding the Core: RemoteIoT, VPC, and SSH
- Why RemoteIoT VPC SSH is a Game-Changer
- The Essential Tool: Your SSH Client on Windows 10
- Setting Up Your Raspberry Pi for RemoteIoT VPC SSH
- Integrating the RemoteIoT Service on Your IoT Device
- Establishing the Secure Connection: RemoteIoT VPC SSH on Raspberry Pi
- Seamless File Transfers: Downloading Files to Windows 10
- Troubleshooting Common RemoteIoT VPC SSH Issues
Understanding the Core: RemoteIoT, VPC, and SSH
Before we dive into the practical steps of setting up a remoteiot vpc ssh download solution, it's crucial to grasp the fundamental components involved. Each element plays a distinct yet interconnected role in creating a secure and efficient remote access ecosystem.
First, let's consider **RemoteIoT**. While not a single, universally defined product, "RemoteIoT" generally refers to a service or framework designed to facilitate the remote management, monitoring, and control of Internet of Things (IoT) devices. This could involve a cloud-based platform that acts as a central hub, allowing you to interact with your distributed IoT fleet from anywhere. The core idea is to abstract away the complexities of direct network access, providing a unified interface for device interaction. It's about making your IoT devices accessible and manageable, regardless of their physical location or local network configuration.
Next, we have the **Virtual Private Cloud (VPC)**. Think of a VPC as your own isolated, private section within a public cloud environment, such as AWS, Azure, or Google Cloud. Within this virtual network, you have complete control over your IP address ranges, subnets, route tables, and network gateways. It provides a secure and logically isolated environment where you can launch your cloud resources, including virtual machines, databases, and, crucially for our discussion, components that can communicate with your IoT devices. The VPC creates a secure perimeter, ensuring that your IoT traffic remains private and protected from the broader internet.
Finally, there's **SSH (Secure Shell)**. This is the cryptographic network protocol that forms the backbone of secure remote access. SSH relies on encryption to create a secure "digital tunnel" over an unsecured network, allowing for secure data communication, remote command-line login, and other secure network services between two networked computers. When used for remote access to RemoteIoT devices within a VPC, SSH offers a robust alternative to less secure protocols like Telnet. Its inherent security features, including strong authentication and data encryption, make it the primary tool you’ll need for establishing a trusted connection. Understanding these three pillars is vital to mastering RemoteIoT VPC SSH, a comprehensive guide for Raspberry Pi on AWS with Windows download.
Why RemoteIoT VPC SSH is a Game-Changer
The combination of RemoteIoT, VPC, and SSH isn't just a technical curiosity; it's a revolutionary approach to IoT device management. RemoteIoT VPC SSH has revolutionized the way we interact with distributed systems, offering a suite of benefits that address common pain points in traditional remote access methods. This is why it’s the ideal choice for setting up your RemoteIoT VPC SSH solution.
One of the most significant advantages is the **enhanced security**. SSH, by its very nature, is built on strong encryption and authentication mechanisms. This means that all data transmitted between your Windows 10 machine and your Raspberry Pi (or any other IoT device) within the VPC is encrypted, safeguarding it from eavesdropping and tampering. This level of security is paramount, especially when dealing with sensitive data or critical infrastructure. Unlike less secure protocols, SSH ensures that your remote sessions are private and your file transfers are protected.
Another major benefit is the **elimination of complex VPN or firewall configurations**. Many traditional remote access solutions require intricate setup processes involving VPN servers, port forwarding, and firewall rules that can be challenging to manage and prone to misconfigurations. RemoteIoT VPC SSH, especially when leveraging a cloud-based RemoteIoT service, simplifies this dramatically. The service often handles the underlying network complexities, allowing your IoT devices to connect outbound to the VPC, thereby bypassing the need for inbound firewall rules or complex NAT setups. This "no complex VPN or firewall configurations required" aspect significantly reduces deployment time and potential security vulnerabilities.
Furthermore, this setup opens up a **world of possibilities for remote management, automation, and system integration**. Imagine being able to remotely update software on a fleet of Raspberry Pis deployed in various locations, collect data from sensors, or even trigger automated scripts, all from your Windows 10 desktop. This powerful combination allows for centralized control and monitoring, drastically improving operational efficiency and responsiveness. The ability to perform secure file transfers, including downloading Windows 10 files from your Raspberry Pi, adds another layer of utility, making it a truly comprehensive remote management solution. This combo is powerful, trust me.
The Essential Tool: Your SSH Client on Windows 10
To begin your journey into the world of RemoteIoT VPC SSH, the primary tool you’ll need is an SSH client on your Windows 10 machine. This client will allow you to initiate secure connections to your Raspberry Pi, which will be integrated with the RemoteIoT service within your VPC. Fortunately, Windows 10 has made this process incredibly straightforward.
Built-in SSH Client in Windows 10
One of the most convenient developments for Windows users is the inclusion of a native SSH client. Starting with the Windows 10 April 2018 Update (version 1803), Microsoft added an SSH client right into the operating system. This means you no longer need to download and install third-party software for basic SSH functionalities, although several robust options are still available for those who prefer them. This built-in client is based on OpenSSH, a widely used, free, and open-source suite of secure connectivity tools.
To check if you have the OpenSSH client installed and enabled, you can simply open PowerShell or Command Prompt and type `ssh`. If you see a usage message, it's installed. If not, you might need to enable it as an optional feature. To do this:
- Go to `Settings` > `Apps` > `Apps & features`.
- Click on `Optional features`.
- Look for `OpenSSH Client`. If it's not there, click `Add a feature` and select `OpenSSH Client` from the list, then click `Install`.
Once installed, you can use the `ssh` command directly from your terminal, providing a seamless experience for connecting to your remote devices. This is a critical step to secure how to set up RemoteIoT VPC SSH on Raspberry Pi for Windows 10 file downloads.
Alternative SSH Clients for Windows
While the built-in OpenSSH client is excellent for most users, several other options are available for Windows 10 that offer additional features, graphical interfaces, or specific functionalities. These might be preferred by network administrators or users who require more advanced capabilities:
- **PuTTY:** This is perhaps the most widely used, free, and open-source SSH client for Windows. PuTTY is renowned for its simplicity, robustness, and extensive configuration options. It provides a graphical interface for managing sessions, SSH keys, and various connection parameters. For many years, PuTTY was the go-to choice for Windows users before the native OpenSSH client became prevalent.
- **MobaXterm:** More than just an SSH client, MobaXterm is a comprehensive toolbox for remote computing. It includes an SSH client, SFTP client, X server, and a plethora of Unix commands, making it ideal for developers and system administrators. It offers a rich user interface and tabbed sessions, enhancing productivity.
- **Windows Terminal (with WSL):** While not strictly an SSH client itself, Windows Terminal is a modern, tabbed console application that can host multiple command-line interfaces, including PowerShell, Command Prompt, and importantly, Windows Subsystem for Linux (WSL). If you have WSL installed, you can run a full Linux distribution within Windows, which comes with its own powerful OpenSSH client, offering a true Linux command-line experience for SSH connections.
Downloading and installing an SSH client is the first tangible step towards establishing your secure connection. Choose the one that best fits your workflow and technical comfort level. For simplicity, we'll primarily refer to the built-in OpenSSH client in subsequent steps.
Setting Up Your Raspberry Pi for RemoteIoT VPC SSH
The Raspberry Pi is an incredibly versatile and affordable single-board computer, making it an ideal candidate for IoT projects and remote deployments. To leverage its capabilities for RemoteIoT VPC SSH, a proper initial setup is essential. This step is critical to secure how to set up RemoteIoT VPC SSH on Raspberry Pi for Windows 10 file downloads.
Initial Raspberry Pi Setup
Before you can connect your Raspberry Pi to a VPC or integrate it with a RemoteIoT service, you need to get it up and running with a suitable operating system. The most common choice is Raspberry Pi OS (formerly Raspbian), which is a Debian-based Linux distribution optimized for the Raspberry Pi hardware. Here's a quick overview of the initial setup:
- **Download Raspberry Pi Imager:** This official tool makes it easy to write an OS image to an SD card. You can download it from the official Raspberry Pi website.
- **Choose OS and Storage:** Open Raspberry Pi Imager, select `Raspberry Pi OS (64-bit)` or `(32-bit)` depending on your Pi model, and choose your microSD card.
- **Configure Advanced Options (Crucial for Headless Setup):** Before writing, click the gear icon (or Ctrl+Shift+X) to access advanced options. Here, you can:
- **Enable SSH:** This is absolutely vital for remote access. Select "Enable SSH" and choose "Use password authentication" (for initial setup, you can switch to key-based later) or "Use public-key authentication" if you've already generated an SSH key pair.
- **Set Username and Password:** Create a strong, unique password for your Pi.
- **Configure Wi-Fi:** If your Pi will connect wirelessly, enter your Wi-Fi SSID and password. This allows the Pi to connect to your network immediately upon boot.
- **Set Locale Settings:** Configure your timezone and keyboard layout.
- **Write Image:** Click "Write" to flash the OS onto your SD card.
- **Boot the Pi:** Insert the SD card into your Raspberry Pi and power it on. It should boot up and connect to your network (if Wi-Fi was configured).
Once booted, you can find your Raspberry Pi's IP address by checking your router's connected devices list or by using a network scanning tool like Nmap. With the IP address, you can perform your first SSH connection from your Windows 10 machine: `ssh your_username@your_pi_ip_address`.
Network Configuration for VPC Access
For your Raspberry Pi to communicate with a RemoteIoT service residing within a VPC, its network configuration needs to be appropriate. While the initial Wi-Fi or Ethernet setup gets it online, connecting it securely to a VPC often involves ensuring outbound connectivity to specific cloud endpoints or, in more advanced scenarios, establishing a direct connection to the VPC via a VPN client running on the Pi itself (though RemoteIoT services often abstract this away).
- **Outbound Connectivity:** Most RemoteIoT services are designed for devices to connect *outbound* to the cloud platform. This means your Raspberry Pi only needs standard internet access to initiate a connection to the RemoteIoT endpoint within your VPC. No complex inbound firewall rules are typically required on your local network.
- **DNS Resolution:** Ensure your Raspberry Pi can correctly resolve DNS names for the RemoteIoT service endpoints. This is usually handled automatically by your router's DNS settings, but it's worth checking if you encounter connection issues.
- **Security Groups/ACLs in VPC:** On the VPC side, ensure that the security groups and network ACLs associated with the RemoteIoT service or any intermediary compute instances allow inbound connections from the specific IP ranges or subnets that your IoT devices will use to connect. This is crucial for the RemoteIoT service to receive connections from your Pi.
By carefully setting up your Raspberry Pi and understanding its network interaction with the VPC, you lay a solid foundation for secure and reliable RemoteIoT VPC SSH operations.
Integrating the RemoteIoT Service on Your IoT Device
With your Raspberry Pi prepared and an SSH client ready on your Windows 10 machine, the next pivotal step is to integrate the RemoteIoT service onto your IoT device. This integration is what allows your Raspberry Pi to securely connect to your Virtual Private Cloud (VPC) and become manageable through the RemoteIoT platform. The exact steps for this integration will vary depending on the specific RemoteIoT service you are using (e.g., AWS IoT Core, Azure IoT Hub, Google Cloud IoT Core, or a custom solution), but the general principle involves installing a client or agent on the device.
The core idea is to **install the RemoteIoT service on any IoT device with a TCP/IP stack**. Since the Raspberry Pi runs a full-fledged Linux operating system, it certainly qualifies. This service acts as an intermediary, securely authenticating your Raspberry Pi with the cloud platform and establishing a communication channel. This channel is then leveraged by the RemoteIoT VPC SSH functionality to provide direct SSH access.
Typically, the process involves:
- **Device Registration:** First, you'll need to register your Raspberry Pi as a "thing" or "device" within your chosen RemoteIoT platform's console. This usually involves providing a unique ID for your device.
- **Credential Provisioning:** The platform will then provide you with credentials for your device to authenticate itself. These usually come in the form of X.509 certificates and private keys, or sometimes shared access signatures. These are crucial for establishing a secure, authenticated connection.
- **Agent/SDK Installation:** On your Raspberry Pi, you will download and install the specific SDK (Software Development Kit) or agent provided by your RemoteIoT service. This is often a lightweight piece of software designed to run on resource-constrained devices. You'll typically use `wget` or `curl` to download it, followed by `apt-get install` or `pip install` for Python-based SDKs.
- **Configuration:** Configure the installed agent with the credentials obtained in step 2. This involves pointing the agent to the specific MQTT broker endpoint or other communication endpoints within your VPC that the RemoteIoT service uses. This step ensures that your Pi knows where and how to connect securely.
- **Service Activation:** Once configured, you'll start the RemoteIoT agent/service on your Raspberry Pi. This service will then attempt to establish a persistent, secure connection to your VPC via the RemoteIoT platform. This connection often uses protocols like MQTT over TLS, which are designed for lightweight, secure messaging.
Once the RemoteIoT service is successfully running on your Raspberry Pi and connected to your VPC, the RemoteIoT platform can then proxy SSH connections directly to your device. This is where the power of RemoteIoT VPC SSH truly shines, as it allows you to bypass the complexities of direct network routing and firewall traversal, instead relying on the secure, established connection from the device to the cloud. This step is what makes "no complex VPN or firewall configurations required" a reality for your remote access needs.
Establishing the Secure Connection: RemoteIoT VPC SSH on Raspberry Pi
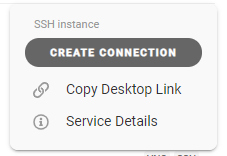
Now that your Raspberry Pi is configured and the RemoteIoT service is installed and running, the stage is set for establishing the secure SSH connection from your Windows 10 machine. This is where the magic of RemoteIoT VPC SSH on Raspberry Pi opens up a world of possibilities for remote management, automation, and system integration. RemoteIoT VPC SSH is essentially a way to securely connect to your Virtual Private Cloud (VPC) using SSH (Secure Shell). Think of it as a digital tunnel that lets you access your devices within the VPC without exposing them directly to the public internet.
The exact method for initiating the SSH connection will depend on the specific RemoteIoT service you're using, as some platforms provide specialized tools or commands to facilitate this. However, the underlying principle remains the same: the RemoteIoT service acts as a secure intermediary, allowing your SSH client on Windows 10 to reach your Raspberry Pi within the VPC.
Here’s a general outline of how this secure connection is established:
- **SSH Key Pair Generation (if not already done):** For maximum security, it is highly recommended to use SSH key-based authentication instead of passwords. If you haven't already, generate an SSH key pair on your Windows 10 machine. Open PowerShell or Command Prompt and type `ssh-keygen`. Follow the prompts, optionally setting a passphrase for your private key. This will create two files: `id_rsa` (your private key) and `id_rsa.pub` (your public key) in your `~/.ssh` directory.
- **Public Key Deployment on Raspberry Pi:** The public key (`id_rsa.pub`) needs to be placed on your Raspberry Pi in the `~/.ssh/authorized_keys` file. You can do this initially by connecting with a password via SSH and then copying the key, or by embedding it during the Raspberry Pi OS setup using the Raspberry Pi Imager's advanced options. This allows your Pi to recognize your Windows 10 machine as an authorized client.
- **Initiating Connection via RemoteIoT Platform:** This is the unique part of the RemoteIoT VPC SSH setup. Instead of directly SSHing to your Pi's IP address (which might not be publicly accessible or stable), you'll typically use a command provided by your RemoteIoT platform. For example, some platforms might offer a command like `remoteiot-cli ssh --device-id your_pi_id` or integrate with a web-based terminal. This command essentially tells the RemoteIoT service to establish a proxy connection to your Pi, over which your SSH session will run.
- **SSH Tunneling/Proxying:** Behind the scenes, the RemoteIoT service leverages its existing secure connection to your Raspberry Pi (established in the previous step) to create an SSH tunnel. Your SSH client on Windows 10 connects to the RemoteIoT service's endpoint, and the service then forwards your SSH traffic securely to your Raspberry Pi. This means your Pi doesn't need a public IP address or complex port forwarding rules.
- **Authentication:** Your SSH client will then attempt to authenticate with the Raspberry Pi. If you're using SSH keys, your client will present your private key, and if it matches the public key on the Pi, the connection will be established. If you're using password authentication (less secure), you'll be prompted for the Pi's password.
Once authenticated, you'll be presented with the Raspberry Pi's command line, just as if you were sitting in front of it. This secure connection is the gateway to executing commands, managing files, and performing all necessary remote operations. This is vital to mastering RemoteIoT VPC SSH a comprehensive guide for Raspberry Pi on AWS with Windows download.
Seamless File Transfers: Downloading Files to Windows 10
Beyond simply executing commands, a crucial aspect of remote management is the ability to transfer files securely. With your RemoteIoT VPC SSH connection established to your Raspberry Pi, you gain the power to seamlessly download files from your IoT device to your Windows 10 machine. This capability is invaluable for retrieving sensor data, log files, configuration backups, or any other data generated on your remote Pi. Connecting and downloading files securely is one of the primary benefits of this setup.
The SSH protocol inherently supports secure file transfer mechanisms, primarily through `scp` (Secure Copy Protocol) and `sftp` (SSH File Transfer Protocol). Both leverage the underlying SSH connection, ensuring that your file transfers are encrypted and authenticated.
Using SCP for Direct Downloads
`scp` is a command-line utility that allows you to securely copy files between local and remote hosts. It's straightforward and excellent for quick, direct file transfers. Since Windows 10 includes the OpenSSH client, you can use `scp` directly from PowerShell or Command Prompt.
To download a file from your Raspberry Pi to your Windows 10 machine using `scp`, the syntax is as follows:
scp username@remote_host:/path/to/remote/file C:\path\to\local\destination\Let's break this down with an example relevant to our setup:
Imagine you have a log file named `sensor_data.log` in the `/home/pi/logs/` directory on your Raspberry Pi, and you want to download it to your `C:\Users\YourUser\Documents\` folder on Windows 10.
First, ensure your SSH connection to the Pi is active or can be established. Then, open PowerShell or Command Prompt on your Windows 10 machine and execute:
scp pi@your_pi_ip_address_or_hostname:/home/pi/logs/sensor_data.log C:\Users\YourUser\Documents\If your RemoteIoT service requires a proxy command or specific SSH configuration for the connection, you might need to adjust your SSH configuration file (`~/.ssh/config`) on Windows 10 to include those details. For instance, if your RemoteIoT platform provides a specific proxy command:
Host my-remote-pi Hostname your_pi_ip_address_or_internal_hostname User pi ProxyCommand remoteiot-cli ssh --device-id <your_device_id> -W %h:%p IdentityFile ~/.ssh/id_rsaThen, you could simply use:
scp my-remote-pi:/home/pi/logs/sensor_data.log C:\Users\YourUser\Documents\This method is highly efficient for downloading single files or small sets of files.
Leveraging SFTP for Advanced Management
While `scp` is great for simple transfers, `sftp` offers a more interactive file management experience, similar to an FTP client but over an SSH connection. It allows you to navigate directories, list files, create folders, and perform more complex file operations.
You can use the command-line `sftp` client that comes with OpenSSH on Windows 10:
sftp username@remote_hostUsing our Raspberry Pi example:
sftp pi@your_pi_ip_address_or_hostnameOr, if you have the `~/.ssh/config` entry:
sftp my-remote-piOnce connected, you'll be in an SFTP shell. You can use commands like:
- `ls` (list remote files)

How To Securely and Directly Connect Raspberry Pi with RemoteIoT P2P

Gain remote access to your Raspberry Pi by using RemoteIoT to SSH into
Making an SSH connection to the AWS Guest VPC – remote.it
