Best Free P2P SSH For Raspberry Pi IoT: Secure Remote Access
Are you looking for the best IoT SSH P2P solution for your Raspberry Pi without breaking the bank? Imagine accessing your Raspberry Pi and IoT devices straight from your browser, without needing any additional software. This comprehensive guide is designed to provide you with exactly that, offering a deep dive into how to securely connect your remote IoT devices using SSH over a free P2P solution.
In today's interconnected world, the ability to remotely manage and control your Internet of Things (IoT) devices is not just a convenience; it's often a necessity. Whether you're a hobbyist tinkering with smart home automation or a professional deploying a fleet of sensors, the Raspberry Pi stands out as an incredibly versatile and cost-effective platform. However, ensuring secure and reliable remote access, especially without incurring ongoing cloud service fees, can be a challenge. This article will explore the top free SSH remote access solutions for IoT, especially focusing on their application with Raspberry Pi devices, providing you with the knowledge to unlock your remote access potential securely and efficiently.
Table of Contents
- Understanding Remote IoT Solutions and Raspberry Pi's Role
- The Power of SSH for Secure Remote Access
- Why P2P SSH is the Future for Raspberry Pi IoT
- Setting Up Free P2P SSH on Your Raspberry Pi: A Comprehensive Guide
- Ensuring Maximum Security: Best Practices for SSH on Raspberry Pi
- Exploring Free P2P SSH Alternatives and Tools
- Troubleshooting Common P2P SSH Connection Issues
- The Future of Remote IoT Management with Free P2P SSH
- Conclusion
Understanding Remote IoT Solutions and Raspberry Pi's Role
Remote IoT solutions are the systems that allow you to access, manage, and control your IoT devices, like a Raspberry Pi, from a remote location. These solutions often provide a user-friendly interface or a command-line environment to interact with your devices, monitor their status, collect data, and even push software updates. For anyone working with a distributed network of sensors, actuators, or smart devices, remote access is indispensable. It eliminates the need for physical presence, drastically reducing operational costs and improving efficiency.
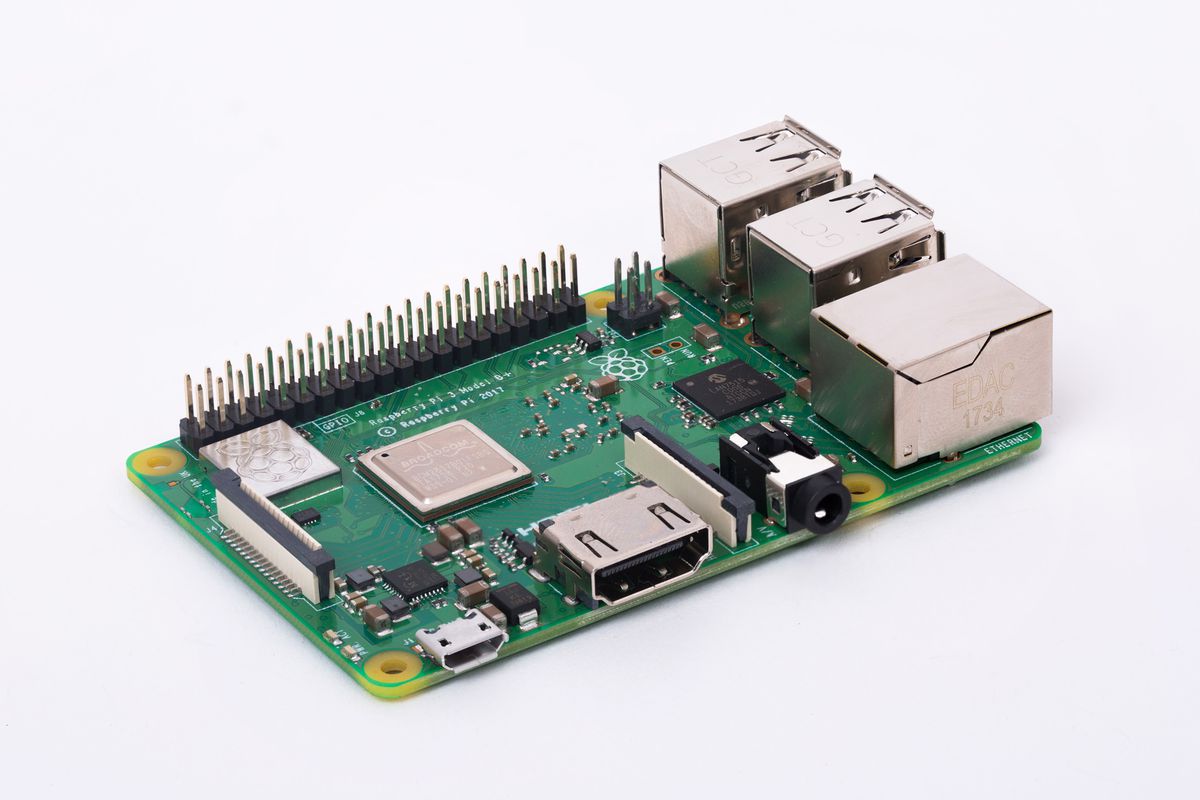
The Raspberry Pi has emerged as a cornerstone in the world of IoT for several compelling reasons. Its small form factor, low power consumption, and robust processing capabilities make it ideal for embedded applications. Furthermore, its affordability means you can deploy multiple units without a significant financial outlay. Running a full Linux operating system, the Raspberry Pi offers unparalleled flexibility for software development and integration with various sensors and peripherals. From environmental monitoring to home automation hubs, the Raspberry Pi serves as a powerful, miniature computer that can be the brain of countless IoT projects. Its widespread adoption also means a vast community and abundant resources are available, making it easier to troubleshoot and innovate.
The Power of SSH for Secure Remote Access
When it comes to securing remote access to any computer system, especially an IoT device like a Raspberry Pi, SSH (Secure Shell) is the undisputed champion. SSH, or Secure Shell, is a protocol designed to allow secure remote command-line access and other secure network services over an unsecured network. It provides a cryptographic strong channel between two networked devices, ensuring that all communications are encrypted and authenticated.
Why is SSH crucial for IoT security? IoT devices are often deployed in diverse environments, sometimes outside the traditional secure perimeters of a home or office network. This makes them potential targets for cyberattacks. Without robust security measures, sensitive data could be intercepted, or devices could be hijacked for malicious purposes. One of the most effective ways to ensure a secure connection is by using SSH (Secure Shell) on a Raspberry Pi. SSH protects against various threats, including:
- Eavesdropping: All data exchanged is encrypted, preventing unauthorized parties from reading it.
- Man-in-the-Middle Attacks: SSH uses public-key cryptography to authenticate the server and optionally the client, ensuring you're connecting to the intended device.
- Data Tampering: The protocol includes integrity checks to ensure that data has not been altered during transit.
By implementing SSH, you create a fortified tunnel through which you can safely send commands, transfer files, and manage your Raspberry Pi without exposing your data to the open internet. This is a fundamental step in building a resilient and trustworthy IoT ecosystem.
Why P2P SSH is the Future for Raspberry Pi IoT
While traditional SSH is excellent for securing a single connection, scaling it for multiple remote IoT devices, especially when they are behind NAT (Network Address Translation) or firewalls, can be complex. This is where P2P (Peer-to-Peer) SSH solutions come into play, offering a more direct, efficient, and often more secure alternative to traditional methods that rely on central cloud servers.
In a traditional setup, remote access often involves routing data through a vulnerable cloud server or requiring complex port forwarding configurations on your router. This introduces several potential drawbacks:
- Security Risks: A central cloud server can become a single point of failure or a target for attacks. If compromised, all connected devices could be at risk.
- Latency and Efficiency: Data has to travel from your client to the cloud server and then to your IoT device, increasing latency and potentially slowing down operations. This approach reduces latency and improves efficiency in many scenarios.
- Cost: Cloud services, while convenient, often come with recurring fees, which can add up significantly as your IoT deployment grows.
- Dependence: You are reliant on the cloud provider's uptime and service availability.
P2P SSH fundamentally changes this architecture. Instead of routing data through a vulnerable cloud server, P2P SSH enables the sensors to directly communicate with a central Raspberry Pi gateway, ensuring that the connection is more direct and private. This peer-to-peer approach means that once the initial connection is established, data flows directly between your client device (e.g., your laptop) and your Raspberry Pi, bypassing intermediary servers where possible. This direct communication offers several significant advantages:
- Enhanced Security: By minimizing reliance on third-party servers, the attack surface is reduced. Data travels directly, reducing points where it can be intercepted or manipulated.
- Reduced Latency: Direct connections mean less "hops" for data, leading to faster response times and improved efficiency for real-time applications.
- Cost-Effectiveness: Many P2P solutions are free or have very generous free tiers, making them ideal for budget-conscious projects.
- Greater Control: You maintain more control over your network and data flow, as you're not beholden to a cloud provider's infrastructure.
For Raspberry Pi IoT projects, P2P SSH represents a powerful paradigm shift, offering a robust, secure, and free way to manage your devices remotely, ensuring that your data stays private and your connections remain stable.
Setting Up Free P2P SSH on Your Raspberry Pi: A Comprehensive Guide
Setting up a P2P SSH connection for your Raspberry Pi can seem daunting at first, but with the right guidance, it's entirely achievable and incredibly rewarding. This section will walk you through the essential steps and considerations. In this article, we will explore the best IoT SSH P2P solutions for Raspberry Pi that are available for free. We'll cover everything from setup to security considerations, ensuring you're well-equipped.
Prerequisites and Initial Setup
Before diving into P2P specifics, ensure your Raspberry Pi is ready:
- Raspberry Pi OS: Ensure you have a recent version of Raspberry Pi OS (formerly Raspbian) installed on your SD card.
- Network Connectivity: Your Raspberry Pi needs to be connected to the internet, either via Wi-Fi or Ethernet.
- SSH Enabled: SSH is disabled by default on newer Raspberry Pi OS images for security reasons. You can enable it via the Raspberry Pi Configuration tool (
sudo raspi-config-> Interface Options -> SSH -> Yes) or by placing an empty file namedssh(no extension) in the boot partition of the SD card before first boot. - Static IP (Optional but Recommended): For local network stability, assigning a static IP address to your Raspberry Pi on your local network can prevent issues where its IP changes.
- Update Your System: Always start with an updated system:
sudo apt update && sudo apt upgrade -y.
Choosing the Right Free P2P SSH Tool/Method
When it comes to managing Raspberry Pi IoT projects, several free SSH tools stand out for their reliability, ease of use, and security. Below are some of the best options that facilitate P2P-like connectivity, allowing you to find the best SSH IoT anywhere for Raspberry Pi free, unlocking remote access potential:
- Reverse SSH Tunneling: This is a classic method. You set up a "jump host" (a publicly accessible server, which can be a low-cost VPS or even another Raspberry Pi with a public IP) and create a reverse SSH tunnel from your local Raspberry Pi to this jump host. Then, you can connect to your local Pi via the jump host. While it requires a public IP for the jump host, the traffic between your client and the Pi remains encrypted and relatively direct.
- ZeroTier/Tailscale (VPN-based P2P): While not strictly "P2P SSH" in the sense of direct SSH protocol, these are incredibly powerful and free (for personal use) VPN solutions that create a virtual peer-to-peer network. They allow your Raspberry Pi and your client device to appear as if they are on the same local network, regardless of their physical location or NAT/firewall restrictions. Once on this virtual network, you can simply SSH into your Raspberry Pi using its assigned virtual IP address. This is arguably one of the easiest and most robust ways to achieve secure P2P-like access.
- Ngrok (Free Tier): Ngrok creates a secure tunnel from your local machine to the internet, exposing local services (like SSH) to a public URL. While the free tier has limitations (e.g., random URLs, session limits), it's excellent for temporary access or testing. It's not truly P2P as it uses Ngrok's servers as an intermediary, but it solves the NAT traversal problem for free.
- Custom Dynamic DNS + Port Forwarding: If your ISP provides a public IP (even dynamic), you can combine a free Dynamic DNS service (like No-IP or DuckDNS) with port forwarding on your router. This allows you to map a memorable hostname to your dynamic IP and forward SSH traffic to your Raspberry Pi. While it gives direct access, it requires router configuration and might expose your SSH port to the internet, necessitating strong security practices.
Step-by-Step Implementation Example (Conceptual)
Let's briefly outline the conceptual steps for setting up a P2P SSH connection using a Raspberry Pi as a free server, focusing on the ZeroTier/Tailscale approach due to its simplicity and effectiveness:
- Sign Up for ZeroTier/Tailscale: Create a free account on their respective websites.
- Create a Network: Within your account, create a new virtual network. Note down the Network ID.
- Install Client on Raspberry Pi: SSH into your Raspberry Pi locally (or connect a monitor/keyboard) and install the ZeroTier/Tailscale client. For ZeroTier:
curl -s https://install.zerotier.com | sudo bash, thensudo zerotier-cli join <Network ID>. For Tailscale: Follow their official installation guide for Raspberry Pi. - Authorize Device: Go back to your ZeroTier/Tailscale web console and authorize your Raspberry Pi to join the network. It will be assigned a virtual IP address.
- Install Client on Your Client Device: Install the same client (ZeroTier/Tailscale) on your laptop or desktop from which you want to access the Raspberry Pi. Join the same virtual network.
- SSH Directly: Once both devices are on the virtual network, you can simply open your terminal and SSH into your Raspberry Pi using its assigned virtual IP address (e.g.,
ssh pi@<Raspberry Pi Virtual IP>). Not only will this save you money, but it'll also give you full control over your remote IoT devices.
This approach bypasses complex firewall rules and NAT issues, allowing for direct, secure communication. By the end of this article, you'll have a clear understanding of how to implement a secure, free, and efficient IoT P2P network using Raspberry Pi. This article will walk you through the process step by step.
Ensuring Maximum Security: Best Practices for SSH on Raspberry Pi
While P2P SSH enhances security by reducing intermediaries, implementing SSH on Raspberry Pi requires adherence to best practices to ensure maximum security. Your Raspberry Pi, acting as an IoT gateway, can be a critical point in your network, making its security paramount. Here are some key practices to follow:
- Use SSH Key Authentication Instead of Passwords: This is the single most important security measure. Generate an SSH key pair (public and private keys) on your client machine and copy the public key to your Raspberry Pi. Then, disable password authentication for SSH. This prevents brute-force attacks.
- Disable Root Login: The 'root' user has ultimate privileges. Never allow direct SSH login as root. Instead, log in as a regular user (e.g., 'pi') and use
sudofor administrative tasks. - Change Default SSH Port: The default SSH port is 22. While not a security measure on its own (it's "security through obscurity"), changing it to a non-standard port (e.g., 2222, 45678) significantly reduces the number of automated scanning attempts against your device. Modify
/etc/ssh/sshd_config. - Implement a Firewall (UFW): Configure a firewall on your Raspberry Pi (e.g., using UFW - Uncomplicated Firewall) to only allow incoming connections on necessary ports (like your chosen SSH port) from trusted IP addresses or your P2P network interface.
- Keep Software Updated: Regularly update your Raspberry Pi's operating system and all installed software (
sudo apt update && sudo apt upgrade). This ensures you have the latest security patches. - Use Strong Passwords for Local Users: If you must use password authentication (e.g., for local console access), ensure all user accounts have strong, unique passwords.
- Monitor SSH Logs: Periodically check SSH authentication logs (
/var/log/auth.log) for suspicious activity. - Physical Security: If your Raspberry Pi is physically accessible, ensure it's in a secure location to prevent unauthorized access or theft.
To best securely connect remote IoT P2P SSH Raspberry Pi downloads, you need to understand the architecture of IoT networks and the role of SSH in securing them. By diligently following these practices, you can significantly harden your Raspberry Pi against potential threats, making your remote IoT solution robust and trustworthy.
Exploring Free P2P SSH Alternatives and Tools
Beyond the direct P2P VPN solutions like ZeroTier and Tailscale, and the classic reverse SSH tunnel, there are other methods and tools that can serve as SSH alternatives for Raspberry Pi, particularly when aiming for free and remote access. This article explores how to do just that, providing a comprehensive overview.
- Cloudflare Tunnel (formerly Argo Tunnel): Cloudflare offers a free tier that includes Cloudflare Tunnel, which creates a secure, outbound-only connection from your Raspberry Pi to Cloudflare's network. This allows you to expose local services (like SSH) to the internet without opening any inbound ports on your router. While it's not strictly P2P, it's a powerful free solution for remote access that bypasses NAT/firewall issues and leverages Cloudflare's robust security infrastructure. It's an excellent choice for those who want to avoid direct port forwarding.
- SSHuttle: This tool creates a VPN-like tunnel over SSH. It allows you to forward all your network traffic through an SSH connection to a remote server (your Raspberry Pi, if it has a public IP or is accessible via another method). It's more about client-side tunneling for secure browsing than direct P2P access to the Pi itself, but it demonstrates the versatility of SSH.
- Custom Scripts with Dynamic DNS and SSH: For the more adventurous, you can write custom scripts that leverage free Dynamic DNS services. The script on your Raspberry Pi periodically updates your public IP with the DDNS provider. You then combine this with SSH key authentication and a non-standard port. This requires manual setup of port forwarding on your router, which can be a hurdle for some, but it offers complete control and is entirely free after the initial setup.
Each of these options presents a different balance of ease of use, security, and flexibility. The best IoT SSH P2P solution for your Raspberry Pi often depends on your specific network environment, technical comfort level, and the scale of your IoT deployment. The key is to choose a method that aligns with your needs while prioritizing security at every step.
Troubleshooting Common P2P SSH Connection Issues
Even with the best intentions and careful setup, you might encounter issues when trying to establish a P2P SSH connection to your Raspberry Pi. Here are some common problems and their solutions:
- "Connection Refused" or "Connection Timed Out":
- SSH Not Running/Enabled: Ensure the SSH server (
sshd) is running on your Raspberry Pi. Check its status withsudo systemctl status ssh. If not running, enable and start it:sudo systemctl enable ssh && sudo systemctl start ssh. - Firewall Blocking: A firewall on your Raspberry Pi (e.g., UFW) or your router might be blocking the SSH port. Ensure the correct port is open for incoming connections from your P2P network interface or specific IP addresses.
- Incorrect IP Address: Double-check the IP address or hostname you are trying to connect to. For P2P VPNs like ZeroTier/Tailscale, ensure you're using the virtual IP assigned by the service.
- Network Connectivity: Verify that both your client and Raspberry Pi have active internet connections and can reach the P2P service's servers (if applicable).
- SSH Not Running/Enabled: Ensure the SSH server (
- "Permission Denied (publickey, password)":
- Incorrect Password: If using password authentication, ensure you're typing the correct password.
- SSH Key Issues: If using SSH keys, verify that your public key is correctly installed in
~/.ssh/authorized_keyson the Raspberry Pi and has the correct permissions (chmod 600 ~/.ssh/authorized_keys). Also, ensure your private key on the client machine has correct permissions (chmod 400 ~/.ssh/id_rsa). - User Not Found: Ensure you're trying to log in with a valid username (e.g.,
ssh pi@<ip>).
- NAT/Router Issues (for non-P2P VPN methods):
- Port Forwarding Incorrect: If using traditional port forwarding, ensure the external port on your router is correctly mapped to the internal IP and SSH port of your Raspberry Pi.
- Dynamic IP Changes: If your ISP assigns dynamic IPs, ensure your Dynamic DNS service is correctly updating your hostname with your current public IP.
- P2P Service Specific Issues:
- Device Not Authorized: For ZeroTier/Tailscale, ensure your Raspberry Pi is authorized in your network settings on their web console.
- Service Not Running: Check if the ZeroTier/Tailscale daemon is running on both your client and Raspberry Pi.
When troubleshooting, always check logs (e.g., /var/log/auth.log on the Raspberry Pi for SSH attempts) and use verbose SSH mode (ssh -v user@ip) for more detailed output, which can often pinpoint the exact issue.
The Future of Remote IoT Management with Free P2P SSH
The landscape of IoT is constantly evolving, and the need for secure, efficient, and cost-effective remote management solutions is more critical than ever. Free P2P SSH solutions for Raspberry Pi are not just a temporary workaround; they represent a significant step towards a more decentralized and resilient IoT infrastructure. By empowering users to establish direct, encrypted connections, these methods reduce reliance on centralized cloud services, offering enhanced privacy and control.
The implications are far-reaching. For individual enthusiasts, it means greater freedom to innovate without being constrained by subscription fees or complex network configurations. For small businesses and educational institutions, it offers a scalable and secure way to manage distributed devices on a budget. As IoT deployments become more widespread and diverse, the ability to securely connect your Raspberry Pi IoT devices remotely, using SSH over a free P2P solution, will become a standard requirement. This guide offers the best way to remotely access your Raspberry Pi securely.
This approach reduces latency and improves efficiency in managing large fleets of devices, especially in scenarios where real-time data processing and immediate control are paramount. The ongoing development of user-friendly P2P tools and the robust nature of SSH itself promise a future where secure, direct access to your IoT devices is not just possible, but also simple and accessible to everyone. By the end of this article, you'll have a clear understanding of how to implement a secure, free, and efficient IoT P2P network using Raspberry Pi.
Conclusion
In this article, we've explored the best IoT SSH P2P solutions tailored for Raspberry Pi, demonstrating how you can achieve secure and free remote access to your devices. From understanding the fundamental role of SSH in securing your IoT network to delving into the benefits of P2P connectivity, we've covered the essential knowledge needed. We've also provided practical guidance on setting up these connections and highlighted crucial security best practices to protect your valuable IoT deployments. This comprehensive guide is designed to provide you with the tools and insights necessary to take control of your remote IoT management.
Whether you’re a tech enthusiast or a professional, implementing these free P2P SSH methods on your Raspberry Pi will empower you with unparalleled control, security, and efficiency. The ability to manage your devices from anywhere, without incurring recurring costs or compromising on security, is a game-changer for any IoT project. So, take the knowledge gained from this article, experiment with the methods discussed, and unlock the full potential of your Raspberry Pi IoT ecosystem. We encourage you to share your experiences and insights in the comments below, and explore other articles on our site for more tips and guides on maximizing your IoT potential!

Ssh Raspberry Pi Iot From Anywhere Download Free Windows Guide Best
Securely Connect Remote IoT P2P SSH Raspberry Pi Free Server
Raspberry Pi based IoT Projects
