Securing Your IoT Frontier: P2P SSH On Raspberry Pi For Remote Access
In today's interconnected world, managing Internet of Things (IoT) devices remotely has become a necessity, yet it introduces significant security challenges. The ability to reliably and **securely connect remote IoT devices using P2P SSH on a Raspberry Pi** is not just a convenience; it's a critical requirement for protecting your data and network integrity. Whether you're a seasoned developer, a curious hobbyist, or a business looking to expand its IoT footprint, understanding how to establish robust, encrypted connections to your remote devices is paramount. This guide will walk you through the essential steps and best practices to achieve exactly that, ensuring your network remains safe and resilient against potential threats.
This comprehensive guide delves into the technical aspects of securely connecting remote IoT devices using P2P SSH on a Raspberry Pi without breaking the bank. We will explore how to set up a robust and encrypted communication channel, enabling you to manage and control your IoT infrastructure from anywhere in the world. From configuring SSH settings to implementing advanced P2P solutions, this article provides everything you need to know to establish secure, free, and efficient remote access.
Table of Contents
- The Imperative of Secure Remote IoT Connectivity
- Raspberry Pi: The Versatile Heart of Your IoT Network
- Understanding SSH: Your Secure Gateway to Remote Devices
- Demystifying P2P Solutions for IoT Access
- A Comprehensive Guide to Securely Connecting Remote IoT P2P SSH Raspberry Pi
- Best Practices for Maintaining Remote IoT Security
- Troubleshooting Common P2P SSH Connection Issues
- The Future of Remote IoT Management with P2P SSH
- Conclusion
The Imperative of Secure Remote IoT Connectivity
The proliferation of IoT devices, from smart home sensors to industrial machinery, has revolutionized how we interact with our environment. However, when dealing with security, particularly for remote access, the stakes are incredibly high. Unsecured IoT devices can become easy targets for cyberattacks, leading to data breaches, unauthorized access, and even physical damage. Traditional methods of remote access, such as port forwarding, often expose your network to the internet, creating significant vulnerabilities. This is where the need for a robust, encrypted, and direct connection becomes critical. Securely connecting IoT devices in a P2P SSH environment on Raspberry Pi can significantly reduce these risks, providing a fortified perimeter around your valuable data and operations.
The inherent distributed nature of IoT demands a flexible and secure connectivity solution. Imagine managing hundreds or thousands of sensors deployed across vast geographical areas. Manually visiting each device for maintenance or data retrieval is impractical and costly. Therefore, a reliable remote access method is not just about convenience; it's about operational efficiency and maintaining business continuity. The challenge lies in achieving this accessibility without compromising security, which is precisely what we aim to address with P2P SSH on Raspberry Pi.
Raspberry Pi: The Versatile Heart of Your IoT Network
The Raspberry Pi has emerged as a cornerstone in the world of IoT, and for good reason. Its compact size, low power consumption, affordability, and powerful capabilities make it an ideal choice for a wide array of IoT projects. From simple sensor hubs to complex edge computing nodes, the Raspberry Pi offers unparalleled versatility. For this tutorial, we’ll be using the Raspberry Pi 4 model, which boasts a quad-core processor, ample RAM options, and robust connectivity features, making it perfectly suited for a headless setup through an SSH connection using Visual Studio Code (VS Code) or any other SSH client. Its processing power ensures that it can handle the encryption and network overhead associated with secure P2P SSH connections without breaking a sweat.
Beyond its hardware specifications, the Raspberry Pi benefits from a vibrant community and extensive software support. Running a Debian-based Linux distribution (Raspberry Pi OS), it provides a familiar and powerful environment for developers. This open-source ecosystem means you have access to a wealth of tools, libraries, and community-driven solutions, simplifying the process of setting up and managing your IoT devices. Its GPIO pins also allow for direct interaction with various sensors and actuators, further solidifying its position as the go-to platform for IoT development.
Understanding SSH: Your Secure Gateway to Remote Devices
SSH, or Secure Shell, is a cryptographic network protocol that enables secure remote login and command-line execution. It's the de facto standard for securely accessing Linux servers and devices over an unsecured network. The magic of SSH lies in its ability to encrypt all communication between your Raspberry Pi and the remote device, protecting data in transit from eavesdropping, tampering, and other malicious activities. This encryption is vital when dealing with sensitive IoT data or managing critical infrastructure.
At its core, SSH uses strong encryption algorithms to establish a secure tunnel. When you connect to your Raspberry Pi via SSH, all commands you type, all output you receive, and any files you transfer are encrypted. This makes it incredibly difficult for unauthorized parties to intercept and understand your communications. Beyond basic login, SSH also supports port forwarding (tunneling), X11 forwarding for graphical applications, and secure file transfers using SCP (Secure Copy Protocol) or SFTP (SSH File Transfer Protocol). For our purposes, it provides the secure conduit through which we will manage our remote IoT devices.
Demystifying P2P Solutions for IoT Access
While SSH provides the encryption, P2P (Peer-to-Peer) solutions address the challenge of network accessibility. Many IoT devices are behind NAT (Network Address Translation) routers, which prevent direct incoming connections from the internet. Traditional solutions like port forwarding are often insecure, complex to configure, or unavailable in certain network environments. VPNs offer a secure alternative but typically require a centralized server, which can incur costs and introduce a single point of failure.
P2P solutions, such as ZeroTier or Tailscale, offer an elegant alternative. They create a virtual private network (VPN) that allows devices to connect directly to each other, regardless of their physical network location or NAT limitations. Essentially, they punch through firewalls and NATs, enabling a direct, encrypted connection between your local machine and your remote Raspberry Pi. This means you can securely connect your Raspberry Pi IoT devices remotely, using SSH over a free P2P solution, without needing to configure complex port forwarding rules or rely on expensive cloud VPN servers. If you're looking to securely connect remote IoT P2P SSH Raspberry Pi free server, you've come to the right place. This guide is packed with everything you need to know to make this setup a reality, providing an accessible and robust way to manage your IoT infrastructure.
A Comprehensive Guide to Securely Connecting Remote IoT P2P SSH Raspberry Pi
This article will guide you through the essential steps and best practices for securely connecting remote IoT devices using P2P SSH on a Raspberry Pi, ensuring your network remains safe and manageable. This comprehensive guide will walk you through every aspect of setting up and maintaining secure remote IoT connections using P2P SSH on Raspberry Pi. By following these steps, you’ve taken a giant leap forward in your IoT journey, enabling robust and secure remote management.
Initial Raspberry Pi Setup and OS Configuration
Before diving into SSH and P2P, you need a properly configured Raspberry Pi.
- Download Raspberry Pi Imager: Get it from the official Raspberry Pi website.
- Choose OS: Select Raspberry Pi OS (64-bit Lite is recommended for headless setups, as it consumes fewer resources).
- Pre-configure Settings (Advanced Options):
- Enable SSH (password or public-key authentication).
- Set a strong username and password (avoid 'pi' and 'raspberry').
- Configure Wi-Fi (SSID and password) if needed.
- Set locale settings.
- Write to SD Card: Insert your SD card and write the OS image.
- First Boot: Insert the SD card into your Raspberry Pi and power it on. It should connect to your network and be accessible via SSH.
- Update Your System: Once connected via SSH, immediately run:
This ensures all your software is up-to-date, patching known vulnerabilities.sudo apt update && sudo apt upgrade -y
Configuring SSH for Enhanced Security
While SSH is inherently secure, several best practices can further harden your Raspberry Pi against unauthorized access.
- Change the Default SSH Port: This simple step can deter automated scanning bots that typically target port 22. Edit the SSH configuration file:
Find the linesudo nano /etc/ssh/sshd_config#Port 22, uncomment it, and change22to a high, non-standard port number (e.g., 22222). Save and exit. - Disable Password Authentication (Use SSH Keys): This is arguably the most crucial security measure. SSH keys are far more secure than passwords.
- Generate SSH Key Pair: On your local machine (client), if you don't have one:
Follow the prompts, optionally setting a passphrase for extra security.ssh-keygen -t rsa -b 4096 - Copy Public Key to Raspberry Pi:
Replace placeholders with your actual details.ssh-copy-id -p [YOUR_NEW_SSH_PORT] [YOUR_USERNAME]@[RASPBERRY_PI_IP] - Disable Password Authentication on Raspberry Pi: In
/etc/ssh/sshd_config, changePasswordAuthentication yestoPasswordAuthentication no.
- Generate SSH Key Pair: On your local machine (client), if you don't have one:
- Disable Root Login: Prevent direct SSH login as the root user by setting
PermitRootLogin noinsshd_config. - Restart SSH Service: After any changes to
sshd_config:sudo systemctl restart ssh - Implement a Firewall (UFW): Uncomplicated Firewall (UFW) is easy to configure.
This ensures only your chosen SSH port is open to the network.sudo apt install ufw -y sudo ufw allow [YOUR_NEW_SSH_PORT]/tcp sudo ufw enable
Implementing a P2P SSH Solution (e.g., ZeroTier, Tailscale)
To enable direct P2P connectivity, we'll use a service like ZeroTier. This allows your devices to communicate as if they are on the same local network, even if they are geographically dispersed. We delve into the technical aspects of securely connecting remote IoT devices using P2P SSH on a Raspberry Pi without breaking the bank. We will also explore how to set up a robust P2P network.
- Create a ZeroTier Account: Go to ZeroTier's website and create a free account. Create a new network and note down its Network ID.
- Install ZeroTier on Raspberry Pi:
curl -s https://install.zerotier.com | sudo bash - Join Your ZeroTier Network:
sudo zerotier-cli join [YOUR_NETWORK_ID] - Authorize Device: Go back to the ZeroTier web console. Under your network, you'll see your Raspberry Pi listed. Check the "Auth" box to authorize it. Assign it a static IP address within the ZeroTier network (e.g., 10.147.17.X).
- Install ZeroTier on Your Local Machine: Repeat steps 2 and 3 on your client machine (laptop/desktop). Authorize it on the ZeroTier console as well.
- Verify Connectivity: Once both devices are authorized and online in ZeroTier, they should be able to ping each other using their ZeroTier assigned IP addresses.
This confirms your P2P network is functional.ping [RASPBERRY_PI_ZEROTIER_IP]
Establishing the Secure P2P SSH Connection
Now that your Raspberry Pi is part of the secure P2P network and SSH is configured, you can establish the connection. Connecting remote IoT devices through P2P SSH on a Raspberry Pi is a powerful way to manage and control your network from anywhere in the world.
- Open Terminal/SSH Client: On your local machine, open your terminal or SSH client.
- Connect via SSH: Use the following command, replacing placeholders with your actual details:
For example:ssh -p [YOUR_NEW_SSH_PORT] [YOUR_USERNAME]@[RASPBERRY_PI_ZEROTIER_IP]ssh -p 22222 myuser@10.147.17.123 - Authentication: Since you set up SSH key authentication, you won't be prompted for a password (unless your SSH key has a passphrase). You should be granted immediate access to your Raspberry Pi's command line.
Congratulations! You have now successfully established a secure, peer-to-peer SSH connection to your remote Raspberry Pi. This setup provides the best way to remotely access your Raspberry Pi securely, providing a robust and encrypted channel for all your remote management needs.
Best Practices for Maintaining Remote IoT Security
Securing remote IoT connections through SSH on Raspberry Pi is a critical step in protecting your devices and data. By following the best practices and advanced techniques, you can significantly enhance your security posture.
- Regular Updates: Always keep your Raspberry Pi OS and all installed software up-to-date. This includes running
sudo apt update && sudo apt upgrade -yregularly. Updates often include critical security patches. - Strong SSH Keys: Always use strong, unique SSH key pairs (e.g., RSA 4096-bit or Ed25519) and protect your private keys with strong passphrases. Never share your private keys.
- Least Privilege Principle: Create dedicated user accounts for specific tasks and grant them only the minimum necessary permissions. Avoid running services as root.
- Log Monitoring: Regularly check SSH logs (
/var/log/auth.log) for suspicious login attempts or activities. Tools like Fail2ban can automatically block IP addresses that attempt brute-force attacks. - Backup SSH Keys: Back up your SSH keys in a secure, encrypted location. Losing your private key could mean losing access to your remote devices.
- Disable Unused Services: If you don't need a service (e.g., Bluetooth, Wi-Fi if using Ethernet), disable it to reduce the attack surface.
- Physical Security: If possible, ensure the physical security of your Raspberry Pi. Prevent unauthorized physical access to the device itself.
Troubleshooting Common P2P SSH Connection Issues
Even with a comprehensive guide, you might encounter issues. Here are some common problems and their solutions:
- "Connection Refused" or "Connection Timed Out":
- Firewall: Ensure your Raspberry Pi's firewall (UFW) allows connections on your chosen SSH port.
- SSH Service: Verify the SSH service is running on your Raspberry Pi:
sudo systemctl status ssh. If not, start it:sudo systemctl start ssh. - Incorrect Port: Double-check that you're using the correct SSH port in your connection command.
- P2P Network: Ensure both your local machine and Raspberry Pi are properly connected and authorized on the ZeroTier network. Check ZeroTier status:
sudo zerotier-cli statusandsudo zerotier-cli listnetworks.
- "Permission Denied (publickey)":
- SSH Key Permissions: On your local machine, ensure your private key file has correct permissions (
chmod 400 ~/.ssh/id_rsa). - Public Key on Pi: Verify your public key is correctly installed in
~/.ssh/authorized_keyson the Raspberry Pi. - User Mismatch: Ensure you are trying to log in with the correct username that corresponds to the public key on the Raspberry Pi.
- SSH Key Permissions: On your local machine, ensure your private key file has correct permissions (
- Slow Connection/Latency:
- Network Speed: Check the internet connection speed on both ends.
- P2P Network Quality: ZeroTier/Tailscale performance can sometimes be affected by network conditions between peers.
- Raspberry Pi Load: If your Raspberry Pi is under heavy load, SSH performance might degrade. Check CPU/memory usage with
htop.
- ZeroTier/Tailscale Not Connecting:
- Service Running: Ensure the ZeroTier/Tailscale service is running on both devices.
- Network ID: Double-check that you've joined the correct network ID.
- Authorization: Confirm that both devices are authorized in your ZeroTier/Tailscale web console.
The Future of Remote IoT Management with P2P SSH
Securely connecting remote IoT devices using P2P SSH on a Raspberry Pi is a powerful solution that can transform how you manage your networks. By following the steps in this guide, you've not only established a secure connection but also gained a deeper understanding of the underlying technologies. This setup offers unparalleled flexibility and control, allowing you to deploy, monitor, and maintain your IoT devices from virtually anywhere, without the complexities and security risks associated with traditional networking approaches. It empowers individuals and organizations to build robust, distributed IoT systems with confidence.
The combination of Raspberry Pi's versatility, SSH's robust encryption, and P2P networking's direct connectivity provides a scalable and cost-effective framework for future IoT deployments. As IoT continues to grow, the demand for secure, efficient, and user-friendly remote management solutions will only intensify. This guide offers the best way to remotely access your Raspberry Pi securely, providing a foundation for innovation in smart homes, industrial automation, environmental monitoring, and countless other applications. By following these steps, you’ve taken a giant leap forward in your IoT journey, embracing a future where your devices are always within reach, and always secure.
Conclusion
We've embarked on a detailed journey to understand, configure, and implement the best way to **securely connect remote IoT P2P SSH Raspberry Pi download** and manage your devices. From the foundational principles of SSH encryption to the ingenious solutions offered by P2P networks like ZeroTier, and leveraging the power of the Raspberry Pi, you now possess the knowledge to establish robust and secure remote access to your IoT ecosystem. This comprehensive guide has provided you with the steps and best practices to securely connect remote IoT devices using P2P SSH on a Raspberry Pi, ensuring your network remains safe and operational.
Whether you’re a tech enthusiast eager to experiment with home automation or a professional deploying large-scale industrial IoT solutions, this setup offers an unparalleled blend of security, flexibility, and cost-effectiveness. By embracing these core technologies—Raspberry Pi, SSH, and P2P—you are not just connecting devices; you are building a resilient, secure, and manageable IoT infrastructure. We hope this comprehensive guide empowers you to take control of your IoT infrastructure securely. Share your experiences in the comments below, or explore our other articles on IoT security and Raspberry Pi projects!

Securely Connect Remote IoT P2P SSH Raspberry Pi Free Server
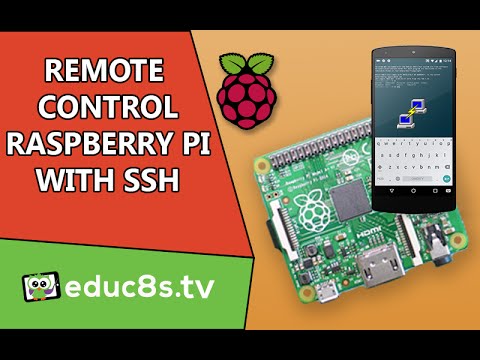
Raspberry Pi tutorial: Use SSH to in order to remote control your

SSH on Raspberry Pi | How to remote control Raspberry Pi If … | Flickr
