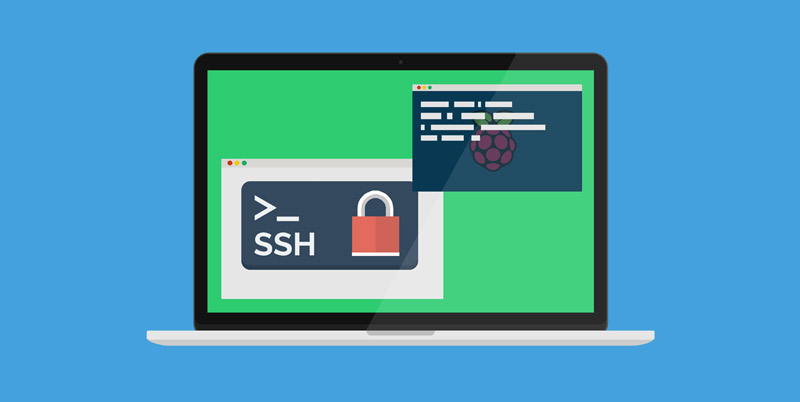
Securely Connect Remote IoT: Free P2P SSH On Raspberry Pi
Table of Contents
- Introduction
- The Imperative of Secure Remote IoT Connectivity
- Why Raspberry Pi is Your Go-To for Free P2P SSH
- Understanding P2P SSH for Remote IoT Access
- Essential Prerequisites for Your Secure Raspberry Pi Setup
- Step-by-Step Guide: Setting Up Your Free P2P SSH Connection
- Advanced Security Practices for Your Raspberry Pi IoT Network
- Troubleshooting Common Issues and Optimizing Performance
- Beyond the Basics: Expanding Your Secure IoT Network
- Conclusion
Introduction
In an increasingly interconnected world, the ability to securely manage and access your Internet of Things (IoT) devices remotely is no longer a luxury but a necessity. Whether you're monitoring environmental sensors, controlling smart home appliances, or managing industrial equipment from afar, ensuring a robust and impenetrable connection is paramount. This comprehensive guide will walk you through how to securely connect your remote IoT devices using P2P SSH on a Raspberry Pi for free, offering a powerful, cost-effective, and highly secure solution.
Are you seeking a way to effortlessly and securely manage your Raspberry Pi from anywhere in the world, without incurring any costs? If you're diving into the world of IoT and networking, you've probably heard about the need to securely connect remote IoT devices using SSH on a Raspberry Pi. This article explores the best methods to securely connect, providing a practical, step-by-step approach that empowers both tech enthusiasts and seasoned professionals to take full control of their remote networks.
The Imperative of Secure Remote IoT Connectivity
The proliferation of IoT devices has brought unprecedented convenience and automation to our lives. From smart thermostats that learn our habits to industrial sensors that predict machinery failures, these devices generate vast amounts of data and perform critical functions. However, this convenience comes with a significant caveat: security. An unsecured IoT device is a gaping vulnerability, a potential entry point for malicious actors to compromise your data, invade your privacy, or even launch wider network attacks.
Traditional methods of remote access often involve complex network configurations, reliance on third-party cloud services, or subscription fees. These can introduce additional security risks, reduce your control over your data, and quickly become expensive. The challenge is particularly acute when dealing with devices behind firewalls or on networks with dynamic IP addresses, common scenarios for home and small business IoT deployments.
This is where the concept of securely connecting remote IoT devices using P2P SSH on a Raspberry Pi for free emerges as a game-changer. It offers a direct, encrypted tunnel between your control device and your remote Raspberry Pi, bypassing many of the common network complexities and eliminating recurring costs. By leveraging the power of SSH (Secure Shell), a cryptographic network protocol for operating network services securely over an unsecured network, you can establish a trusted connection that protects your data in transit. The peer-to-peer (P2P) aspect means you're establishing a direct link, rather than routing through potentially vulnerable central servers, giving you unparalleled control and privacy.
Why Raspberry Pi is Your Go-To for Free P2P SSH
The Raspberry Pi, a series of small single-board computers, has become a darling of the IoT community for good reason. Its affordability, versatility, and robust community support make it an ideal platform for a myriad of projects, including acting as a secure gateway for your remote IoT devices. When it comes to securely connecting remote IoT devices using P2P SSH on a Raspberry Pi for free, its advantages are particularly pronounced:
- Cost-Effectiveness: A Raspberry Pi (model 3B+ or higher recommended) is a one-time investment, often costing less than a single month's subscription to some commercial remote access services. This aligns perfectly with the "free" aspect of our solution, as you're leveraging open-source software and readily available hardware.
- Low Power Consumption: Raspberry Pis are designed to be energy-efficient, making them suitable for always-on operation without significantly impacting your electricity bill. This is crucial for remote IoT setups that need continuous monitoring or access.
- Compact Size: Their small footprint allows them to be deployed discreetly in various environments, from inside a weather station enclosure to a smart home hub.
- Linux-Based OS: Running a Debian-based operating system (Raspberry Pi OS) means you have access to a vast ecosystem of Linux tools and utilities, including OpenSSH, which is the cornerstone of our secure connection. This familiarity with a standard Linux environment makes configuration straightforward for anyone with basic command-line knowledge.
- Community Support: The global Raspberry Pi community is immense and highly active. This means a wealth of tutorials, forums, and troubleshooting resources are readily available, making it easier to overcome any challenges you might encounter.
- Full Control: Unlike cloud-based solutions where your data might traverse third-party servers, setting up P2P SSH on your Raspberry Pi gives you complete control over your data and connection. Not only will this save you money, but it'll also give you full control over your data, a critical aspect for privacy and security-conscious users.
These factors collectively make the Raspberry Pi an unparalleled choice for establishing a free, secure, and reliable P2P SSH connection to your remote IoT infrastructure.
Understanding P2P SSH for Remote IoT Access
To truly appreciate the power of this solution, it's essential to grasp the underlying concepts of SSH and P2P networking in this context.
SSH (Secure Shell): At its core, SSH is a cryptographic network protocol that enables secure data communication between two networked devices. It provides a secure channel over an unsecured network by using strong encryption. When you use SSH, you're essentially creating a secure, encrypted tunnel through which you can send commands, transfer files, and even tunnel other network services. One of the most effective ways to ensure a secure connection is by using SSH (Secure Shell) on a Raspberry Pi.
P2P (Peer-to-Peer): In a P2P network, individual devices (peers) communicate directly with each other without the need for a central server. While traditional P2P often refers to file sharing, in our context, it means establishing a direct SSH connection between your local machine and your remote Raspberry Pi. This method allows you to connect to your devices securely, even behind firewalls or on networks with dynamic IP addresses, which are common hurdles for remote access. The challenge lies in how these peers find each other and initiate a connection when they are both behind NAT (Network Address Translation) routers, which is typical for home networks.
The solution lies in using techniques like SSH reverse tunneling or a small, publicly accessible "rendezvous" server (often a low-cost VPS or another Raspberry Pi with a public IP) to initiate the connection. The remote Raspberry Pi "calls out" to this rendezvous server, creating a persistent SSH tunnel. Your local machine then connects to this tunnel via the rendezvous server, effectively creating a P2P-like direct link to your Raspberry Pi, even though it's behind a firewall. This approach allows you to securely connect remote IoT devices using P2P SSH on a Raspberry Pi for free, without needing to open ports on your router or relying on expensive VPN services.
Securing remote IoT devices with P2P SSH offers several advantages: enhanced privacy, reduced latency compared to cloud-proxied connections, and a higher degree of control over your network architecture. We delve into the technical aspects of securely connecting remote IoT devices using P2P SSH on a Raspberry Pi without breaking the bank.
Essential Prerequisites for Your Secure Raspberry Pi Setup
Before diving into the configuration, you'll need to gather a few essential items and ensure your environment is ready. This preparation phase is crucial for a smooth setup process.
Gathering Your Hardware and Software
- Obtain a Raspberry Pi: A model 3B+ or higher is recommended for optimal performance, especially if you plan to run other services or manage multiple IoT devices. Ensure you have a compatible power supply (USB-C for Pi 4, Micro USB for older models).
- MicroSD Card: A high-quality microSD card (16GB or larger, Class 10 or higher) is essential for the operating system.
- Ethernet Cable or Wi-Fi Dongle: For network connectivity.
- Computer for Setup: A desktop or laptop to flash the OS onto the SD card and perform initial configurations.
- SSH Client: For your local machine. PuTTY (Windows), Terminal (macOS/Linux) are common choices.
- Raspberry Pi OS: Download the latest "Lite" version (headless, no desktop environment) for minimal resource usage and better security, or the "Desktop" version if you prefer a graphical interface for initial setup.
- SD Card Imager: Tools like Raspberry Pi Imager or Balena Etcher are user-friendly for flashing the OS.
- A Publicly Accessible Server (Optional but Recommended for True P2P behind NAT): This can be a very small, cheap Virtual Private Server (VPS) with a static public IP address. This server will act as the "rendezvous" point for your Raspberry Pi to establish a reverse SSH tunnel. Many providers offer basic VPS plans for a few dollars a month, or you can use a free tier if available, though this might not be sustainable long-term. This is the key to truly securely connect remote IoT devices using P2P SSH on a Raspberry Pi for free when both ends are behind NAT.
Once you have these components, you're ready to proceed with the setup. Remember, securely connecting your Raspberry Pi to a remote IoT setup might sound intimidating, but trust me, it's not as complicated as it seems. With the right tools and a bit of guidance, you'll have your secure network up and running in no time.
Step-by-Step Guide: Setting Up Your Free P2P SSH Connection
Here's a breakdown of the essential steps involved in setting up your secure P2P IoT network. This guide outlines a secure method for establishing the connection.
Initial Raspberry Pi Configuration
- Flash Raspberry Pi OS:
- Download Raspberry Pi Imager.
- Select your Raspberry Pi model, choose "Raspberry Pi OS (Lite)" for headless operation.
- Crucially, before writing, click the gear icon (or Ctrl+Shift+X) for advanced options:
- Enable SSH: Set a strong password or, even better, choose "Use public-key authentication" and import your local machine's public SSH key.
- Set hostname (e.g.,
myiotpi). - Configure Wi-Fi (if applicable) with SSID and password.
- Set locale settings.
- Select your microSD card and click "Write."
- Boot and Connect:
- Insert the flashed microSD card into your Raspberry Pi and power it on.
- Wait a few minutes for it to boot.
- From your local computer, use SSH to connect to your Raspberry Pi. If you enabled SSH and Wi-Fi/Ethernet correctly, it should be accessible on your local network. You can find its IP address using a network scanner (like
nmap) or by checking your router's connected devices list.
(Replacessh pi@your_raspberry_pi_ip_addressyour_raspberry_pi_ip_addresswith the actual IP). - If you set a password, enter it. If you used key authentication, it should connect automatically.
- Update Your System:
- Once connected, update your Raspberry Pi's software packages to ensure you have the latest security patches and features.
sudo apt updatesudo apt full-upgrade -y
- Once connected, update your Raspberry Pi's software packages to ensure you have the latest security patches and features.
Generating SSH Keys and Enabling SSH Service
For secure P2P SSH, password authentication is generally discouraged. Instead, we'll use SSH key pairs, which are far more secure.
- Generate SSH Key Pair on Your Local Machine:
- If you don't already have one, generate an SSH key pair on your local computer (the one you'll use to connect from).
(Follow the prompts. It's highly recommended to use a strong passphrase for your private key).ssh-keygen -t ed25519 -C "your_email@example.com" - This will create two files, typically
id_ed25519(private key) andid_ed25519.pub(public key) in your~/.ssh/directory.
- If you don't already have one, generate an SSH key pair on your local computer (the one you'll use to connect from).
- Copy Public Key to Raspberry Pi:
- Copy your local machine's public key to the Raspberry Pi.
(Enter your Raspberry Pi's password if prompted).ssh-copy-id -i ~/.ssh/id_ed25519.pub pi@your_raspberry_pi_ip_address - This command appends your public key to the
~/.ssh/authorized_keysfile on the Raspberry Pi, allowing password-less, secure login from your local machine.
- Copy your local machine's public key to the Raspberry Pi.
- Disable Password Authentication on Raspberry Pi (Crucial Security Step):
- Edit the SSH daemon configuration file on your Raspberry Pi:
sudo nano /etc/ssh/sshd_config - Find the line
#PasswordAuthentication yesand change it toPasswordAuthentication no. Make sure to uncomment it (remove the#). - Find the line
#PermitRootLogin prohibit-passwordand ensure it's set toPermitRootLogin noorPermitRootLogin prohibit-password. - Restart the SSH service:
sudo systemctl restart ssh - Test logging in with your key. If it works, password authentication is disabled. If not, re-enable it temporarily to fix the issue before trying again.
- Edit the SSH daemon configuration file on your Raspberry Pi:
Establishing the P2P Tunnel (Reverse SSH Tunnel)
This is the core of the P2P connection behind NAT. Your Raspberry Pi will initiate an SSH connection to your publicly accessible rendezvous server, creating a tunnel that your local machine can then use to connect back to the Raspberry Pi.
- Set Up Your Rendezvous Server:
- Ensure your rendezvous server has SSH enabled and you can connect to it.
- Create a dedicated user on the rendezvous server for the reverse tunnel (e.g.,
tunneluser) and ensure it has limited permissions. - Copy the Raspberry Pi's public SSH key to the rendezvous server's
tunneluser'sauthorized_keysfile, similar to how you copied your local key to the Pi. This allows the Pi to connect to the rendezvous server without a password. - On the rendezvous server, edit
/etc/ssh/sshd_configand ensureGatewayPorts yesis set. This allows connections to forwarded ports from remote hosts. Restart SSH service on the rendezvous server.
- Create the Reverse SSH Tunnel on Raspberry Pi:
- On your Raspberry Pi, execute the following command. This command will create a persistent reverse tunnel.
Where:ssh -NT -R 2222:localhost:22 tunneluser@your_rendezvous_server_ip -i ~/.ssh/id_ed25519-N: Do not execute a remote command (just forward ports).-T: Disable pseudo-terminal allocation.-R 2222:localhost:22: This is the reverse tunnel. It means "forward connections to port 2222 on the rendezvous server to port 22 on the Raspberry Pi (localhost from the Pi's perspective)."tunneluser@your_rendezvous_server_ip: The user and IP of your rendezvous server.-i ~/.ssh/id_ed25519: Specifies the private key on the Raspberry Pi used to authenticate with the rendezvous server.
- To make this persistent, you can use a tool like
autosshor a systemd service. For example, usingautossh:sudo apt install autossh -y
(autossh -M 0 -NT -R 2222:localhost:22 tunneluser@your_rendezvous_server_ip -i ~/.ssh/id_ed25519-M 0disables the monitoring port, as we're relying on SSH's internal keepalives). - For a more robust solution, create a systemd service for
autosshto ensure it starts on boot and restarts if the connection drops.
- On your Raspberry Pi, execute the following command. This command will create a persistent reverse tunnel.
- Connect from Your Local Machine:
- Now, from your local computer, you can connect to your Raspberry Pi via the rendezvous server:
(Replacessh -p 2222 pi@your_rendezvous_server_ipyour_rendezvous_server_ipwith the actual IP of your rendezvous server). - This command tells your local SSH client to connect to port 2222 on the rendezvous server. Because of the reverse tunnel, this connection is then forwarded directly to port 22 on your remote Raspberry Pi.
- Now, from your local computer, you can connect to your Raspberry Pi via the rendezvous server:
And there you have it—everything you need to know to securely connect remote IoT devices using P2P SSH on a Raspberry Pi for free. By following these steps, you can establish a secure SSH connection to your Raspberry Pi over a P2P network, even if it's behind a firewall.
Advanced Security Practices for Your Raspberry Pi IoT Network
While the previous steps establish a secure connection, implementing SSH on Raspberry Pi requires adherence to best practices to ensure maximum security. However, when dealing with security, vigilance is key. Securely connecting remote IoT devices using P2P SSH on a Raspberry Pi constitutes a powerful solution that can revolutionize how you manage your networks, but it must be continuously fortified.
Fortifying Your SSH Configuration
- Change Default SSH Port: Instead of using the default SSH port (22), change it to a non-standard, high-numbered port (e.g., 22222). This won't stop a determined attacker but will significantly reduce automated scanning attempts. Edit
/etc/ssh/sshd_configand changePort 22to your desired port. Remember to update your connection commands accordingly. - Disable Root Login: Ensure
PermitRootLogin nois set in/etc/ssh/sshd_config. Always log in as a regular user (likepi) and usesudofor administrative tasks. - Limit User Access: If multiple users need access, create separate user accounts for each. In
/etc/ssh/sshd_config, you can useAllowUsers yourusernameto explicitly list allowed users. - Use Strong Passphrases for SSH Keys: Even though key-based authentication is superior, a strong passphrase for your private key adds an extra layer of security in case your private key is compromised.
- Implement a Firewall (UFW): Uncomplicated Firewall (UFW) is easy to configure.
sudo apt install ufw -y

Securely Connect Remote IoT P2P SSH Raspberry Pi Free Server
Learn how to use SSH to remote control your Raspberry Pi – Howto

How To Securely and Directly Connect Raspberry Pi with RemoteIoT P2P
