Mastering IoT Remote Desktop Behind NAT On Your Mac
In today's interconnected world, the ability to access and control devices remotely has become not just a convenience, but often a necessity. For enthusiasts and professionals alike, the allure of managing Internet of Things (IoT) devices from anywhere is powerful. However, a common hurdle arises when these IoT devices are tucked away behind a Network Address Translation (NAT) gateway, especially if you're a macOS user. This comprehensive guide delves deep into the complexities of achieving seamless IoT remote desktop behind NAT Mac, offering practical solutions and insights to overcome these technical challenges. We'll explore various methods, tools, and security considerations to ensure you can securely and efficiently manage your remote IoT devices, transforming what can sometimes be a frustrating experience into a streamlined process.
Connecting your IoT devices to a remote desktop through a router on a Mac can sometimes be frustrating, especially when things don't work as expected. The inherent design of NAT, which allows multiple devices on a private network to share a single public IP address, creates a barrier for incoming connections from the internet. This guide is designed to demystify this process, providing you with the knowledge and steps needed to securely control and manage remote IoT devices, whether it's a Raspberry Pi, an Nvidia Jetson Nano, or any other IoT gadget.
Table of Contents
- Understanding NAT and Its Challenges for IoT Remote Access
- Why IoT Remote Desktop Behind NAT is Crucial
- Traditional Methods and Their Limitations
- Mac-Specific Considerations and Tools
- Leveraging Cloud Services for Seamless IoT Remote Access
- Step-by-Step Guide to Secure IoT Remote Desktop on Mac
- Security Best Practices for IoT Remote Access
- Troubleshooting Common Issues
Understanding NAT and Its Challenges for IoT Remote Access
Network Address Translation (NAT) is a fundamental component of modern networking, allowing multiple devices within a private network to share a single public IP address. This conserves public IP addresses and adds a layer of security by hiding internal network topology. However, this very mechanism poses a significant challenge for remote access. Because IoT devices installed behind a NAT router and firewall cannot be accessed from the internet directly, establishing a connection from an external network becomes problematic. Imagine your home router as a security guard at the entrance of a building. When you send a request out to the internet (e.g., browsing a website), the guard knows where to send the reply back to you. But if someone from outside tries to initiate a connection to a specific device inside your building (like your IoT device), the guard doesn't know which internal device the request is for, as all requests appear to come from the same public address. This is the core issue with IoT remote desktop behind NAT. Network address translation (NAT) networks (such as those that use macOS internet sharing) require special configuration if you want to use remote desktop. Without specific instructions, the router will simply drop unsolicited incoming connection attempts, making it impossible to reach your IoT device's interface from outside your local network.Why IoT Remote Desktop Behind NAT is Crucial
The ability to access the remote desktop of your IoT device is invaluable for several reasons. Firstly, it enables easy for remote control and troubleshooting. Whether you need to adjust settings, update firmware, or diagnose a problem, having direct graphical access to the device's operating system (like Raspberry Pi OS or a custom Linux distribution) saves immense time and effort. Instead of physically connecting a monitor, keyboard, and mouse, you can perform all necessary operations from your Mac, regardless of your physical location. Secondly, for developers and hobbyists, remote desktop access facilitates continuous development and testing. You can deploy code, run simulations, and monitor performance metrics in real-time without interrupting your workflow. For instance, if you're developing an application for an Nvidia Jetson Nano, being able to access its desktop remotely allows you to iterate quickly and efficiently. This level of control and management is essential for projects that are deployed in hard-to-reach locations or for those that require frequent adjustments. The convenience of remotely controlling and managing remote IoT devices cannot be overstated in today's fast-paced technological landscape.Traditional Methods and Their Limitations
Historically, several methods have been employed to bypass NAT restrictions for remote access. While these methods can work, they often come with their own set of complexities and security implications, especially when dealing with IoT devices and macOS environments.Port Forwarding: The Double-Edged Sword
Port forwarding is perhaps the most common traditional method for allowing external access to internal devices. It involves configuring your router to direct incoming traffic on a specific public port to a specific internal IP address and port. For example, you might forward port 3389 (the default RDP port) from your router's public IP to your IoT device's internal IP address. While seemingly straightforward, port forwarding has several drawbacks:- Security Risks: Opening ports on your router makes your internal network more vulnerable to attacks. If not properly configured, it can expose your IoT device directly to the internet, potentially leading to unauthorized access. This is particularly concerning for YMYL (Your Money or Your Life) applications where security breaches could have severe consequences.
- Dynamic IP Addresses: Many internet service providers (ISPs) assign dynamic IP addresses, meaning your public IP changes periodically. This breaks your remote connection unless you use a Dynamic DNS (DDNS) service, adding another layer of configuration.
- Router Configuration Complexity: Setting up port forwarding requires access to your router's administration interface and a good understanding of network settings. This can be complex, especially for macOS users who might be less familiar with router-level configurations.
- Multiple Devices: If you have multiple IoT devices requiring remote access, you'd need to set up unique port forwards for each, which can become cumbersome and increase the attack surface.
VPNs: A More Secure but Complex Path
Virtual Private Networks (VPNs) offer a more secure alternative. By establishing an encrypted tunnel between your Mac and your home network (or a VPN server), you can effectively make your Mac appear as if it's directly on your home network, bypassing NAT restrictions. This allows you to access your IoT devices as if you were on the local network. However, setting up a VPN server on your home network (often on the router itself or a dedicated server) can be complex. It requires technical expertise, and not all routers support VPN server functionality. Furthermore, maintaining a VPN connection can sometimes introduce latency, which might affect the responsiveness of your remote desktop experience. While VPNs provide excellent security through encryption, their setup and ongoing management can be a barrier for many users, especially when the primary goal is simple, reliable IoT remote desktop behind NAT on a Mac.Mac-Specific Considerations and Tools
macOS users often face unique challenges when dealing with network configurations. While Apple's ecosystem is known for its user-friendliness, deep-diving into network settings can sometimes feel less intuitive. For instance, Network address translation (NAT) networks (such as those that use macOS internet sharing) require special configuration if you want to use remote desktop. If you're using macOS Internet Sharing, your Mac itself acts as a NAT router, adding another layer of complexity. Apple Remote Desktop (ARD) is a powerful tool for controlling other Macs on your network. However, as one user aptly put it, "I already use Apple Remote Desktop to control other Macs on my network, but I don't know how to penetrate the remote network to get to her computer, What do I have to do to get..." This highlights the core issue: ARD is designed for local network access, not for traversing NAT and firewalls to reach devices on distant networks. How does a firewall affect remote connections on a Mac? macOS has a built-in firewall that, by default, blocks unsolicited incoming connections. While this enhances security, it means you'll need to configure it to allow connections for any remote access tools you use. This adds another layer to the setup process, ensuring that even if you bypass NAT, your Mac's firewall doesn't block the connection. For accessing remote desktops, macOS users typically rely on Microsoft Remote Desktop Client (RDC). To access the remote desktop of your IoT connected to your local network, simply open the RDC client, enter the IP address or hostname of your IoT device, and you're good to go. The challenge, however, is when that IoT device is not on your local network but behind a NAT. This is where specialized tools and services come into play.Leveraging Cloud Services for Seamless IoT Remote Access
Given the complexities of port forwarding and VPNs, a modern and often more efficient approach for IoT remote desktop behind NAT on a Mac involves using cloud-based remote access platforms. These services are designed to overcome NAT and firewall limitations by establishing secure outbound connections from your IoT device to the cloud, creating a tunnel that your Mac can then use to connect. This eliminates the need for complex router configurations and dynamic DNS.SocketXP: A Powerful Solution for IoT Remote Desktop Behind NAT Mac
SocketXP is an excellent example of such a platform. It provides secure remote access to IoT devices behind NAT routers or firewalls over the internet using secure SSL/TLS VPN tunnels. This approach means your IoT device initiates an outbound connection to the SocketXP cloud server, which is allowed by almost all firewalls. Your Mac then connects to the same cloud server, and SocketXP intelligently routes the traffic between your Mac and your IoT device through this secure tunnel. The "Data Kalimat" specifically mentions: "Because IoT devices installed behind a NAT router and firewall cannot be accessed from the internet, we’ll use SocketXP’s IoT remote access." This highlights SocketXP's core utility. It's particularly useful for devices like the Nvidia Jetson Nano, allowing secure remote access without the headaches of traditional methods. Key benefits of using SocketXP for IoT remote desktop behind NAT on a Mac:- No Port Forwarding: Eliminates the need to open ports on your router, significantly enhancing security.
- NAT Traversal: Designed specifically to bypass NAT and firewall restrictions.
- Secure Tunnels: Utilizes SSL/TLS VPN tunnels, ensuring all data transmitted between your Mac and the IoT device is encrypted.
- Ease of Use: Generally simpler to set up than manual port forwarding or self-hosted VPNs. You download and install a remote access tool like SocketXP on your IoT device, and then use the client on your Mac.
- Dynamic IP Compatibility: Works seamlessly regardless of whether your IoT device has a dynamic or static public IP address.
Pinggy TCP Tunnels for Raspberry Pi RDP
Another similar solution, particularly popular for Raspberry Pi users, involves creating TCP tunnels. "Discover a quick guide to remotely access your Raspberry Pi desktop using Remote Desktop Protocol (RDP), Learn how to set up an RDP server, create a Pinggy TCP tunnel for internet." Pinggy, like SocketXP, creates an outbound tunnel from your Raspberry Pi to their cloud service, allowing you to expose services (like RDP or SSH) to the internet without direct port forwarding. The process typically involves:- Setting up an RDP server on your Raspberry Pi (e.g., using `xrdp`).
- Installing the Pinggy client on your Raspberry Pi.
- Using the Pinggy client to create a TCP tunnel for your RDP port (e.g., `pinggy --port 3389`).
- Pinggy provides a public URL or IP:port combination that you can then use from your Mac's RDC client to connect to your Raspberry Pi's desktop.
Step-by-Step Guide to Secure IoT Remote Desktop on Mac
While the specific steps vary slightly depending on the chosen cloud service (e.g., SocketXP, Pinggy) and your IoT device, the general workflow for achieving IoT remote desktop behind NAT Mac is as follows: 1. **Prepare Your IoT Device:** * Ensure your IoT device (e.g., Raspberry Pi, Jetson Nano) is powered on and connected to your local network. * Install a desktop environment if it doesn't have one (e.g., `sudo apt install raspberrypi-ui-mods` for Raspberry Pi). * Install an RDP server on your IoT device (e.g., `sudo apt install xrdp` for Linux-based devices). Configure it to start on boot. * Note down your IoT device's local IP address. 2. **Choose and Configure a Remote Access Tool/Service:** * **For SocketXP:** * Sign up for a SocketXP account. * Download and install the SocketXP agent on your IoT device. This is usually a simple command-line installation. * Follow SocketXP's documentation to create a tunnel for your RDP port (e.g., `socketxp connect tcp://localhost:3389`). SocketXP will provide you with a public endpoint URL. * **For Pinggy (Raspberry Pi specific):** * Install Pinggy on your Raspberry Pi (e.g., `curl -sL https://pinggy.io/install.sh | sudo bash`). * Create an RDP tunnel: `pinggy --port 3389 --subdomain your-chosen-name` (optional subdomain). Pinggy will provide a public URL. 3. **Configure Your Mac:** * Download and install a remote access tool like Microsoft Remote Desktop Client from the Mac App Store. This is the standard RDC client for macOS. * Open the RDC client. 4. **Connect to Your IoT Device:** * In the RDC client, create a new connection. * For the PC name, enter the public endpoint provided by your chosen cloud service (e.g., the SocketXP URL or Pinggy URL). * Enter the username and password for your IoT device's operating system when prompted. * Click "Connect." If you're using a Mac, there are key steps to follow to remotely connect to IoT devices behind a firewall remote access tool. This comprehensive guide will provide you with all the necessary information. Remember, the goal is to establish a secure, reliable connection without resorting to risky network configurations.Security Best Practices for IoT Remote Access
While cloud-based tunneling solutions significantly enhance security by avoiding port forwarding, adhering to general security best practices is paramount, especially when dealing with IoT devices that might be less secure by design. Your Money or Your Life (YMYL) principles dictate that any system dealing with sensitive information or critical operations must prioritize security. * **Strong Passwords:** Always use complex, unique passwords for your IoT devices and remote access accounts. Avoid default credentials. * **Two-Factor Authentication (2FA):** If your remote access service or IoT device's operating system supports 2FA, enable it. This adds an extra layer of security. * **Regular Updates:** Keep your IoT device's operating system, RDP server, and remote access client software (on both the IoT device and your Mac) updated to the latest versions. Software updates often include critical security patches. * **Least Privilege:** Only grant the necessary permissions to users or services. For example, don't use a root account for everyday remote access if a standard user account suffices. * **Firewall Configuration:** Even with tunneling, ensure your IoT device's internal firewall is configured to allow only necessary traffic. How does a firewall affect remote connections on a Mac? Ensure your Mac's firewall is also configured to allow the RDC client to communicate. * **Monitor Activity:** Regularly check logs on your IoT device and remote access service for any suspicious activity. * **Secure Tunnels:** Always use services that provide secure, encrypted tunnels (like SSL/TLS VPN tunnels offered by SocketXP). This protects your data from eavesdropping. By following these guidelines, you can ensure that your IoT remote desktop behind NAT Mac setup remains secure and reliable.Troubleshooting Common Issues
Even with the best planning, you might encounter issues. Here are some common problems and their solutions: * **"Connection Refused" or "Remote Desktop Can't Connect":** * **Check RDP Server:** Ensure the RDP server (e.g., `xrdp`) is running on your IoT device. Restart it if necessary (`sudo systemctl restart xrdp`). * **Firewall on IoT Device:** Verify that the IoT device's firewall (e.g., `ufw`) is not blocking the RDP port (3389). Allow it: `sudo ufw allow 3389/tcp`. * **Cloud Service Tunnel:** Confirm that your SocketXP or Pinggy tunnel is active and correctly configured to forward the RDP port. Check the service's dashboard or logs. * **Slow or Lagging Remote Desktop:** * **Internet Speed:** Check the internet connection speed on both your Mac and the IoT device's location. * **RDP Quality Settings:** In the Microsoft Remote Desktop Client, adjust the display quality settings to lower resolutions or disable features like font smoothing and desktop background to improve performance. * **IoT Device Resources:** Ensure your IoT device isn't overloaded. Check CPU, RAM, and disk usage. * **"Authentication Failed" or Incorrect Credentials:** * **Username/Password:** Double-check the username and password for your IoT device. Remember that Linux is case-sensitive. * **Keyboard Layout:** Sometimes, keyboard layouts can cause issues with special characters in passwords. Try a simpler password temporarily for testing, then revert to a strong one. * **Connection Drops Frequently:** * **Network Stability:** Investigate network stability at both ends. Wi-Fi signal strength can be a factor for IoT devices. * **Cloud Service Reliability:** While rare, temporary issues with the cloud tunneling service can occur. Check their status pages. * **Power Management:** Ensure your IoT device isn't going into a low-power state that disconnects it from the network. * **"I'm aware of TeamViewer, VMC, but the question is more around resolving the..."** * While tools like TeamViewer and VNC (Virtual Network Computing) can also provide remote access, they often rely on their own proprietary tunneling mechanisms or require specific configurations to bypass NAT. The focus here is on RDP and SSH over secure tunnels provided by services like SocketXP, which are often preferred for headless IoT devices or when direct desktop access is needed without a full VNC server setup. These services specifically address the challenge of IoT remote desktop behind NAT by providing dedicated solutions. Remember, patience and systematic troubleshooting are key. Consult the documentation of your specific IoT device and chosen remote access tool for detailed troubleshooting steps.Conclusion
Navigating the complexities of IoT remote desktop behind NAT Mac can initially seem daunting, especially with the layers of network address translation, firewalls, and macOS-specific considerations. However, as this comprehensive guide has shown, modern cloud-based solutions like SocketXP and Pinggy offer elegant and secure ways to overcome these hurdles without resorting to risky or overly complex traditional methods like port forwarding. By understanding the underlying principles of NAT, leveraging specialized tools, and diligently applying security best practices, you can establish reliable and secure remote desktop access to your IoT devices from your Mac, regardless of where they are located. This capability is not just about convenience; it empowers you to manage, troubleshoot, and develop on your IoT projects with unprecedented flexibility and efficiency. We hope this guide has demystified the process and equipped you with the knowledge to securely control and manage remote IoT devices. If you found this article helpful, please share it with your network, or leave a comment below with your experiences or any further questions. Explore our other articles for more insights into IoT, networking, and macOS tips to further enhance your digital life!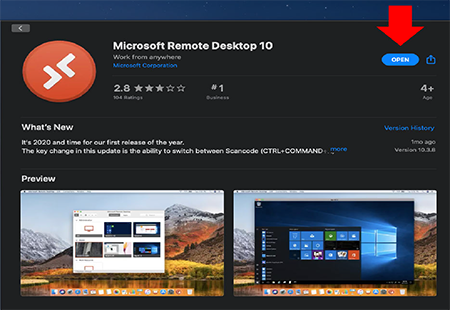
Remote Desktop Mac | How to Connect Remote MacOS?
How To Access Iot Device Remote Desktop: Unlocking The Future
IoT Remote Desktop Over Internet: Unlocking The Potential
