Unlock Your Pi: How To Access Raspberry Pi From Anywhere Securely
Imagine the power of your Raspberry Pi, a tiny computer packed with immense potential, but instead of being tethered to your desk, it's accessible from across the room, across town, or even across the globe. The ability to control, monitor, and interact with your Raspberry Pi remotely isn't just a convenience; it's a game-changer for hobbyists, developers, and anyone managing a fleet of these versatile microcomputers. This comprehensive guide will walk you through everything you need to know to set up remote access to your Raspberry Pi, transforming it into a truly ubiquitous computing device.
Whether you're looking to manage a smart home server, host a personal website, or simply tinker with your projects while on the go, learning how to access your Pi from anywhere is an essential skill. We'll delve into various methods, from direct command-line access to full graphical desktop control, ensuring you find the perfect solution for your needs. Along the way, we'll share expert tips to enhance security, navigate common challenges like dynamic IP addresses, and ensure your remote connection is robust and reliable.
Table of Contents
- Why Remote Access Your Raspberry Pi?
- Understanding the Fundamentals of Remote Access
- Direct Methods for Remote Raspberry Pi Access
- Cloud-Based and Simplified Solutions
- Secure Remote Access: VPNs and Reverse Proxies
- Advanced Scenarios and Specific Applications
- Enhancing Security for Your Remote Raspberry Pi
- Troubleshooting Common Remote Access Issues
- Conclusion
Why Remote Access Your Raspberry Pi?
The Raspberry Pi, in its essence, is a compact, low-power computer that can perform a myriad of tasks. However, its true potential often remains untapped when it's confined to a physical setup with a dedicated keyboard, mouse, and monitor. This is where remote access becomes invaluable. The ability to access your Raspberry Pi from anywhere offers significant advantages:
- Cost and Space Savings: Eliminating the need for a dedicated display, keyboard, and mouse for each Pi saves you money and precious desk space. This is particularly beneficial if you maintain a "fleet" of remote microcomputers, such as for home automation, sensor networks, or educational labs.
- Convenience and Flexibility: Imagine you're traveling and need to check on your home server, restart a script, or access files stored on your Pi. Remote access makes this possible with just a laptop or even a smartphone. You can manage your projects, deploy updates, or troubleshoot issues without physically being next to the device.
- Centralized Management: For those with multiple Raspberry Pis deployed in various locations, remote access allows for centralized management, monitoring, and updates, streamlining maintenance and ensuring consistent performance across all devices.
- Uninterrupted Operation: Many Pi projects are designed to run 24/7, like a media server or a network-wide ad blocker (Pi-hole). Remote access ensures you can interact with these services without interrupting their operation or needing to move them.
Practical Applications and Use Cases
The versatility of remote access opens doors to numerous practical applications:
- Home Automation Hub: Control smart lights, thermostats, and security cameras from your phone, even when you're away from home.
- Personal Cloud Storage: Access files stored on your Raspberry Pi (via Samba or other file-sharing protocols) from any device, anywhere in the world, creating your own private cloud. "Hi, I recently just set up Samba on my Pi 4, and is working great so far as I am able to access the files stored on my Raspberry Pi on any device connected to that network. However, I want to be able to access them outside my home network and access them anywhere, anytime." This is a common desire that remote access fulfills.
- Web Server Hosting: Host a personal website, blog, or web application directly from your Pi, accessible to anyone with an internet connection.
- Ad Blocking (Pi-hole): Manage your network-wide ad blocker, check DNS queries, or update blocklists from your phone or laptop. "I can get to my Pi-hole via the admin portal, or use private DNS (Android) on my phone so I can check all my DNS queries within Pi-hole." This highlights the practical benefit of remote Pi-hole access.
- Development and Testing: Deploy and test code on your Pi from your primary development machine, without constant physical connection.
- Remote Monitoring: Keep an eye on sensor data, security camera feeds, or system health metrics from a remote location.
Understanding the Fundamentals of Remote Access
Before diving into specific solutions, it's crucial to grasp the basic concepts of how devices communicate over networks, especially when trying to access your Pi from anywhere. At its core, remote access involves establishing a connection between your client device (laptop, phone) and your Raspberry Pi over a network, typically the internet.
- IP Addresses: Every device connected to a network has an IP address. Within your home network, your Pi has a local IP address (e.g., 192.168.1.100). To access it from the internet, you need to know your home network's public IP address, which is assigned by your Internet Service Provider (ISP).
- Ports: Services running on your Pi (like SSH, VNC, web servers) listen on specific "ports." For example, SSH typically uses port 22, and web servers use port 80 or 443. When you try to connect remotely, you're telling your router to direct traffic for a specific port to your Pi's local IP address.
- Routers and Firewalls: Your home router acts as a gatekeeper between your local network and the internet. It typically has a built-in firewall that blocks unsolicited incoming connections for security reasons. To allow remote access, you often need to configure your router to "forward" specific ports to your Raspberry Pi.
- Dynamic vs. Static IP: Most home internet connections use dynamic IP addresses, meaning your public IP address can change periodically. This presents a challenge for remote access, as the address you use to connect might become invalid. Solutions like Dynamic DNS (DDNS) services address this. "I don't have a static IP and router. So my Raspberry Pi connected with hotspot from my phone, for now. I want to make it ready for that. I used No-IP and tried something. However, it was only able to ping the DDNS with my hotspot connected devices." This scenario highlights the need for DDNS and understanding network limitations.
Local vs. Global Network Access
It's important to distinguish between accessing your Pi within your local network (LAN) and accessing it from the broader internet (WAN). Most initial setups, like enabling SSH or Samba, primarily allow local access. To access your Pi from anywhere in the world, you need to bridge the gap between your local network and the internet, often involving your router's configuration or specialized cloud services.
Direct Methods for Remote Raspberry Pi Access
These methods involve direct connections to your Pi, typically requiring some network configuration on your end. They are powerful and offer fine-grained control.
1. SSH (Secure Shell) for Command Line Access:
SSH is the backbone of remote command-line access. It provides a secure, encrypted connection to your Pi's terminal, allowing you to execute commands, manage files, and run scripts as if you were sitting right in front of it. It's often the first step in setting up any remote access.
- How it works: Your client (e.g., PuTTY on Windows, Terminal on macOS/Linux) connects to the SSH server running on your Pi (usually enabled by default or easily enabled via `sudo raspi-config`). All communication is encrypted.
- Setup steps:
- Enable SSH on your Pi: `sudo raspi-config` > Interface Options > SSH > Yes.
- Find your Pi's local IP address: `hostname -I`.
- From your client, connect: `ssh pi@your_pi_ip_address` (default username is 'pi').
- For external access: You'll need to configure port forwarding on your router (forward external port 22 to your Pi's internal IP and port 22). For enhanced security, consider changing the external port to something non-standard (e.g., 2222).
- Security tips: Always change the default 'pi' password, use SSH key-based authentication instead of passwords, and consider fail2ban to block brute-force attacks.
2. VNC (Virtual Network Computing) for Graphical Desktop Access:
If you prefer a graphical user interface (GUI) over the command line, VNC is your go-to solution. It allows you to see and interact with your Raspberry Pi's desktop environment remotely, just as if you had a monitor, keyboard, and mouse connected.
- How it works: A VNC server runs on your Pi, streaming its desktop display to a VNC viewer application on your client device.
- Setup steps:
- Enable VNC on your Pi: `sudo raspi-config` > Interface Options > VNC > Yes. This typically installs RealVNC Server.
- Find your Pi's local IP address.
- Install a VNC Viewer application on your client device (e.g., RealVNC Viewer).
- Connect using your Pi's IP address.
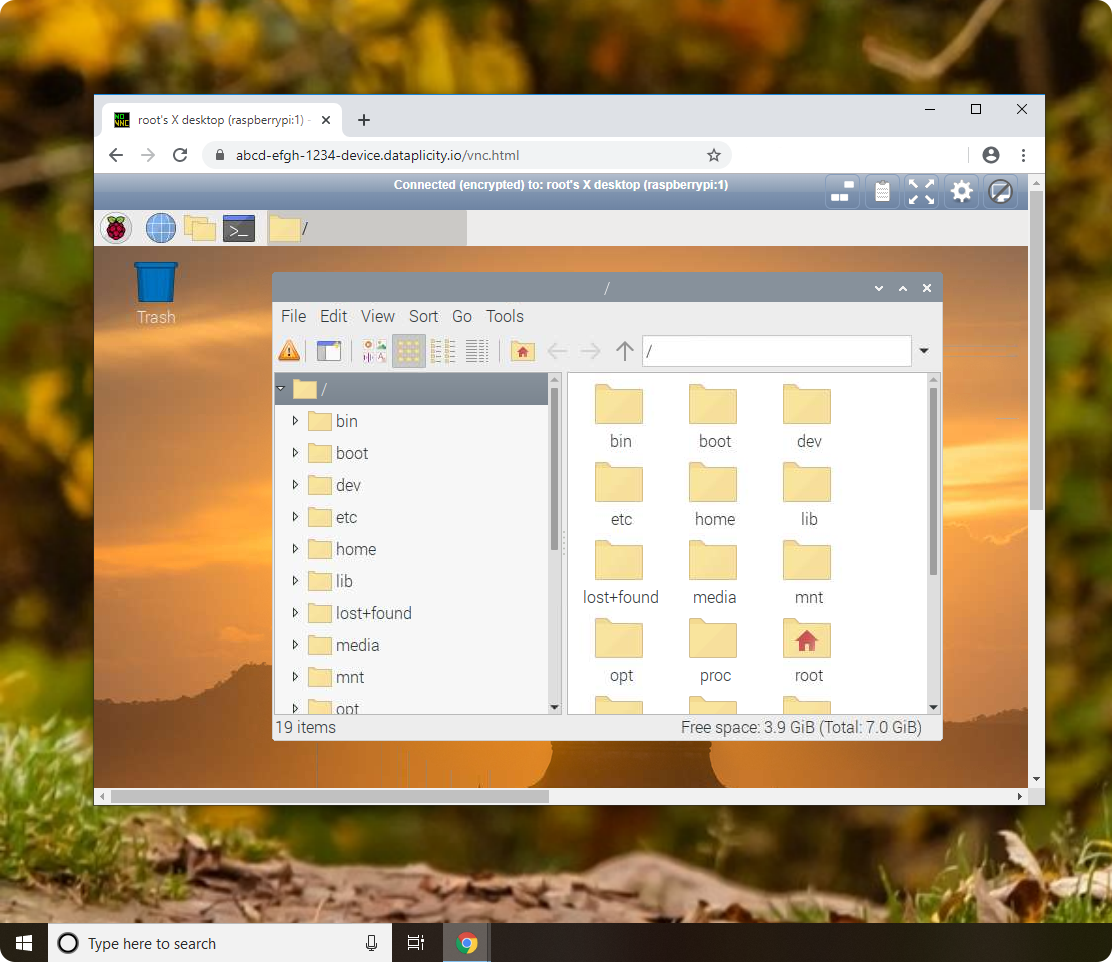
- For external access: Similar to SSH, you'll need to port forward the VNC port (usually 5900 or 5901) on your router to your Pi's internal IP. "Once it’s set up, you can access your Raspberry Pi’s graphic interface from [anywhere]."
- Security tips: Use strong passwords for VNC, and ideally, tunnel VNC connections through an SSH tunnel or VPN for enhanced security, especially if port forwarding. "That’s all, VNC is all setup — you can now access your Pi from anywhere in the world."
3. XRDP (X Remote Desktop Protocol):
XRDP is another option for graphical desktop access, particularly popular for those coming from a Windows Remote Desktop background. It allows you to connect to your Raspberry Pi's desktop using the standard Microsoft Remote Desktop client.
- How it works: XRDP acts as an RDP server on your Pi, translating its graphical output into the RDP protocol.
- Setup steps:
- Install XRDP on your Pi: `sudo apt update && sudo apt install xrdp`.
- Ensure your desktop environment is running.
- From a Windows PC, open "Remote Desktop Connection" and enter your Pi's IP address. For other OS, use an RDP client like Remmina.
- For external access: Port forward the RDP port (usually 3389) on your router to your Pi's internal IP.
- Security tips: As with VNC, consider tunneling XRDP through an SSH tunnel or VPN for security, especially if port forwarding. "Solutions like TeamViewer, VNC, or XRDP can provide remote access to a Raspberry Pi over the internet. A few extra configuration steps are required to make them work from anywhere, but it’s doable."
Cloud-Based and Simplified Solutions
For those who prefer a simpler setup without the complexities of port forwarding or dynamic IP addresses, cloud-based services offer an excellent alternative. These solutions typically establish an outbound connection from your Pi to a cloud server, allowing you to connect through that server without direct incoming connections to your home network.
1. Raspberry Pi Connect: The Official Solution
This is a significant recent development from the Raspberry Pi Foundation, designed to simplify and secure remote access. "Today, the Raspberry Pi Foundation is releasing a new solution to simplify and secure access to a remote Raspberry Pi. Raspberry Pi has just announced a new way to remotely access a Raspberry Pi."
- How it works: Raspberry Pi Connect establishes a secure, outbound connection from your Pi to the Raspberry Pi Connect cloud service. You then access your Pi through a web browser via the connect.raspberrypi.com portal. This bypasses the need for port forwarding entirely. "It is a secure remote access solution for Raspberry Pi OS, allowing you to connect to your Raspberry Pi desktop and command line directly from any browser."
- Setup steps:
- Install the Connect software on your Pi (it may come pre-installed on newer Raspberry Pi OS images or can be installed via `sudo apt install rpi-connect`).
- Link your device with an account on your Raspberry Pi (usually a simple command-line utility that guides you).
- Visit connect.raspberrypi.com in any web browser.
- Log in with your Raspberry Pi account credentials.
- You will see your linked Pi(s) and can choose to open a desktop session or a shell (command line) directly in your browser window. "Then visit connect.raspberrypi.com to access the desktop or a shell running on your Raspberry Pi in a browser window." "Once you click on that, a new window will open. It will take a few seconds to establish a connection with the Pi and then you will be able to access your Pi’s shell remotely through a web browser window. Next, let’s see how to access the Pi’s desktop interface remotely for newer Raspberry Pi devices."
- Benefits: Extremely easy to set up, no port forwarding required, secure by design (outbound connection), and browser-based access from any device. "Raspberry Pi Connect provides secure access to your Raspberry Pi from anywhere in the world."
2. VNC Connect (Cloud Connection):
RealVNC, the creators of the VNC software often pre-installed on Raspberry Pi OS, offers a cloud-based service called VNC Connect. This service provides a similar "zero-configuration" remote access experience to Raspberry Pi Connect.
- How it works: Your VNC Server on the Pi registers with the VNC Connect cloud service. Your VNC Viewer then connects to the cloud service, which brokers the connection to your Pi. This also avoids port forwarding. "Recently, VNC Connect came out to make it easy to access your Raspberry Pi from anywhere using a cloud connection."
- Setup steps:
- Ensure VNC Server is enabled on your Pi.
- Open the VNC Server application on your Pi and sign in with your RealVNC account. This links your Pi to your cloud account.
- From your client device, open VNC Viewer, sign in with the same RealVNC account, and your Pi will appear in your list of accessible devices.
- Benefits: Very user-friendly, bypasses port forwarding, and offers robust security features.
Secure Remote Access: VPNs and Reverse Proxies
For advanced users seeking maximum security and flexibility, Virtual Private Networks (VPNs) and Reverse Proxies are powerful tools to access your Pi from anywhere without directly exposing it to the internet.
1. VPN (Virtual Private Network):
A VPN creates a secure, encrypted tunnel between your client device and your home network (or directly to your Pi). Once connected to the VPN, your client device effectively becomes part of your home network, allowing you to access your Pi as if you were locally connected, using its internal IP address.
- How it works: You run a VPN server (e.g., OpenVPN, WireGuard) on your home router (if supported) or directly on your Raspberry Pi. Your client device connects to this VPN server, establishing a secure tunnel.
- Setup options:
- Router-based VPN: "A common way is using an OpenVPN server on your home router if it supports it." This is ideal as it secures all devices on your network when connected via VPN and offloads the VPN server duties from your Pi.
- Pi-based VPN server: "Otherwise, you can run an OpenVPN server directly on your Pi for secure remote access." This is a popular choice if your router doesn't support VPN server functionality. Projects like PiVPN simplify the OpenVPN or WireGuard server setup on your Pi.
- Benefits: Highly secure, encrypts all traffic, allows access to all devices on your home network (not just the Pi), and eliminates the need for individual port forwards for each service. "This gives you local network access to your Raspberry Pi from anywhere in the world."
- Considerations: Requires more setup complexity than direct methods or cloud services. Your home internet's upload speed can impact VPN performance.
2. Reverse Proxy:
A reverse proxy (like Nginx or Apache) acts as an intermediary for web traffic. Instead of directly exposing your Pi's web services (e.g., a website, Pi-hole admin interface) to the internet, you expose the reverse proxy, which then securely forwards requests to the correct service on your Pi.
- How it works: You configure your router to port forward only port 80 (HTTP) and/or 443 (HTTPS) to your reverse proxy server (which can run on your Pi). The reverse proxy then inspects incoming requests and directs them to the appropriate internal service based on the domain name or path.
- Benefits: Centralizes web access, enhances security by hiding internal network structure, allows hosting multiple web services on different internal IPs/ports behind a single public IP, and simplifies SSL certificate management.
- Use case: "Everyone can effectively now use my Pi-hole from outside (as a DNS over TLS server) but it can't be used as an open resolver because it's only accessible via three URLs." A reverse proxy can help manage access to specific web UIs like Pi-hole's admin portal.
The Importance of Port Forwarding and Its Alternatives
In the rest of this article, we will explore the various ways you can remotely access your Raspberry Pi and discuss the importance of port forwarding and reverse proxy solutions. Port forwarding, while effective for direct access methods like SSH, VNC, and XRDP, involves opening specific "holes" in your router's firewall. This can be a security risk if not done carefully, as it makes your Pi directly reachable from the internet.
Alternatives to direct port forwarding include:
- Cloud-based services (Raspberry Pi Connect, VNC Connect): These establish outbound connections from your Pi, meaning your router doesn't need to open any incoming ports. This is generally the safest and easiest method for beginners.
- VPNs: By creating an encrypted tunnel, you only need to port forward the single VPN server port (if running on your Pi/router), and all subsequent traffic within the tunnel is secure and internal.
- Reverse Proxies: For web services, you only port forward HTTP/HTTPS ports (80/443) to the reverse proxy, which then handles internal routing, adding a layer of security and flexibility.
- Ngrok/Tailscale/ZeroTier: These are other third-party services that create secure tunnels to your devices without needing port forwarding, often providing a "virtual LAN" experience over the internet. "There are actually two really good ways to connect to your Pi over the internet without using port forwarding or exposing your devices to hackers. I’ll give you both solutions now and then you can follow the steps below to learn how to use them." These services fall into this category of secure, port-forwarding-free solutions.
Advanced Scenarios and Specific Applications
Beyond basic desktop or command-line access, remote capabilities extend to managing specific applications and overcoming unique network challenges.
1. Accessing Pi-hole Remotely:
Pi-hole is a network-wide ad blocker that runs on your Raspberry Pi. While you can access its admin portal locally, remote access is highly convenient. As mentioned earlier, you can access the admin portal via a web browser. If you're using a VPN, simply connect to your VPN, and then navigate to your Pi-hole's local IP address in your browser. For more advanced setups, a reverse proxy can expose the Pi-hole admin interface securely to the internet, potentially with authentication. For DNS queries from outside your network, you can configure your devices to use your Pi-hole as a DNS over TLS (DoT) or DNS over HTTPS (DoH) server, provided you have a public IP and proper firewall rules, though this is more complex and requires careful security configuration to avoid becoming an "open resolver."
2. Remote File Access with Samba:
Samba allows your Raspberry Pi to act as a network file share, accessible from Windows, macOS, and Linux. To access these files from outside your home network, you have a few options:
- VPN: The most secure and recommended method. Connect to your VPN, and your Samba shares will appear as if you're on your local network.
- SFTP (SSH File Transfer Protocol): If you have SSH access, you automatically have SFTP. Use an SFTP client (like FileZilla or WinSCP) to securely transfer files to and from your Pi.
- Cloud Sync Services: For specific folders, you could use services like Nextcloud or Syncthing running on your Pi to synchronize files to other devices or cloud storage, making them accessible anywhere.
Overcoming Dynamic IP and Hotspot Challenges
One of the most common hurdles for remote access is a dynamic public IP address, which changes periodically. This means the address you use to connect today might not work tomorrow. Another challenge arises when your Pi is connected to a mobile hotspot, which often involves Carrier-Grade NAT (CGNAT), making incoming connections virtually impossible.
- Dynamic DNS (DDNS): Services like No-IP, DuckDNS, or Dynu provide a solution for dynamic IPs. You register a hostname (e.g., `my-pi.ddns.net`), and a small client running on your Pi or router periodically updates the DDNS service with your current public IP address. You then use the hostname to connect, which always points to your current IP. "I used No-IP and tried something. However, it was only able to ping the DDNS with my hotspot connected devices." This often indicates a CGNAT issue, where the hotspot itself doesn't provide a public, routable IP.
- Solutions for CGNAT/Hotspots: When behind CGNAT (common with mobile hotspots and some ISPs), direct port forwarding is impossible because you don't have a unique public IP. In these cases, cloud-based solutions are your best bet:
- Raspberry Pi Connect: As discussed, this is designed to work by establishing an outbound connection.
- VNC Connect: Similar to Raspberry Pi Connect, it uses an outbound connection.
- VPN Services (e.g., Tailscale, ZeroTier, Ngrok): These services create a virtual network overlay over the internet, allowing your devices to communicate directly regardless of underlying network topology or CGNAT. They are excellent for establishing secure, peer-to-peer connections without port forwarding.
Enhancing Security for Your Remote Raspberry Pi
When you open your Raspberry Pi to the internet, you also open it to potential threats. Security is paramount. "I’ll be explaining each step in detail, providing code examples you can use, and sharing expert tips to enhance security."
- Change Default Passwords: The very first step. The default 'pi' user with 'raspberry' password is a massive security vulnerability. Change it immediately (`passwd`).
- Use Strong, Unique Pass

(IoT + Raspberry) How to View Raspberry Pi Desktop From Any Device and
Remotely access Pi desktop

3 Easy Ways to Access Your Pi Over the Internet Remotely – RaspberryTips
