Unlock Your Pi: Raspberry Pi VNC Port Forwarding Explained
Are you looking to access your Raspberry Pi's desktop from anywhere in the world? Perhaps you're managing a home automation system, a media server, or a remote sensor array, and you need the flexibility to interact with your Pi's graphical interface without being physically present. This is where Raspberry Pi VNC port forwarding becomes an indispensable tool, allowing you to establish a secure and reliable connection over the internet.
Navigating the intricacies of network configuration, especially when dealing with concepts like IP addresses, ports, and router settings, can seem daunting at first. However, with a clear understanding and step-by-step guidance, you'll find that setting up VNC port forwarding for your Raspberry Pi is a straightforward process that unlocks a world of remote possibilities. This comprehensive guide will walk you through everything you need to know, from the fundamental principles of VNC to the practical steps of configuring your router and connecting from a remote location, ensuring you gain full control over your Pi projects, no matter where you are.
Table of Contents
- Understanding the Core: What is Raspberry Pi VNC Port Forwarding?
- Why Remote Access Your Raspberry Pi?
- The Anatomy of VNC Ports: Display Numbers and Defaults
- Preparing Your Raspberry Pi for VNC
- Navigating Your Router: The Heart of Port Forwarding
- Connecting to Your Raspberry Pi via VNC Client
- Enhanced Security: SSH Tunneling for VNC
- Alternatives to Traditional Port Forwarding
- Conclusion
Understanding the Core: What is Raspberry Pi VNC Port Forwarding?
Alright, let’s start with the basics. Raspberry Pi VNC port forwarding is essentially a method that allows you to access your Pi remotely using a Virtual Network Computing (VNC) connection. Think of it as creating a secret tunnel that lets your Pi talk to your computer, no matter where you are. This capability is crucial for anyone who needs to manage their Raspberry Pi without direct physical access, transforming it into a powerful computing platform that can be controlled from afar.
At its heart, VNC operates on a client-server model. The server runs on your Raspberry Pi. This VNC server captures the graphical output of your Pi's desktop and sends it over the network. Conversely, the client runs on a device you can physically interact with, such as a personal laptop, desktop, tablet, or phone. When you use VNC, the client transmits keyboard and mouse events to the server. The server then executes those events on your Raspberry Pi, and returns screen updates to the client. This seamless interaction makes it feel as though you are sitting right in front of your Pi, even if it's thousands of miles away.
The "port forwarding" aspect comes into play because your Raspberry Pi is typically located behind a router within your local network (LAN). For external devices on the internet (the Wide Area Network or WAN) to reach your Pi, your router needs to be instructed to forward incoming connection requests on a specific port to your Pi's internal IP address and VNC port. Without this forwarding, your remote VNC client wouldn't know how to find your Pi amidst the myriad of devices on your home network.
Why Remote Access Your Raspberry Pi?
The ability to remotely access your Raspberry Pi, particularly its graphical desktop via VNC, offers a multitude of benefits for both hobbyists and professionals. Imagine you have a Raspberry Pi set up as a home server, perhaps running a media center like Plex, or controlling smart home devices. If an issue arises or you need to make a quick configuration change, having VNC access means you don't need to physically connect a monitor, keyboard, and mouse to the Pi. You can simply open your VNC client on your laptop or phone and resolve the issue from your couch, office, or even while on vacation.
For developers and educators, remote VNC access to a Raspberry Pi is invaluable. It allows for collaborative projects where multiple users can access and work on the same Pi, or for teaching environments where students can access a shared Pi desktop without needing individual hardware. Furthermore, for those deploying Raspberry Pis in remote or inaccessible locations—like a weather station in a field or a security camera system in a distant building—VNC provides the necessary means for maintenance, data retrieval, and system updates without on-site visits. This level of flexibility and convenience is precisely why understanding and implementing Raspberry Pi VNC port forwarding is a highly sought-after skill.
The Anatomy of VNC Ports: Display Numbers and Defaults
Understanding VNC ports is fundamental to successful Raspberry Pi VNC port forwarding. VNC servers typically listen on specific port numbers, which are directly tied to the "display" number they are serving. The default port, 5900, is registered for use by VNC servers with the Internet Assigned Numbers Authority (IANA), and often does not need to be explicitly identified by connecting VNC viewer users if it's the primary VNC instance.
However, VNC servers can run multiple "displays," each with its own unique port. The standard convention is that VNC display 0 corresponds to port 5900, display 1 to port 5901, display 2 to port 5902, and so on. For example, when connecting to a VNC server on display 1, you would use `your.ip.goes.here:5901`. If the VNC server was on display 2, you would use `your.ip.goes.here:5902`. This mapping is crucial when configuring your VNC server on the Raspberry Pi and subsequently setting up port forwarding on your router.
When you set up port forwarding, it's vital to ensure that the port you are forwarding externally is the same as the port your VNC server is listening on internally on the Pi. So, if you want to connect to display one on your Raspberry Pi, you would forward port 5901. While it's possible to change the VNC server's listening port (often configurable in files like `/etc/vnc/config` or `/etc/vnc/config.custom`), for most basic setups, sticking to the default display-to-port mapping simplifies the process significantly. This consistency ensures that when an external connection hits your router on a specific port, it's correctly directed to the corresponding VNC display on your Raspberry Pi.
Preparing Your Raspberry Pi for VNC
Before you dive into router configurations for Raspberry Pi VNC port forwarding, your Raspberry Pi itself needs to be properly set up. The first step is to ensure VNC is enabled and running on your Pi. Modern versions of Raspberry Pi OS (formerly Raspbian) come with RealVNC Connect pre-installed, making this process quite straightforward. You can enable VNC via the Raspberry Pi Configuration tool (accessible from the desktop menu under Preferences) or through the command line using `sudo raspi-config` and navigating to Interface Options > VNC.
Once VNC is enabled, it's highly recommended to set a static IP address for your Raspberry Pi within your local network. This is crucial because if your Pi's IP address changes (which can happen with DHCP, where IPs are dynamically assigned), your port forwarding rule will break. You can typically configure a static IP either through your router's DHCP reservation settings (preferred, as it centralizes IP management) or directly on the Raspberry Pi by editing network configuration files like `/etc/dhcpcd.conf`. A typical static IP might look like `192.168.1.x`, where `x` is a number outside your router's DHCP range.
Finally, and perhaps most importantly, security cannot be overstated. When you open a port to the internet, you are creating a direct pathway to your Raspberry Pi. Therefore, ensure your Pi has a strong, unique password, and your VNC server is configured to require robust authentication. Consider setting up SSH for secure command-line access, as this often forms the basis for more advanced VNC tunneling, which we'll discuss later. Neglecting these basic security measures can leave your Raspberry Pi vulnerable to unauthorized access, potentially compromising your data and network.
Navigating Your Router: The Heart of Port Forwarding
The most critical step in enabling Raspberry Pi VNC port forwarding is configuring your home router. Your router acts as the gateway between your local network and the vast expanse of the internet. To instruct it to direct incoming VNC traffic to your Raspberry Pi, you'll need to access its administration interface. This is typically done by entering your router's default gateway IP address (something like `192.168.1.1` or `192.168.0.1`) into your web browser's address bar. You'll then need to log in with your router's administrative username and password.
Once logged in, navigate to the port forwarding or virtual server settings. These settings may be located under various sections, commonly found under "Advanced," "Security," "NAT (Network Address Translation)," or "Firewall" settings. The exact terminology and layout vary significantly between router manufacturers, so you might need to explore a bit.
Creating a New Port Forwarding Rule
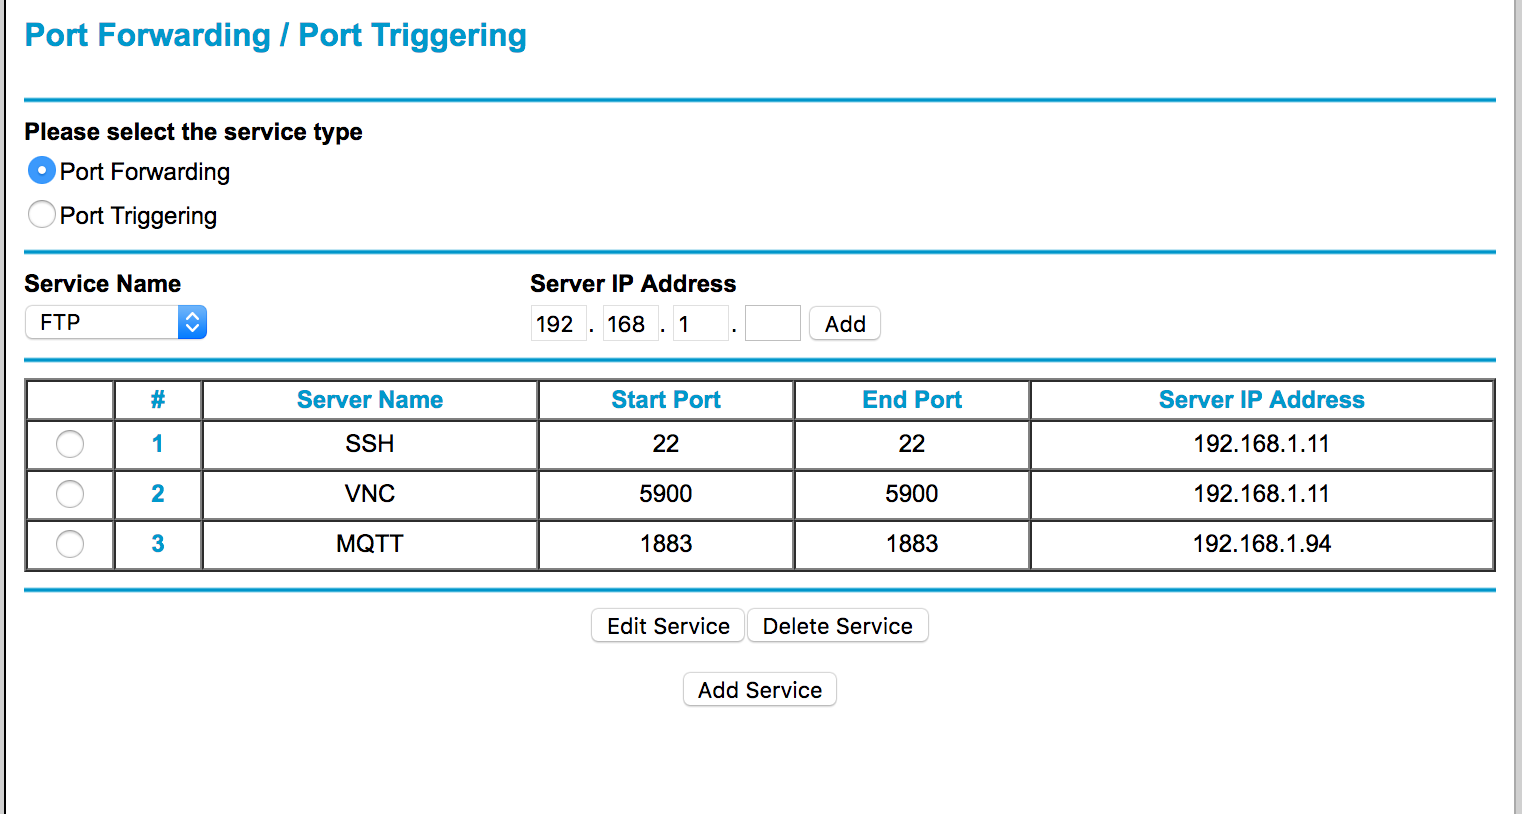
Within the port forwarding section, you'll need to create a new port forwarding rule. This rule tells your router to listen for incoming connections on a specific external port and redirect them to a specific internal IP address and port on your local network. Here's what you'll typically need to specify:
- Service Name (Optional): A descriptive name for the rule, e.g., "Raspberry Pi VNC."
- External/WAN Port (or Start/End Port): This is the port number that devices on the internet will use to try and connect to your Pi. For VNC, the default is 5901 (for display 1). Some routers require you to enter both the external start and end port numbers.
- Internal/LAN IP Address: This is the static local IP address of your Raspberry Pi (e.g., `192.168.1.3`).
- Internal/LAN Port: This is the port number on your Raspberry Pi that the VNC server is listening on. This should match the external port if you're using the default setup (e.g., 5901 for VNC display 1).
- Protocol: For VNC, you should typically select both TCP and UDP, or just TCP if only one option is available. Most VNC traffic relies on TCP, but some components might use UDP. For example, in a section called NAT, you would enter a new entry to the table saying that port 5901, both UDP and TCP, will be sent to your local Raspi IP (you know, 192.168.x.x).
- Enable/Status: Ensure the rule is enabled.
Remember the example: if you want to connect to display one, you would forward port 5901. Make sure that the port you are forwarding externally is the same as the port on the Pi.
Understanding External and Internal Port Mapping
One powerful feature of most routers is the ability to forward one externally visible port to a different internal port on your Pi. This means you can change the external port number from 5901 to a different, less common port number externally (e.g., `37893`), and forward it to 5901 on your Pi. This can offer a minor security advantage by making your VNC service less obvious to automated port scanners, which often target common ports like 5901. For instance, you might set an external IP like `178.x.x.x:37893` to port to `192.168.0.13:5901` for VNC.
If your router allows this, it's a good practice. Then, the only question is getting your VNC client to use the new external port, which should be straightforward as most VNC clients allow you to specify the port number when connecting. For example, instead of connecting to `your.external.ip.goes.here:5901`, you would connect to `your.external.ip.goes.here:37893`.
It's important to differentiate between your router's internal IP (e.g., `192.168.1.1`), your Pi's internal IP (e.g., `192.168.1.3`), and your router's external (WAN) IP address (which is what the outside world sees, like `178.x.x.x`). When you VNC into your Pi from your laptop within the same LAN, you would use the Pi's internal IP and display number, like `192.168.1.3:1` (which means display 1, corresponding to port 5901). However, when you are outside of your LAN, you must use your external IP address and the forwarded port. For example, if your router's external port is `8022` and the Pi's SSH port is `22`, this means the router is forwarding `8022` externally to `22` internally on the Pi. Similarly, for VNC, if you forward `37893` externally to `5901` internally, you'd use `your.external.ip.goes.here:37893` from outside your network.
Connecting to Your Raspberry Pi via VNC Client
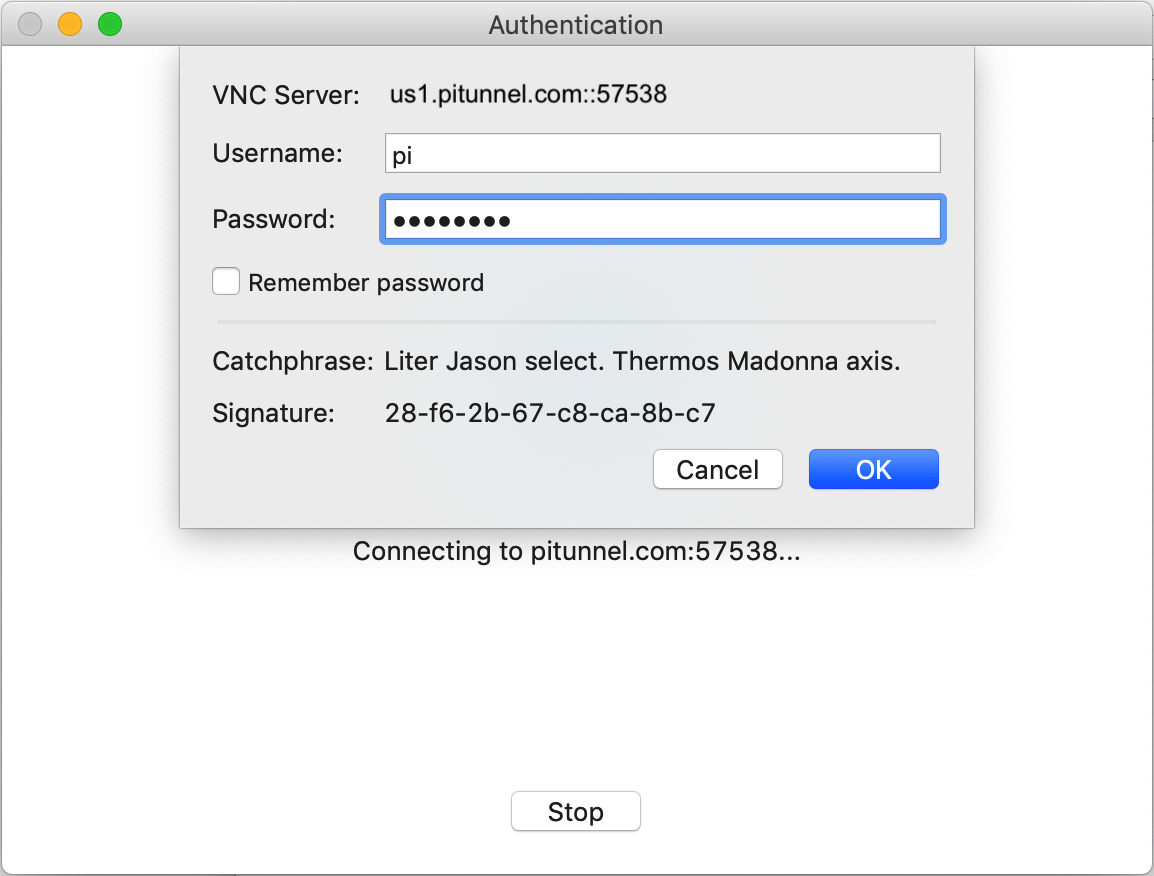
Once you've successfully configured Raspberry Pi VNC port forwarding on your router, the next step is to connect to your Pi using a VNC client from your remote device. As mentioned earlier, the client runs on a device you can physically interact with, such as a personal laptop, desktop, tablet, or phone. There are many VNC client applications available, such as RealVNC Viewer, TightVNC Viewer, or others, compatible with various operating systems.
To establish a connection, you will need two pieces of information:
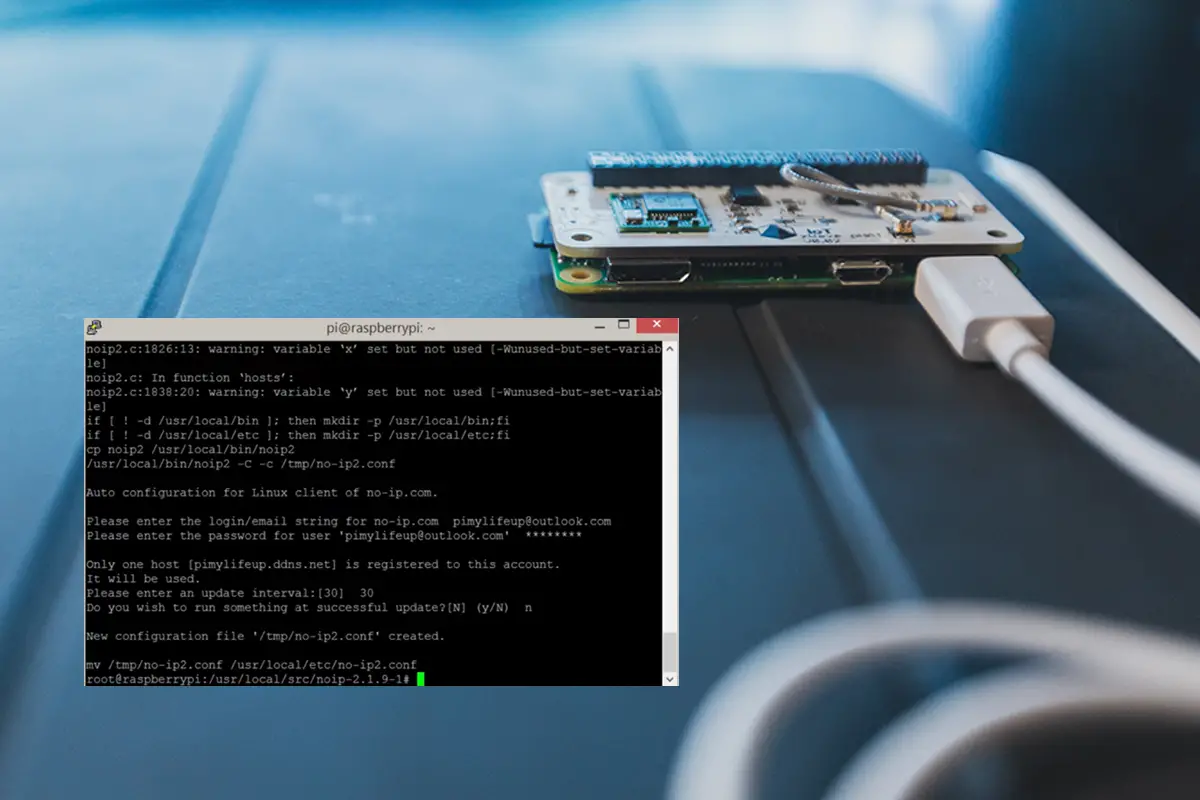
- Your Public IP Address: This is the external IP address of your home network. You can find this by simply searching "What is my IP" on Google from a device connected to your home network. Be aware that most home internet connections use dynamic IP addresses, meaning your public IP can change periodically. For a more stable solution, consider using a Dynamic DNS (DDNS) service, which maps a memorable hostname (e.g., `myraspi.ddns.net`) to your dynamic IP address.
- The Forwarded Port Number: This is the external port you configured in your router's port forwarding settings (e.g., 5901, or a custom port like 37893 if you opted for external port mapping).
In your VNC client, you will typically enter your public IP address followed by a colon and the forwarded port number. For example, if your public IP is `178.x.x.x` and you forwarded external port `37893` to your Pi's internal VNC port `5901`, you would enter `178.x.x.x:37893` into your VNC client. If you're using a DDNS hostname, it would be `myraspi.ddns.net:37893`.
When you attempt to connect, your VNC client will send a request to
How to install Raspbian and SSH to Raspberry Pi
How To Port Forward Raspberry Pi | Revised 2025
How to remotely access the Desktop of your Raspberry Pi over the
